An ultimate all-in-one music manager to download music, transfer music between iPhone/iPad/iPod and iTunes/Mac, and clean up music collection.
 Get Started
  Discover Music
  Download Music
  Record Music
  Transfer Music
  Manage iTunes Library
  More Tools in Toolbox
  More Tips for iMusic
 Music downloaded from free apps, websites and shared from friends on iPhone, iPod and iPad can’t be transferred to iTunes Library as well as computer. However, if you like, you can do it with iMusic. It lets you export music from iPhone, iPod and iPad to your computer with tunes.
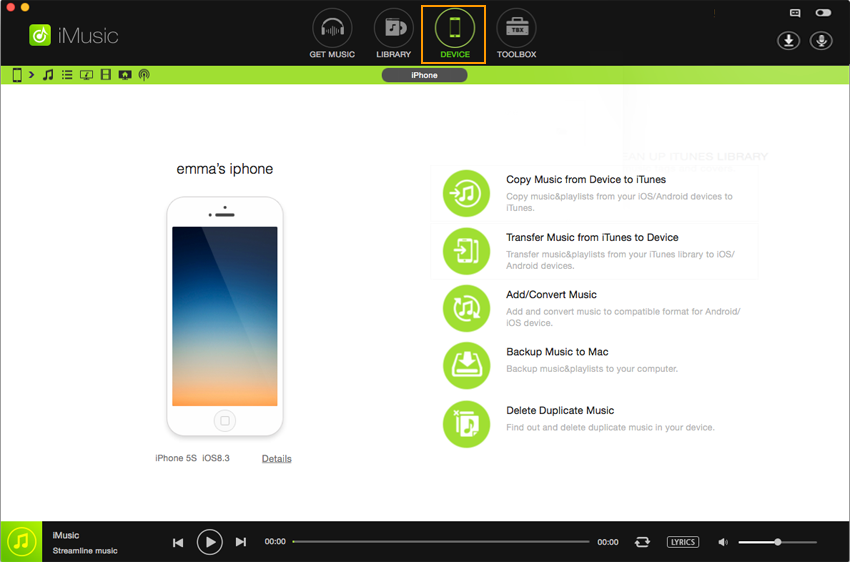
Step 1. Install iMusic on your computer first. After then launch it and connect your iPhone, iPod or iPad with the computer via a digital cable. The device name will appear in the “DEVICE” area.
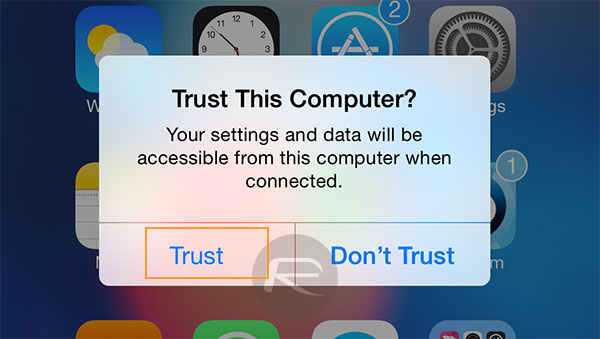
If you don’t see the device in “DEVICE” area, then please try to reconnect the Apple device with computer again and tap “Trust” in the popped up window “Trust This Computer”.
Step 2. Click “DEVICE” to enter the control panel window. From there, 2 options are for you to export music from iPhone, iPod and iPad to your computer.
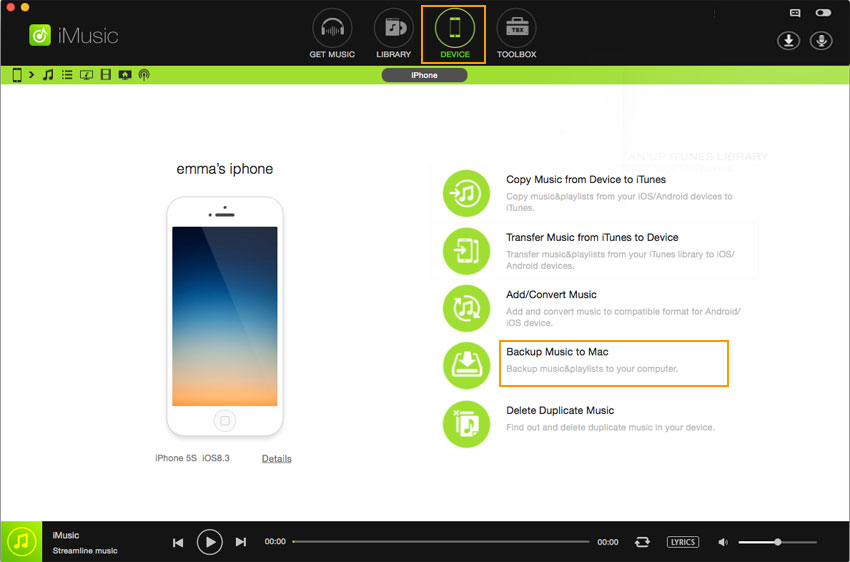
Option 1. Export all songs and playlists from iPhone/iPod/iPad to computer: click the button “Backup Music to PC” (for Windows Version) or “Backup Music to Mac” (for Mac version). After then choose the name of the connected Apple device to begin the transferring process.
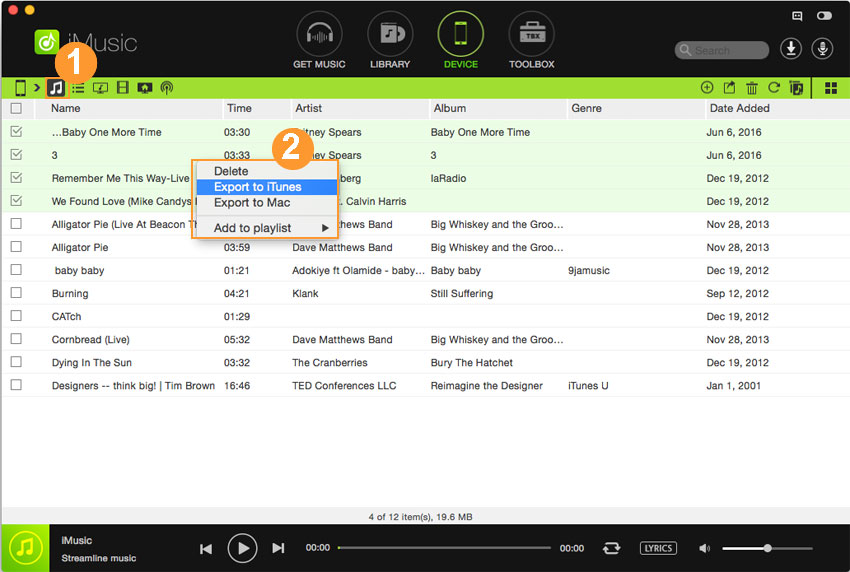
Option 2. Export selected songs from iPhone/iPod/iPad to computer: Click the music icon followed the device icon (the second one) on the left side of window, then click the export icon (the 2nd one on the right side) > choose “Export to Mac”. Find a destination to save the exported songs.

Actually, you can also right-click on the selected songs, then choose “Export to” > “Export to Mac”. Set a destination to save these songs.
Or drag and drop the selected songs from iMusic to a folder on your computer. It works too.