Spotify offers a pleasing medium for music listeners as the best online streaming provider of music. It is not sufficient to enjoy the music provided by Spotify only over the Internet. Many users would like to have the content available offline so that they can transfer the USB for playing in the car.
How to transfer Spotify music to USB for playing in the car
Every user using Spotify understands that no proper application/option will allow them to transfer music to USB for playing in the car. There is presently an advantage that will allow Spotify lovers to transfer their music to USB. The tool that you would be using is iMusic. The recommended software is a platform that will help you achieve the task by downloading all your favorite songs/playlists from Spotify and transfer them to USB, which you can play in the car.
The reason why we are emphasizing on using iMusic is the technology and features it offers. Unlike other programs, the software is a single tool that performs multiple actions. For instance, apart from downloading songs from Spotify, you can transfer them to USB, between a computer and iOS device, or between Android and iOS device. You can also use additional options provided by it to record online songs, clean music collection, and repair corrupted iTunes libraries. Regardless of the different features, our focus is mainly on Discover and Download options. Let us see in detail about these two characteristics.

- Discover – The discover feature within the iMusic application is a versatile format for searching thousands of songs by numerous artists. You can perform the search by using the song name, an artist’s name, style, or a playlist. You can listen to them online or even download them to your computer.
- Download – Unlike the Discover feature, download option allows you to download songs from over 3,000 additional sites present on the internet that stream videos and music. It means, you can make a quick pit stop on YouTube, search for a video, and download it as MP3. You can carry out the action on all reputed sites such as Facebook, VEVO, Dailymotion, Spotify, and others.
- Record – Helps in recording a live session or streaming audio over the internet. While you can download the song, the app performs a quick search for ID3 tags in the background and adds to the song.
- Backup/Rebuild – you can create a backup of your existing music library, move it to a new computer/Mac, and reassemble without trouble. Migrating data was never easy!
- Fix – It helps in overhauling iTunes library for broken links, missing album arts, and ID3 tags.
- Toolbox – It consists of additional options that provide greater command over music and phone management with ease.
Step-by-step guide for how to download music from Spotify to computer via iMusic
iMusic provides the opportunity to download music from Spotify with a few simple steps. You no longer have to choose the Premium version. Let us see how we can use iMusic to download songs from Spotify in a few simple steps using the Download feature.
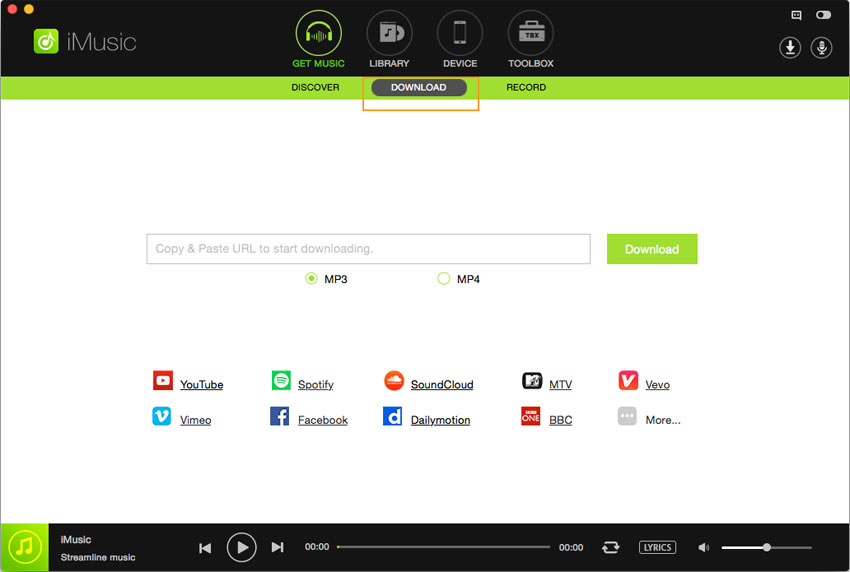
Step 1: Aimersoft is extending a warm gesture by providing iMusic as a free edition to users to understand the ability of the program. Get it from the official site and install the same. You can propel the application by tapping the iMusic icon, which appears on your computer desktop screen. The window opens up displaying several options that it offers as a service. From the window, tap “Get Music” and press “Download” choice.

Step 2: Open Spotify website using your preferred browser. Use the search box within the website to look for the song that you wish to save to your computer. You can find an album or a playlist too. Now, just copy the URL of the same from the address bar. In the Aimersoft iMusic application, you will notice that there is an URL paste box provided. You can paste the copied URL from Spotify site here, and click Download to begin saving the song/album/playlist to the computer. You can alter the output format to MP3 as well, apart from MP4.
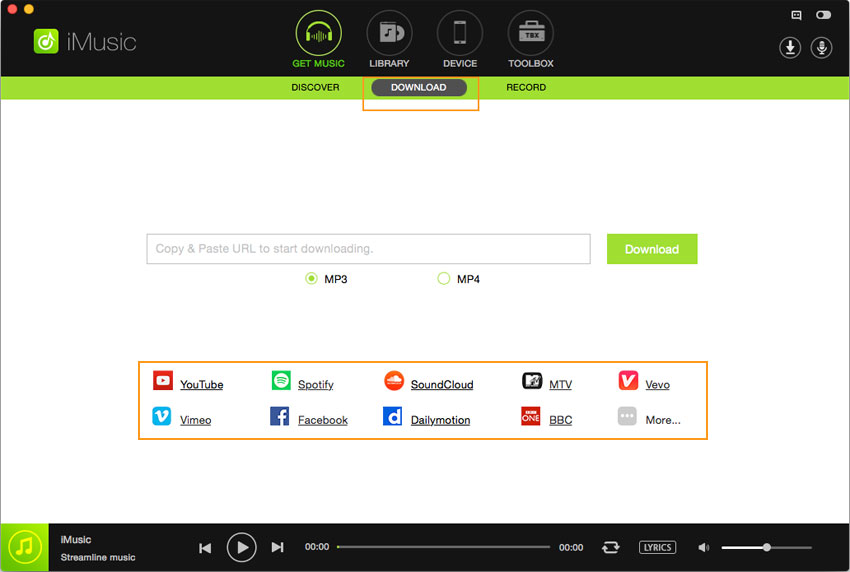
Step 3: You can perform the activity in another way, by gaining access to Spotify directly by tapping on the link presented within the window below the URL paste box. You can search directly using the search box, and click Download to save the song or album.
Step-by-step guide for how to transfer Spotify music to USB for playback in a car
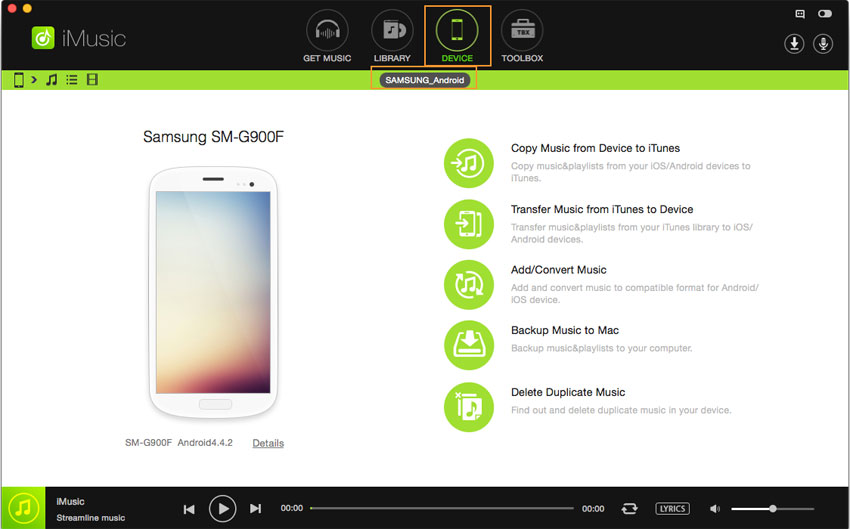
Step 1: Start iMusic by clicking the launch icon from the desktop. The product window opens showing you with different options offered. You can now connect your USB stick to the computer. iMusic will instantly detect it and display the information about the same, which you can find by clicking the “DEVICE” feature from the menu bar.
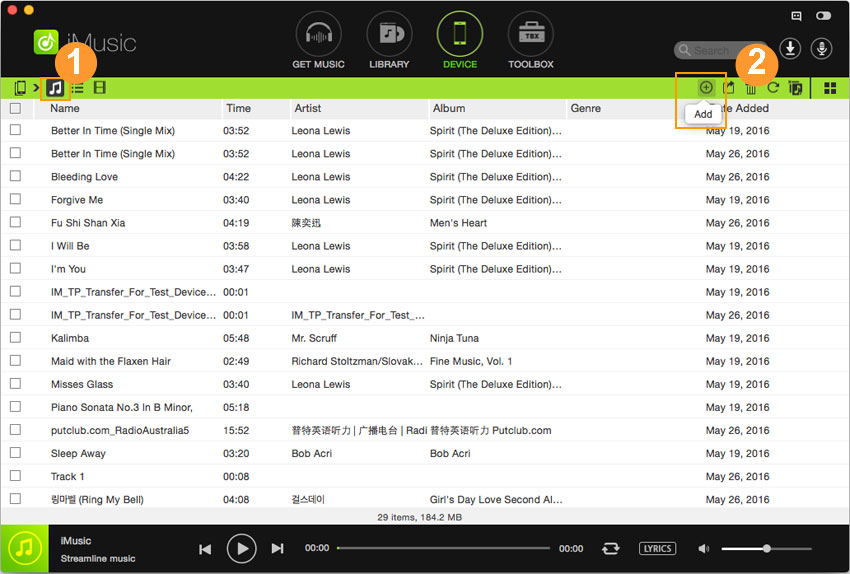
Step 2: If there are any songs present on the USB stick, iMusic will display them for you on the screen. To add Spotify music from the computer to the USB stick, tap the “plus” symbol that you can witness it to the right side of the screen. It will open the explorer window, through which you can navigate to the location where you stored the downloaded Spotify songs/playlist. Press Open to add them instantly to the list. Time to complete the transferring process depends on the number of songs selected or the size of the playlist.
Note:
1. An important note you have to remember here is that most of the audio players in the car identify only MP3 formatted songs. Also, they recognize only FAT32 USB sticks or other file systems.
2. If you are adding Spotify songs or playlist from a Mac, you have the feature “Add/Convert Music” to ensure that the songs convert automatically to MP3 format. iMusic will convert them during the transferring process, which is playable on any audio system in a car.


Any Product-related questions? Tweet us @iMusic_Studio to Get Support Directly