If you have ever owned an iPhone, iPod, iPad, or any other iDevice, you might be familiar with the pain associated with transferring music from one computer to another, especially when they are not synced. Apple designs things to make them seamless and fully integrated with Apple devices, but sadly, that makes it awfully difficult to do on other platforms and simple stuff like transferring a playlist from one computer to another becomes a living hell. Lucky for you, we have found a way to simplify the process and you need not bang your head against a wall in frustration anymore.
Transferring iTunes playlist manually from one computer to another can be very tricky for some users. You have to copy iTunes library files from one computer to another through an external data source and still, there are some chances that you may lose your data.
There are two ways to transfer your iTunes Playlists to another computer. The first method is to do it all manually without any help of 3rd party software. A number of steps are involved in manually transfer playlists to another computer. 2nd method is to use iMusic software for this purpose. Let’s take a look at easy method first.
Method 1: Transfer iTunes Library Through iMusic
The best way to transfer iTunes library from one computer to another is through iMusic. This is the best music manager for iDevices out there with a lot of things made easy for you. Along with organizing your iTunes music library, it can also be used to download free music from more than 3000 music sources online. It removes the damaged library files and also repairs them. When your iTunes library is well organized, you won’t face any problem playing your favorite music and iMusic is the best software to keep your iTunes library in top form.
First, you have to transfer your iTunes music from computer to any of the iDevices. Also, you have to install iMusic on both the computers which are candidates for iTunes library transfer. Here are the detailed steps to transfer music from computer to iTunes.
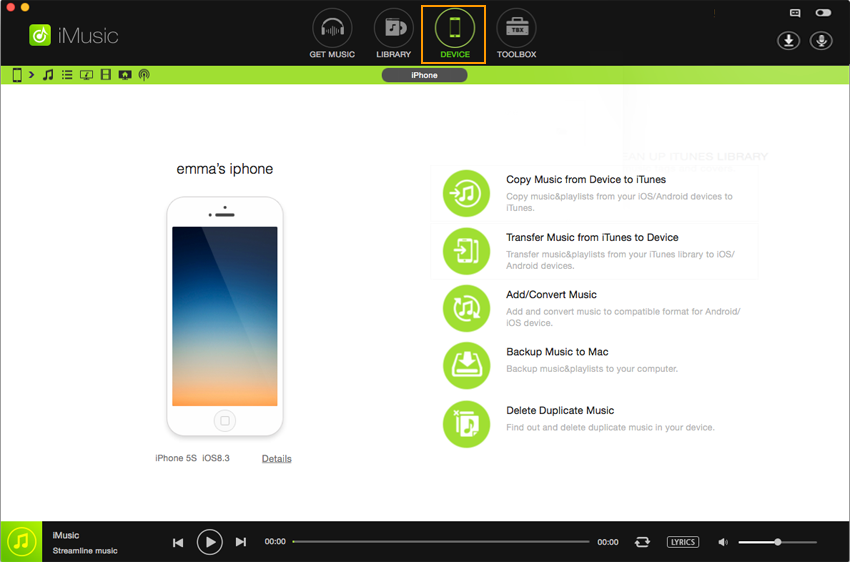
Step 1: First of all, install iMusic on your computer and it will automatically locate your iTunes library. Now connect any of iPhone/iPad/iPod with your computer. Click on ‘Device’ icon on iMusic and it will detect the device type.
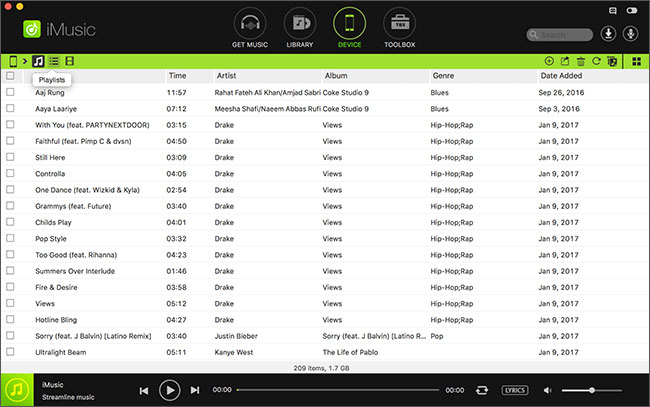
Step 2: If the device is not recognized, then you have to tap on ‘Trust this Computer’ prompt on your iDevice. After the device is connected, click on LIBRARY and then click on Music icon on the left and all the music in your iTunes library will show up.
Step 3: Now check the music or playlist on the left and click on the plus or add icon on the right and choose what to transfer on your iDevice. You can choose the whole library for this special purpose.
Now you have to transfer that library to the new computer from iDevice through iMusic. Here are detailed steps.
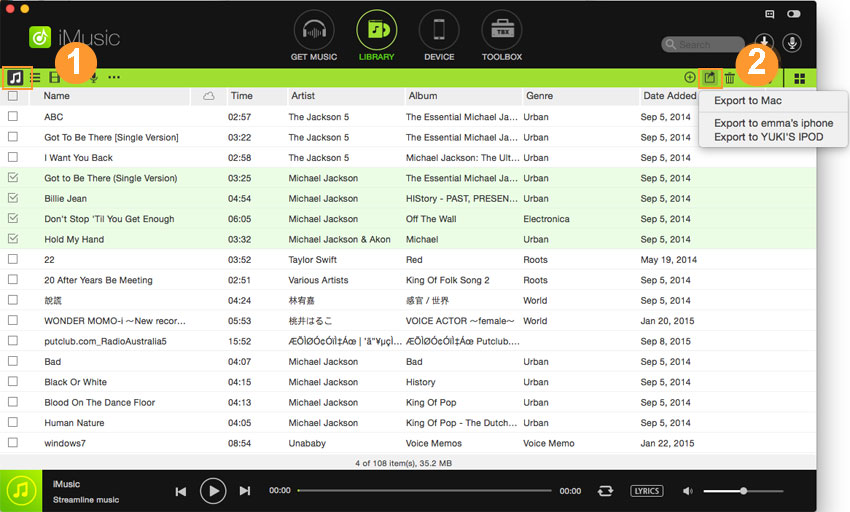
Make sure that iMusic is installed on the new computer. Now connect your iPhone/iPad or iPod and click on ‘Device’ icon on iMusic. Now from the main window, click on ‘Backup Music to Mac’ or ‘Backup Music to PC’ and then choose the connected device to start the transfer process.
And this is it, all your iTunes songs playlist is transferred to the new computer. If you are not going to use the old computer, don’t forget to de-authorize it.
There are two ways to transfer your iTunes Playlists to another computer. The first method is to do it all manually without any help of 3rd party software. A number of steps are involved in manually transfer playlists to another computer. 2nd method is to use iMusic software for this purpose. Let’s take a look at easy method first.
Method 2: Transfer iTunes Library Manually to Another Computer
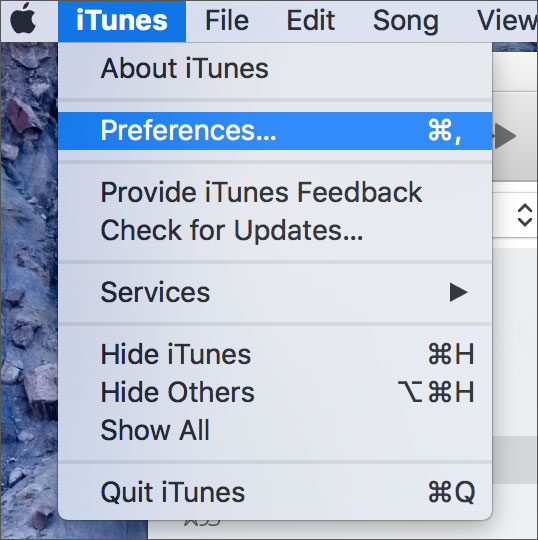
Step 1: Open iTunes on Mac. You must have iTunes to complete this process. Without it, you won’t be able to transfer music to PC. In iTunes, go to ‘Preferences’ .
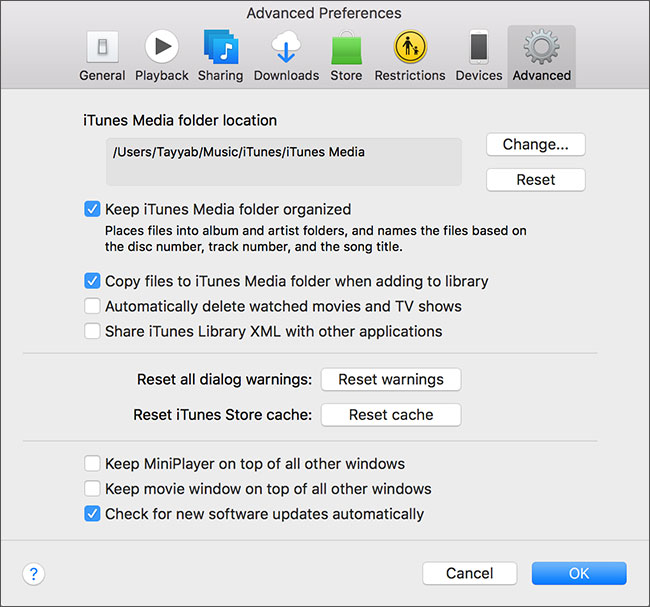
Step 2: in that menu, there is an ‘Advanced’ option. Click on Advanced. In ‘Advanced’ menu, check ‘Keep iTunes Media Folder Organized’. Enabling this option will make your transfer process easier because all the files will be well organized and easy to move.
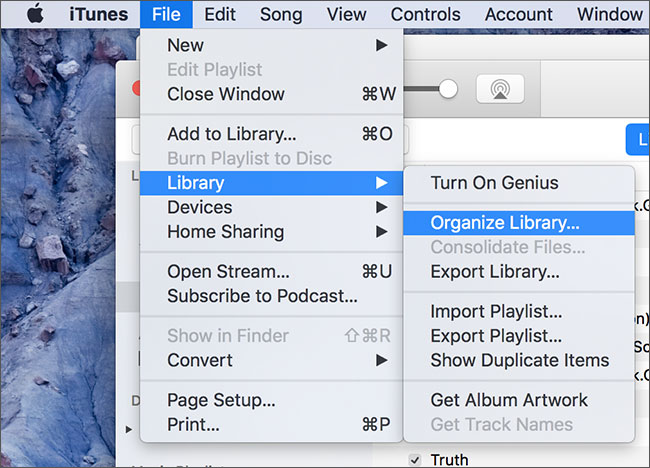
Step 3: Click on File>Library>Organize Library because it will make all the songs in your library easy to move to another computer. Organizing every file is the key to making sure that no file is missed or neglected.
Step 4: Now plug your external hard drive or flash drive and transfer iTunes library into it. When you are done, remove the flash/hard drive and connect it to the PC. Now before you transfer it to PC, change its extension because PC recognizes a different format than MAC. So change the file extension to *.itl and copy it in My Music folder of the PC. Taking proper backups of your iTunes library is always a good way to secure your favorite music because sometimes you are unable to transfer /migrate music properly which results in loss of data. So taking a backup on a secure hard drive is always recommended.
If you want to transfer iTunes library from PC to PC, then the procedure is almost the same. First, you have to organize your media folder so that all the files are up to date and there are no discrepancies. Once you are done, attach an external data source and copy your files onto it. When you are done, remove external drive safely and plug it into your new PC. iTunes must be installed on the new PC. Locate the iTunes media folder in new PC and copy your iTunes playlist there. Before you begin with your new PC, make sure to de-authorize your old PC from iTunes.


Any Product-related questions? Tweet us @iMusic_Studio to Get Support Directly