Google provides an easy way to transfer the music and videos from your computer to Android Phone – Google Play Music. Back in 2011, Google released music streaming service Google Play music. At first, the sign up option was available only for the invites and users could only upload to the music to listen. Later on, like other music streaming services, Google introduced the paid service which allows users to listen the tracks while they are online from the Android Phone, Web browser from their computer or iOS App on iPhone and iPad. Google Play music now let you upload thousands of the songs which can be retrieved on any device with the Google Play music app. Here’s how you can use this service to transfer music from computer to Android Phone.
Part 1. Step by Step guide to transfer Music from Google Play to Android Phones:
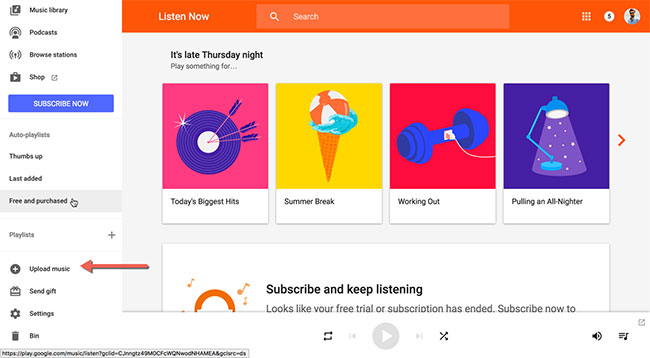
Step 1. Before you continue, make sure that Google Play music service is available in your country. Moreover, you will also need a Google Play music account to perform this job successfully. If you have already made an account to the Google Play Music, Click Here to open the service on your computer. This page will redirect you to the main page of Google Play Music. Click on the three lines on the left side of the screen to reveal the main panel on Google Play Music.
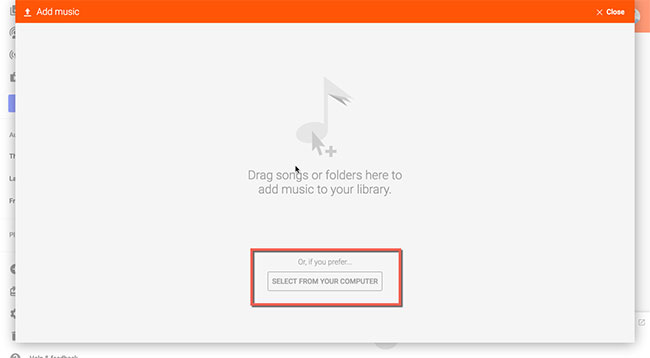
Step 2. Now, go to the bottom of this panel till you see the “Upload Music” option and click on this option. On the next windows, you can either drag and drop the music or can click on the “Select from your Computer” to upload tracks from your computer. Select different tracks that you want to upload and click on the “Open” button. Now, click on the “Continue” on the next screen. You will also need to install Google Play music extension to the Google Chrome browser on your computer to complete the upload the process.
Step 3. After completing the uploading, go to Play Store on your Android Phone and search for “Google Play Music” and install this application. Launch this application on your phone and herein this application, you will find the recently uploaded tracks to your Google Play Music account.
Advantages and Disadvantages of Transferring Music from Google Play to Android Phone:
*Advantages: One of the main benefit of using Google Play music is that you will not need a USB cable to complete the transfer the songs to your Android Phone. Moreover, once the songs are uploaded to the Google Play Music, you can listen to them on different devices at the same time. So, technically, you will have to upload the songs once and can play them on different devices with the same Google account.
*Disadvantages: On the other hand, you will need to have an active internet connection on your computer to complete the transfer process and you will also need Wi-Fi or data plan on your Android Phone to listen these songs. Another disadvantage of using Google Play Music is that it will not automatically update the artwork and missing ID3 Tags of your songs. Some users will also find it very difficult to use because the user interface of the software is not simple as it seems. Alternatively, you can use iMusic to transfer Music from your computer, iPhone, iPod and even iTunes Library.
Part 2. Best Google Play Alternative – iMusic:
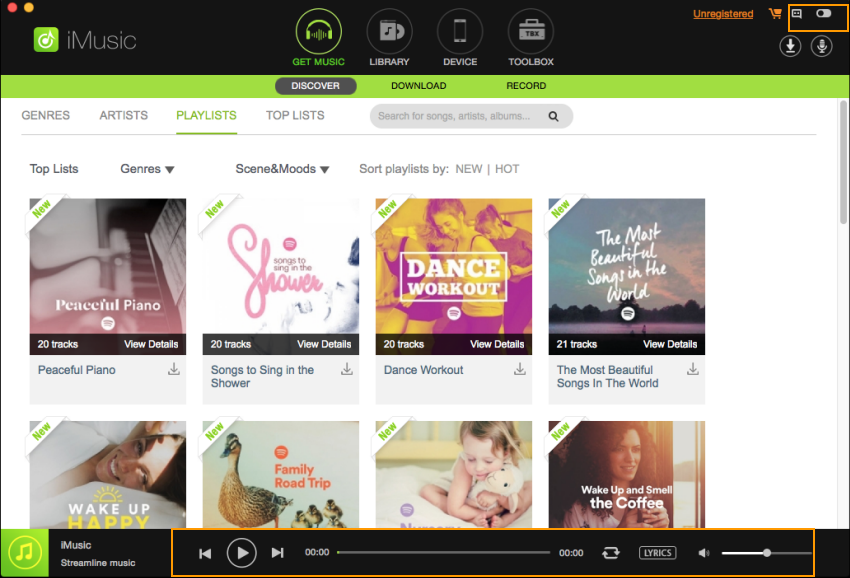
iMusic is a complete downloader, transfer and music managing tool for Android users. The user-interface of the program is very sleek and it can transfer the songs from a specific folder on your computer or iTunes Library to your Android phone. Besides, it is able to directly transfer the music from iPhone, iPad or iPad to the Android Phone. Here’s the step by step guide on how you can use iMusic to transfer Music from Computer to Android Phone or iTunes Library to Android Phone.
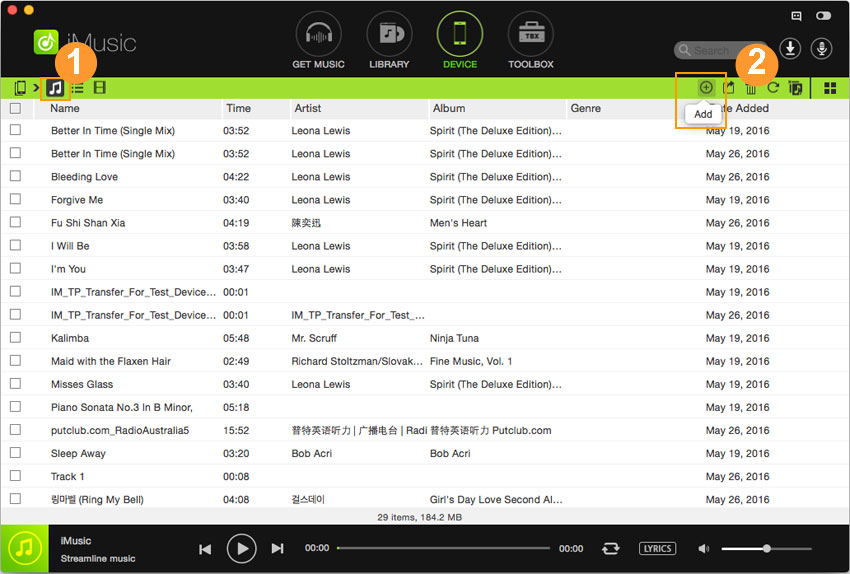
*Step-by-step guide to transfer music from computer to Android Phones:
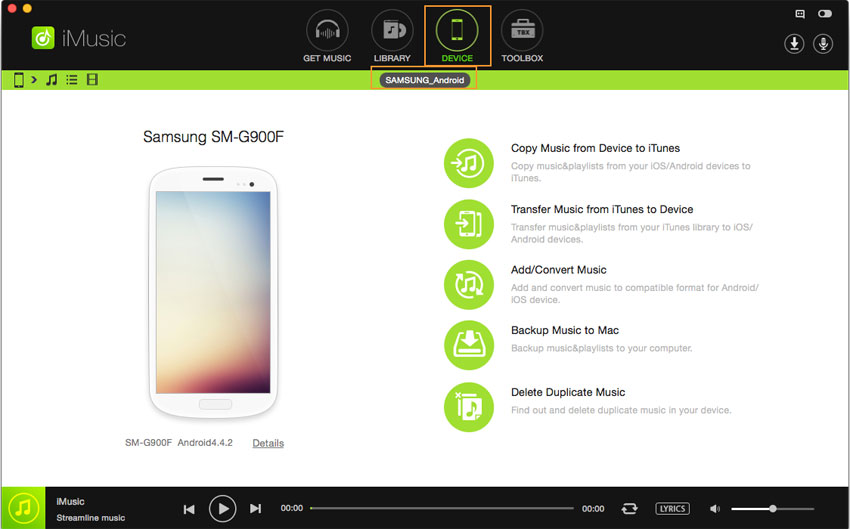
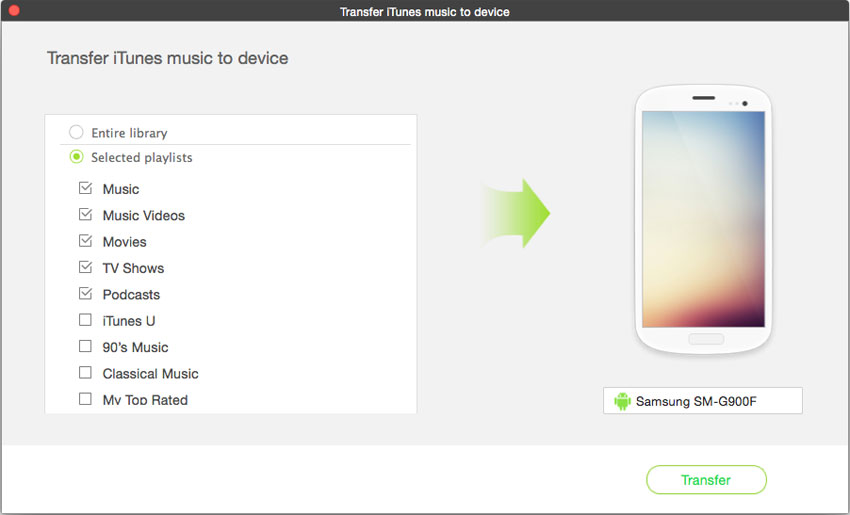
*Step-by-step guide to transfer music from iTunes Library to Android phone
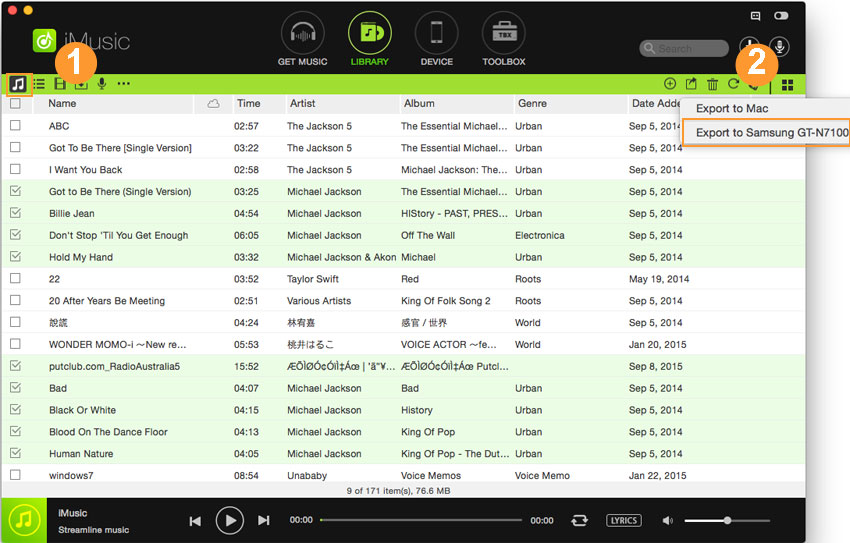
Step 3.To save the storage on your Android phone, I suggest you transfer Selected music from iTunes Library to Android phone. To do this, you first need to click “LIBRARY” tab on the top of iMusic. Next, select songs you need, click the Export icon on the right side window of the software, select “Export to (your android device model).”


Any Product-related questions? Tweet us @iMusic_Studio to Get Support Directly