Transferring music between iTunes and iPhone is the traditional process. However, the new norm is transferring music from Android to iTunes! You heard it right. You now have the possibility to copy music from iTunes to your Android device and vice versa. The benefit of this opportunity is that all your favorite music is now available on any device. You can also transfer all the downloaded files to the device’s local storage.
Best Tool to Transfer music from android phone to iTunes library – iMusic
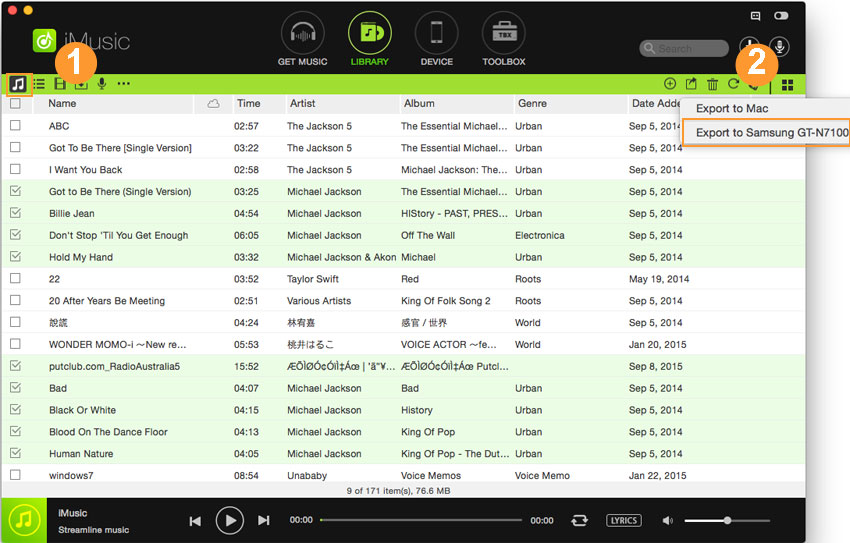
If you are keen on moving music from your Android phone to iTunes library, all you need is iMusic from iSkysoft . The application is a single solution for all your music requirements. With the help of it, you can search, download, record, transfer, and even organize all the files on your computer. The best element is its ability to transfer music between Android phone and iTunes library and from Mac or PC to iPhone, iPad, iPod, and Android devices. The important features for Android phones include:
-
A single click to transfer music from any Android phone to iTunes Library;
-
Transfer music without any limitation between iTunes, Mac, PC, iDevices, and Android devices;
-
Fix iTunes library by cleaning up broken tracks, fixing mislabeled songs, adding covers automatically, and removing duplicate tracks;
-
Transfer music to USB drive, burn songs to CDs, remove DRM protection, and fix tags of the songs in music library, recover iTunes library, etc. with the help of the powerful inbuilt toolbox
-
Downloading songs from over 3000 music sites including established ones such as Dailymotion, Spotify, YouTube, Pandora, and VEVO;
Part 1. Transfer All Music from Android Phone to iTunes in a Single Click
Step 1: Download the trial version of the software for your Mac or Windows. Install the trial version. Remember that trial version has limitations over the paid version. In the trial version, you can only transfer ten songs from your Android phone to the iTunes Library. However, this will allow you to check the ability of the software in completing the task with ease.
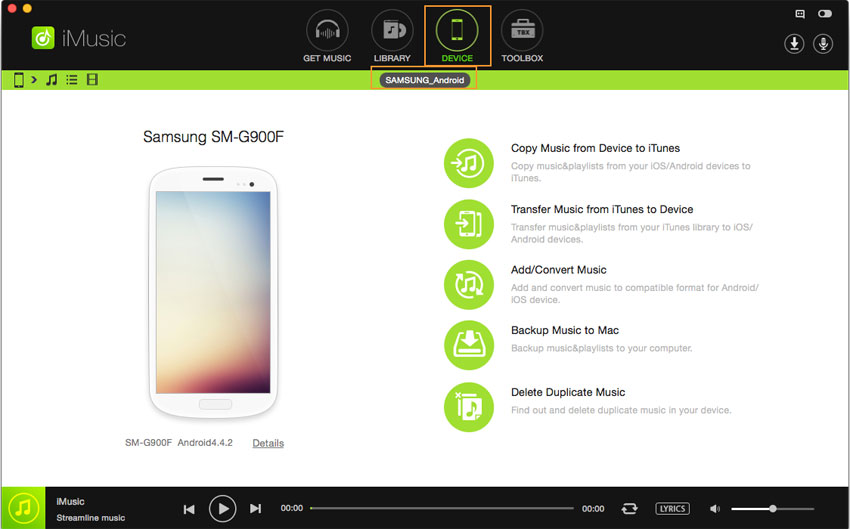
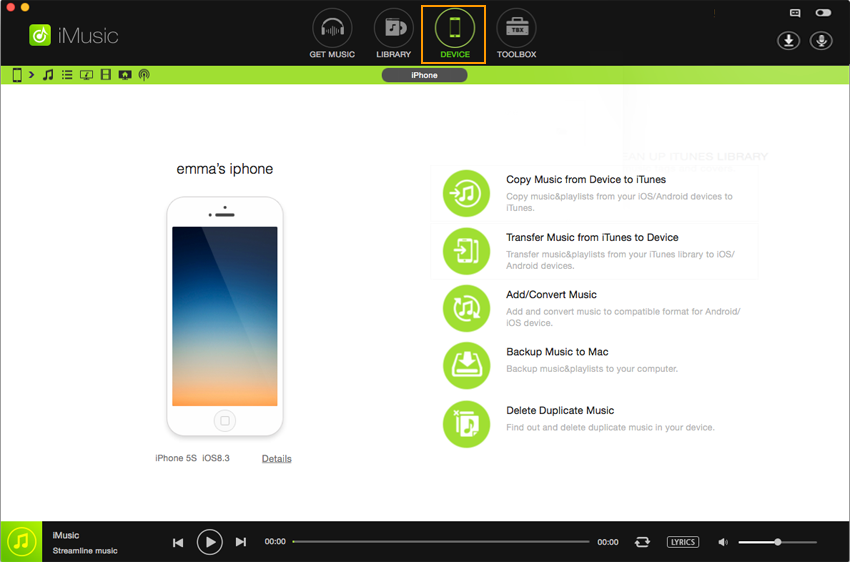
Step 2: Use the USB cord provided with your Android device to connect it to the computer. After establishing the connection, iMusic will detect the device automatically and provides the information of the device on the main interface under the “Device” category.
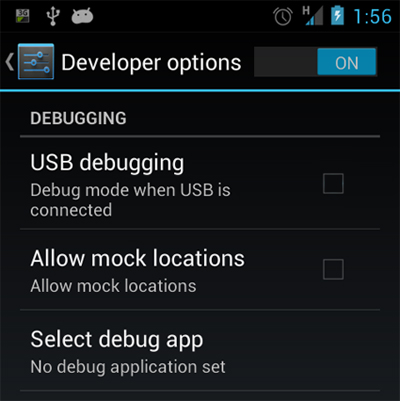
Step 3: If nothing is visible under the “Device” category, then you need to root your Android phone. Go the “Settings” app on your device and choose “About Phone” option. Tap the “Build Number” for seven times to get into the hidden “Developer Mode.” Once done, you will see the “Developer Options,” from where you have to enable “USB Debugging” option. Unplug the USB cable and restart the device. After rebooting, connect the phone to the system using the USB. Now, iMusic will detect the device automatically and show you the details as shown in the above picture.
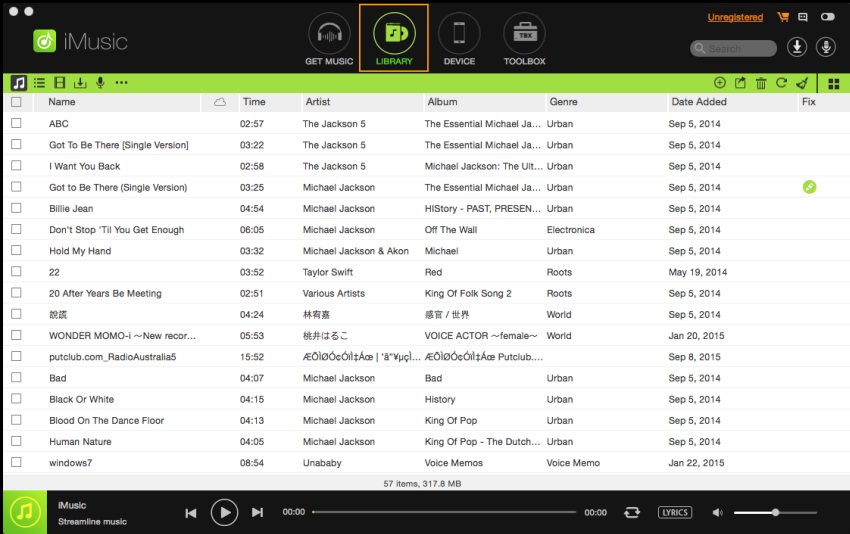
Step 4: Press “Copy Music from Device to iTunes” option from the main screen. After then the iMusic will scan your Android phone, displaying all the file types and files you can transfer from Android to iTunes Library. Select the needed files, say music or music videos and click “Transfer”. Wait until the process is complete. Once done, you will have all the music transferred to your iTunes library by clicking the “LIBRARY”.
Part 2. Transfer Selected Songs from Android Phone to iTunes Library
Step 1: Download the trial variant of the software from the official website. Install the same and start the program. Plug your Android phone into the PC through the USB wire. If the program detects the phone, you will see the information on the main screen under the “Device” tab.
Step 2: If you do not see the device, root your Android and select “USB Debugging.” Reboot the phone and connect it to the computer. The program will detect the gadget automatically.
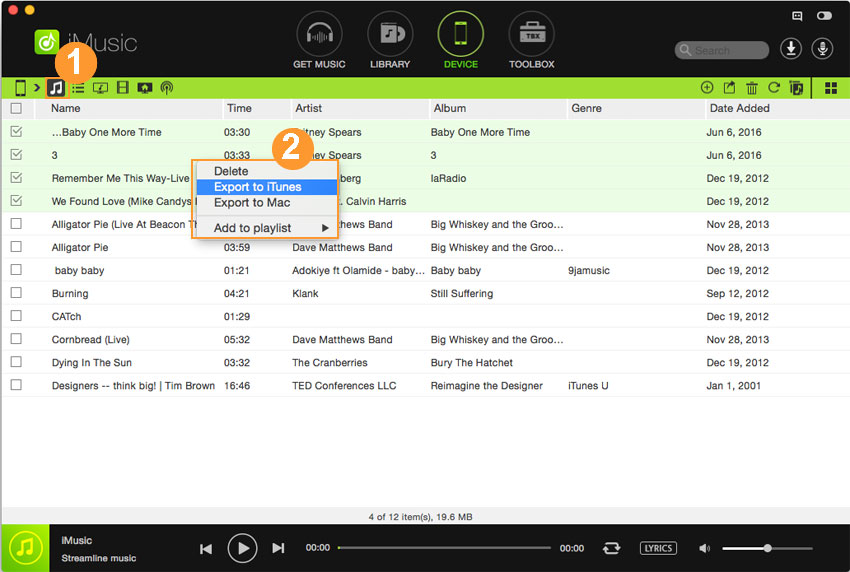
Step 3: Click the music icon on the left side of iMusic window to enter the music management windows for the Android phone. From there, you can see all the songs displayed in the Android phone. Now, from the screen, choose the songs that you would like to transfer to iTunes library. Mark the checkbox before the songs as shown in the picture above. Once the selection process is complete, right click the mouse to see properties sub-menu. From the menu, choose “Export to iTunes” option. Selecting the option will begin transferring the selected songs to your iTunes library.
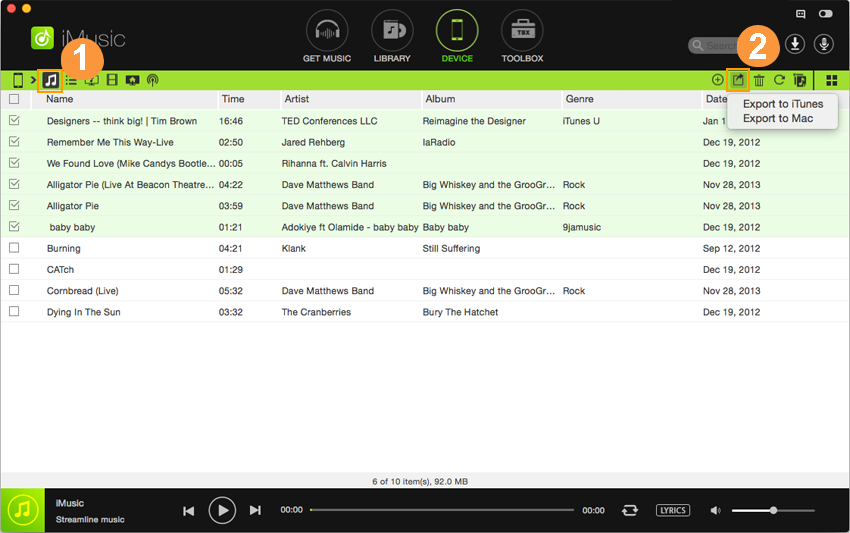
The other way to move the songs in by pressing the “Export” icon located at the top-right corner of the window. Pressing the icon will display a few choices, from which you will have to select “Export to iTunes” feature. iMusic will then begin transferring all the chosen songs. The time taken for transferring the songs will depend on the number of songs selected.
With the help of iMusic, you do not have to follow the lengthy procedure of copying songs from your Android phone to the system and then from system to iTunes. With the steps explained above, you can transfer them with a single click or even copy only selected songs that you want to be present in your iTunes library. Grab your copy today and begin moving all your favorite music!
Download iMusic to have a try!



Any Product-related questions? Tweet us @iMusic_Studio to Get Support Directly