Music is a way of life and has the ability to suit every occasion. Now, you can just pull any kind of music from the internet and listen to it on your Smartphone or iPod. iPod is becoming an old way to listen to music because with the invention of Smartphone and other handheld devices, listening to music became really easy and you don’t have to carry a separate device dedicated to music. Transferring your music from iPod to iTunes is the best way to sync your music with your other devices like iPhone and iPad so that you don’t have to depend only on your iPod for music.
Part 1: Best way to transfer from iPod to iTunes – iMusic
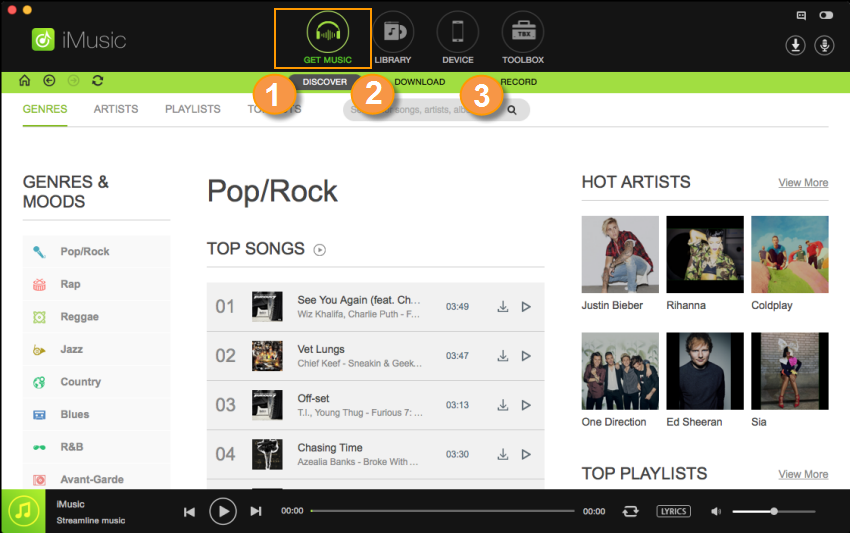
Now the question is that how can you easily transfer your music from iPod to iTunes. There are several different ways but there is a way to transfer it in a single click. iMusic is the best music management software you can have at your disposal. This software is enriched with many features to download, manage, record and transfer your music from your Apple devices to iTunes. With the record feature, this software can easily record any music you listen online so you don’t have to worry whether it is downloadable or not.
- Download music from more than 300 music sites, including YouTube, by copying and pasting the URL.
- Record unlimited music from any website or any audio or video playing in your computer with just one click.
- Built-in music library let you browse and preview the lattest and hottest music from popular music sites.
- Automatically save downloaded/recorded music to library for management and easy transfer.
- Identify and tag music with artist, title, album, genre, and more with the latest ID3 tag technology.
When you buy a new computer, you need to back up your original iTunes library and restore it back to the new computer. This is where iMusic makes it very easy for you to backup and restore your entire iTunes library. The software design is really intuitive and you can easily perform different operations.
There are two ways to transfer music from iPod to iTunes through iMusic.
Method 1: Transfer music from iPod to iTunes Library with one-click.
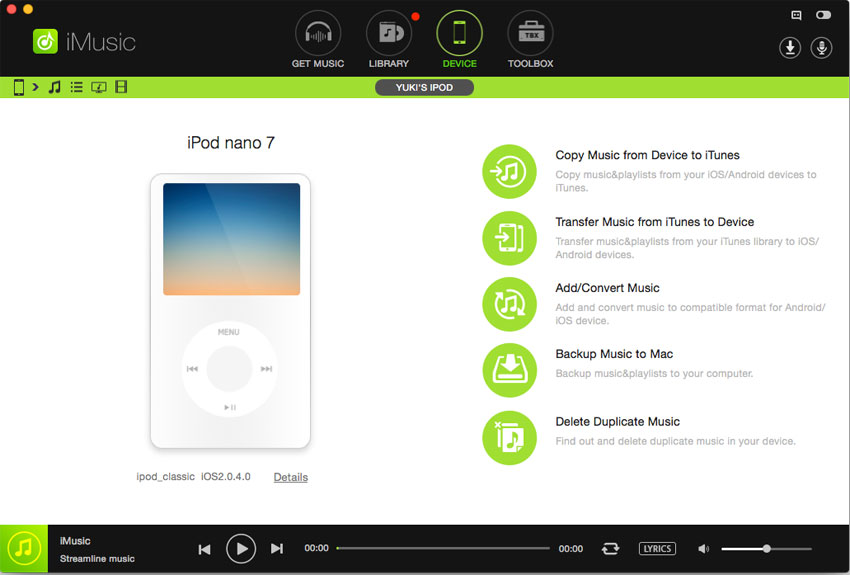
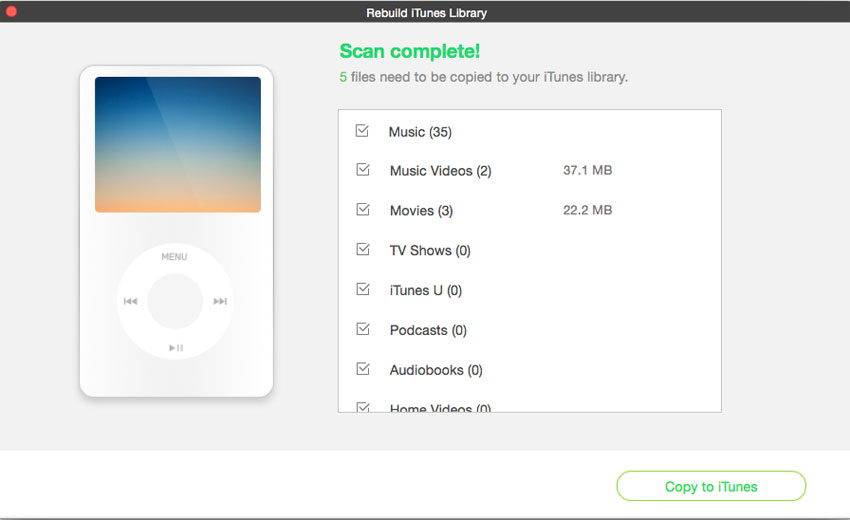
This method allows you to transfer your music in one simple click after connecting your device. This method is as easy to perform as it sounds. Here are the detailed steps to use this method.
Step 1: First of all, you have to install iMusic software on your Mac or PC. You can get this software from the links below. There are trial and premium versions of the software.
Step 2: After installation, connect your iPod through a USB cable. The software will recognize the device and the name of iPod will appear below “Device” icon. Click on that “Device” icon and your device name will appear on the left side of the view.
Method 2: Transfer selected music to iTunes Library
If you are not comfortable with the 1-click method and want to choose your music yourself to export to iTunes, there is also a way to do it.
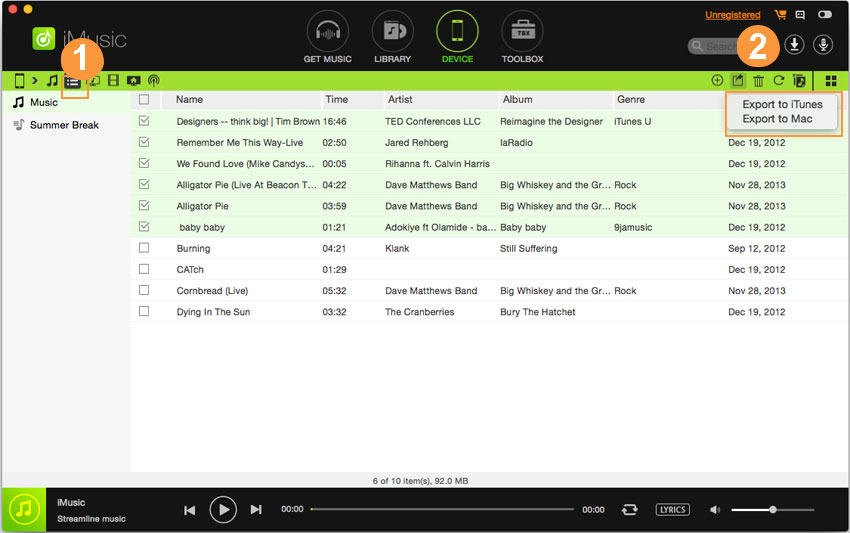
Step 1: Connect the device via USB cable and wait for the device to get recognized by the iMusic software. It’ll take a few seconds and name iPod with appearing below “Device” icon.
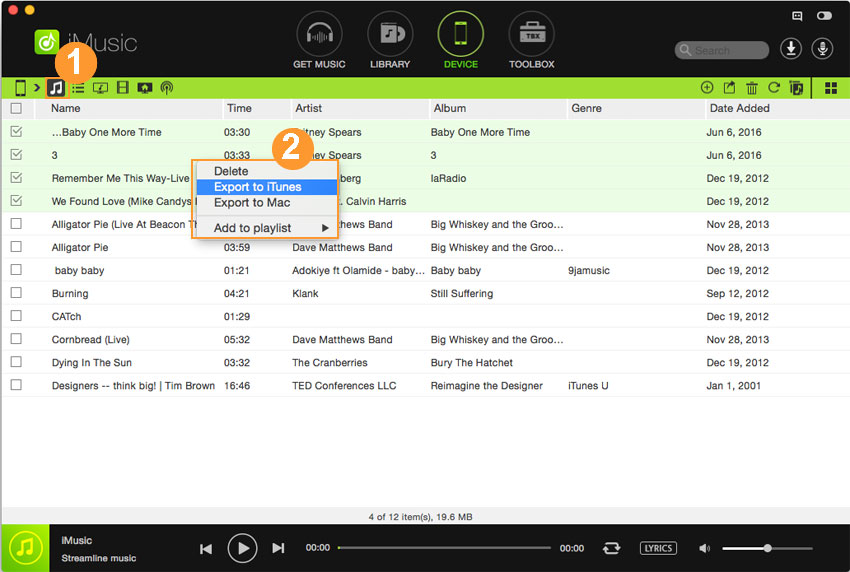
Step 2: Now click on the music icon and you’ll be able to see all your music listed in the software window. Mark the tracks you want to transfer and then right click. Choose the “Export to iTunes” and your chosen tracks will be transferred to iTunes. You can also click on the “Export” button on the top right corner after marking the tracks for transfer. Then from the “Export” option, choose “Export to iTunes Library”.
Step 3: You can also export your entire playlists from iPod to iTunes. It is really simple. Just click on the “Playlist” icon located on the third number in top menu. A playlists window will open displaying all your playlist. Just right click on any playlist and choose “Export to iTunes”.
If you have not used the wide network of iMusic to download free music, and purchased music from iTunes Store, then there is a way provided by iTunes to transfer your purchases from iPod to iTunes.
- First of all, make sure that your computer is authorized with the same Apple ID you used to purchase the music. Otherwise, you’ll face an authorization error. If the music was purchased from different Apple IDs, then you have to authorize your computer for each one of them.
- Now connect your iPod to your computer with a USB cable and wait for the device icon to appear on the iTunes.
- Now on the top menu bar of iTunes, choose File>Devices>Transfer Purchases from ‘Device Name’.
- Choose iPod and all your purchased music will be transferred to iTunes.
This method only works for music purchased from iTunes store and any other free music won’t get transferred to iTunes. To transfer free music, you can use iMusic software.
All in all, iMusic is one of the best music managers to transfer your beloved music on iTunes. When synced with iTunes, you can listen to your music on any device you want and you won't have to be dependent upon your iPod for music listening. iMusic is priced at $39.95 for an Annual license and $59.95 for a Lifetime license.



Any Product-related questions? Tweet us @iMusic_Studio to Get Support Directly