SoundCloud is one of the most popular music stations and libraries in the world with over millions of users from around the world. It is a place where musicians and music lovers connect with each other through their favorite songs. However, if you are a beginner on SoundCloud then sharing and uploading music can seem like a complex task. This is why we have put together a step by step guide on how you can upload and share music on SoundCloud.
Supported Formats:
The first thing that you need to be aware of is the formats that are supported by SoundCloud. There are several limitations and restrictions on the audio formats on the music platform which is why it is important that you learn about them. SoundCloud supports the following formats for music: FLAC, AIFF, WAV, OGG, MP2, WMA, MP3, AMR, AAC, and ALAC. Though the list seems limited and short, this is all that SoundCloud supports. If you have music in any other format, you will have to convert it to the required format before uploading.
Things to pay attention to before uploading:
The SoundCloud rules and regulations for uploading music files is another important aspect of the music platform that you need to know about. Here are some of the most essential things that you need to know before you upload a music file to SoundCloud:
Now that you know the exact requirements of uploading a music file to SoundCloud, let us take a look at how you can upload music to SoundCloud.
Step by Step Guide to Upload Music on SoundCloud:
Step 1. Open the SoundCloud website on your desired browser. On the top right hand side of your screen, you will be able to see a Create account option, click on it.
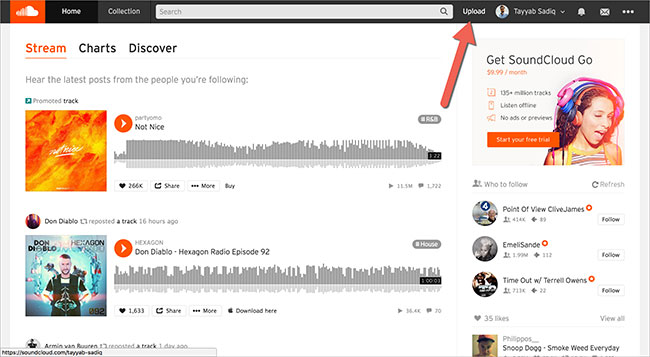
Step 2. You will be asked for your email address to verify that you have not signed up before too. Fill in the required basic information in the screen that follows to complete signing up on SoundCloud. Check your email address for an email for SoundCloud. Follow the instructions in the email for verifying your email address. Once you have verified your account and logged into SoundCloud, click on the Upload button on the top right of the page. This will redirect you to the upload menu.
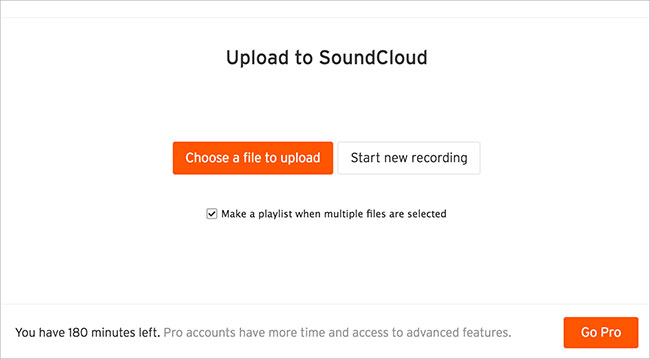
Step 3. Here, you can choose from two options: Choose the file to upload and Start new recording. Click on the first option (Choose the file to upload) to select the file that you wish to upload to SoundCloud.
Step 4. In the Browse Dialog that opens, navigate to the location of the file on your computer system and select it. Alternatively, you can drag and drop the file to SoundCloud as well.The upload for the file will begin automatically. Once it is complete, you will be asked to fill in details about the song such as the title, tags, and album. Enter all the required details and that is it! The song will now appear on your SoundCloud profile.
Sharing a public track or playlist:
Uploading a song (or playlist) publically on SoundCloud automatically makes it visible for everyone on your profile and the Stream. It is also automatically added to the Stream of all your followers as well so that they can listen. Your public track can be listened to or reposted by anyone on SoundCloud. To share a public soundtrack or playlist, all you need to do is copy the link of the song in the browser URL bar and send it to anyone that you like! For public tracks, both users of SoundCloud and guests can listen to the track or playlist.
All SoundCloud tracks are uploaded as public by default. However, if you do not want everyone to be able to listen to your songs then you can change your track or playlist’s privacy to private. This will give you complete control over who can listen to your tracks. These tracks can neither be searched on SoundCloud nor are they available on your profile. To change the privacy of a public track to private, navigate to the track (or playlist) on your profile. Under the waveform, click on the pen button to access the Edit settings. Here, you will be able to see an option saying Track is Private/Public. Click on the bubble next to the word private and click on the Save button. This will change the settings and take off the song from the Stream and your profile (for visitors).
Now, what if you want to share a private track or playlist with someone? Here are the steps that you need to follow to do so:
Sharing a private track or playlist:
Contrary to public tracks, private tracks are only accessible to you alone. For sharing these tracks, you need to fetch the secret link for the track that can be found under the information for the soundtrack. This link can be shared within SoundCloud and externally as well. For getting the secret link for your private track or playlist, navigate to the song on your profile. Here, click on the Share button below it. You will now be able to see a link under Private Share that will allow you to share it with others. You can now send this link to anyone that you like. These private tracks, once shared, can also be listened by guests (individuals that do not have a SoundCloud account). However, if you share it via SoundCloud message, it gives you the luxury of striking up a conversation (privately) about the song as well!


Any Product-related questions? Tweet us @iMusic_Studio to Get Support Directly