If you are a Windows media player user, you already know that you can easily manage and play digital music. However, you might not have known that you could also rip music CD using the same media player. Additionally, you can easily add the content directly to the music library.
Step-by-step guide for how to Rip CD with Windows Media Player
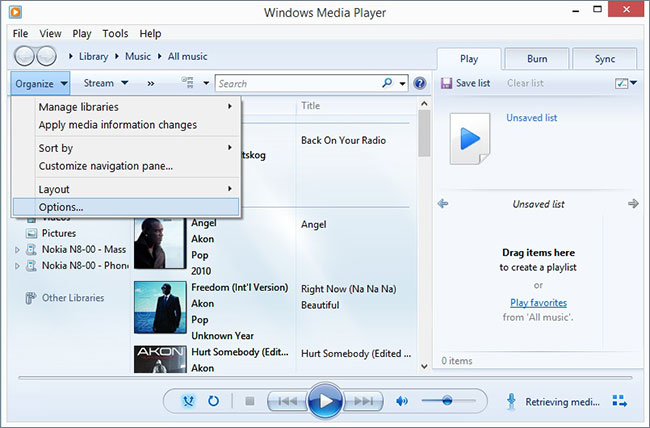
Step 1: Initiate Windows Media Player by clicking the Windows icon on your computer and searching for the media player program. In the media player window, press the Organize button available at the top of the window and then choose the options tab.
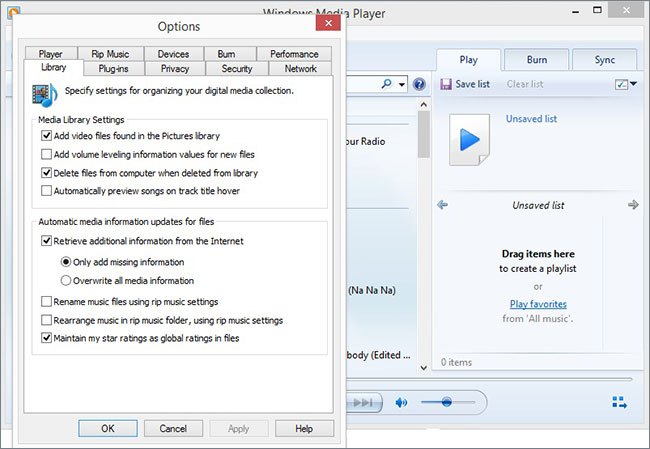
Step 2: Selecting the options tab will open a pop-up message that contains several options.
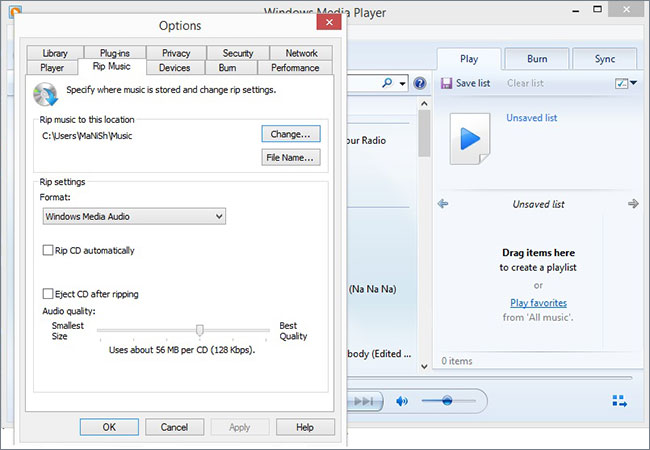
Step 3: Press the “Rip Music” tab from the message window. Here, you can make changes to the output location where you wish to store the songs, change the output format from the default Windows media audio, and select eject CD after ripping, and modify the output of the audio quality.
Step 4: Now place the audio CD that you wish to rip using the media player. Windows automatically opens a pop-up message asking you to choose a particular option. You can select “Rip Music” and allow the operating system to open the media player for further procedure. As you have already set the ripping parameters, you can directly head to the selection of the songs if you are keen on choosing only a few rather than the entire lot present within the CD. Press “Rip” button start ripping the music from the CD.
Note: By default, Windows Media Player stores the songs in Windows Media Audio format. Usually, Windows ensures that there is no loss of quality while ripping the content from a CD. However, only a few devices support .WMA format. Therefore, many users prefer the output of the file in .MP3 extension. In such a case, it is possible for a user to change the output format from the advanced settings offered within the options tab. The following steps will help in changing the output format to MP3:
Step 1: After opening the Windows Media Player, press the Tools tab. From the Tools tab, click Options feature.
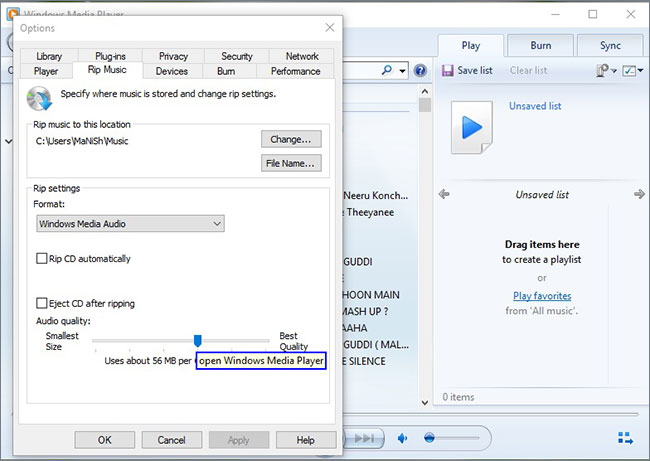
Step 2: In the same window, choose the Rip Music feature.
Step 3: In this window, you can use the drop down menu under the format category and select MP3 as the output format. It is also preferable to increase the audio quality to ensure that there is no loss of content while ripping and converting the format of the audio CD into MP3. After completion, click the OK button. You can then proceed ahead as mentioned above to rip the CD.
Where does Windows Media Player store the ripped CD songs and how to copy them to a different location?
By default, Windows Media Player stores any music in the “Music” folder available in the user document. It is also the same location for you to find the ripped songs from an audio CD. You will be able to find this location by choosing the “Rip Music” option under the Tools category of the Windows Media Player. From the above picture, you can see that you have the option to change the location. You can click the change button to make necessary changes to the storage area and choose a different folder. After completing the changes, click the okay button to apply the settings and then begin ripping the audio CD. After completing the ripping process, you will be able to see the ripped songs of the audio CD in the preferred location. From there, you can easily move the content to a different location on your hard disk or copy them to an outside device such as a smartphone or tablet. Before transferring them, ensure that the file extension is compatible with the device so that you can enjoy the music without any hardship.
Why Windows Media Player in Windows 10 cannot rip CDs?
Although Windows fixed many of the errors in its Windows 10 operating system, there still exist if you issues that make it impossible for a user to rip music using the media player. If you are encountering a condition where you are unable to rip an audio CD, the following solution might be of great help.
Solution 1: Managing libraries
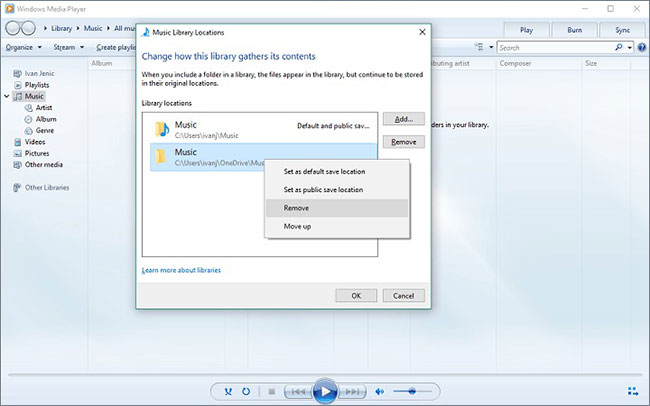
Although it sounds absurd, managing libraries are important because there lays a conflict between the locations where you choose the music and the existing library. If you have more than one music library, then there is a high possibility that you will accustom the error that will make it impossible for you to rip music using media player. A better way to overcome such a simple hurdle is by deleting the unwanted music library so that you can easily copy the music from the CD to the computer. You can do this with the help of the following steps:
- Open the Windows media player and press the Alt button to open the file context menu.
- Go to File> Manage libraries>Music.
- Delete other music libraries accept the default for the where you will be placing the music.
- You can now try ripping the audio CD and copy the content to your computer.
Solution 2: Installing necessary codecs
There is a possibility that Windows Media Player fails to rip an audio CD in Windows 10 operating system due to the absence of necessary audio codecs. The lack of the codecs also makes it impossible for you to play the songs on your computer. A better way to carry out the processes is by installing the latest K-lite codec pack for Windows 10 from the Internet. You also have the opportunity to look for other codecs according to the requirement. After finishing the installation of the codec pack, try ripping the audio CD using the Windows Media Player. You will probably complete the procedure smoothly and achieve the success with ease.


Any Product-related questions? Tweet us @iMusic_Studio to Get Support Directly