Part 1: How to Make Sound Better in Audacity
When it comes to all your audio editing and mixing needs, audacity is a great software program to use. To make sure that you get audio sounds with high fidelity when using it, the following is what you need to do.
1. Appropriate Recording Devices
To make sound better in Audacity, you need to make sure that the microphones that are you are using work great for your environment or device. You will also need to make sure that the cables and connectors that are being used are of high quality.
2. Space With Good Acoustics
You need to make sure that the space that you are recording from has good acoustics. You should avoid spaces that are so confined or echo because they may distort the sound. But it will also depend on the sound that you are looking for.
3. Avoid Background Noise As Much As Possible
You should avoid recording in places where there is too much background noise because that noise may add a hiss to the recording. The his may be too hard to get rid of.
4. Multiple Takes
It may be a great idea to record multiple times and then choose the recording that you think has the highest quality.
5. Updated Sound Card And Drivers
If you can be able to update your sound card, be sure to do so if you want to get the best sound quality when recording with Audacity. You should also download the latest drivers for the sound card that you are using.
6. Save Recordings With Highest Quality
In case you record with another software program or device before using Audacity, you should be sure to export or extract that audio using the highest sound quality possible. Loss of quality can also be caused by conversion from one audio format to another.
Part 2: Tips on Audacity Sound Effects
To be able to get the most out of Audacity, you should know how to use its sound effects properly. This application presents you with three options for incorporating audio into an open project. The first method is dragging the audio file into the project window, the second method is using the Audio Menu by going to Import, and then Audio, and the third method is using the keyboard shortcut Ctrl+Shift+I in Windows and Cmd+Shift+I for Mac. You need to make sure that your audio is positioned where you would like it to be, and then clip it as necessary.
After inserting the audio, you may want to adjust its volume. You can adjust the volume without changing the audio itself by double clicking the Gain slider that is found in the control panel, or you can simply drag the volume on the slider. Note that this may adjust the entire track volume, something that may not be desirable.
Another handy audio tool that Audacity has is Auto Duck. It allows you to automatically reduce your background volume when you have audio in another track. Before you attempt this feature, you need to make sure that the background volume is immediately above the vocal track. Once that is done, you can choose the portion of music that you would like to edit, and then go to the Effects Menu, and then choose Auto Duck.
Other sound effects that you are quite useful when using Audacity are fade ins and fade outs. To use them, you will need to clip the audio to the length that you need it to be, and then choose part of the beginning for a fade in, or part of the ending for a fade out. After that, you should select the appropriate command from the "Effects" menu.
Part 3: How to Record from Sound Card with Audacity
The following is how you record from sound card using Audacity.
1. First, you will need to make sure that a Soundflower, which is simply a system extension that enables applications to pass audio to other software programs, is installed on your computer. You can download it here https://cycling74.com/forums/topic/soundflower/.
2. After the Soundflower has installed successfully, you will need to launch the Soundflower bed (it is found inside the Soundflower folder).
3. Next, you will open Sound Control Panel on your computer, and then go to Preferences.
4. Go to the output tab, and then choose Soundflower (2ch) from the list.
5. After that, go to the Sound Effects tab, and choose Line Out or Internal Speakers from the drop down menu that comes up after clicking Play Alerts and Sound Effects Through.
6. Go to the menu bar and then click on the Soundflower icon, and then choose Built-in Line Output in the "Sound flower (2ch) section".
7. After that, you will need to choose Audio Setup from the Soundflower menu, and then Choose Window followed by Show Audio Window.
8. A list of inputs will come up. Choose Soundflower (2ch) option, and then click the Input button. Choose the desired format as well as master volume and channels, and then click the Output button.
9. After that, you will need to open Audacity, and then select Soundflower (2ch) as the input device from the Device toolbar.
10. When you are ready to capture sounds, press the red record button.
Part 4: Record from Sound Card without Audacity
If you find recording audio from sound card with Audacity to be so difficult, you should try using an easy alternative such as iMusic.
iMusic provides the best way to record audio from sound card or online to MP3 or M4A on Mac. Whether you are listening to a radio program or watching a YouTube music video, you can capture the audio by simply clicking the Record button and then save it to high quality MP3 or M4A files.
Key Features:
- It can record anything that you can hear from your Mac.
- It records audio without quality loss.
- It can extract audio from online video.
- It comes with a built-in media player.

Steps for Recording Audio with Audacity Alternative
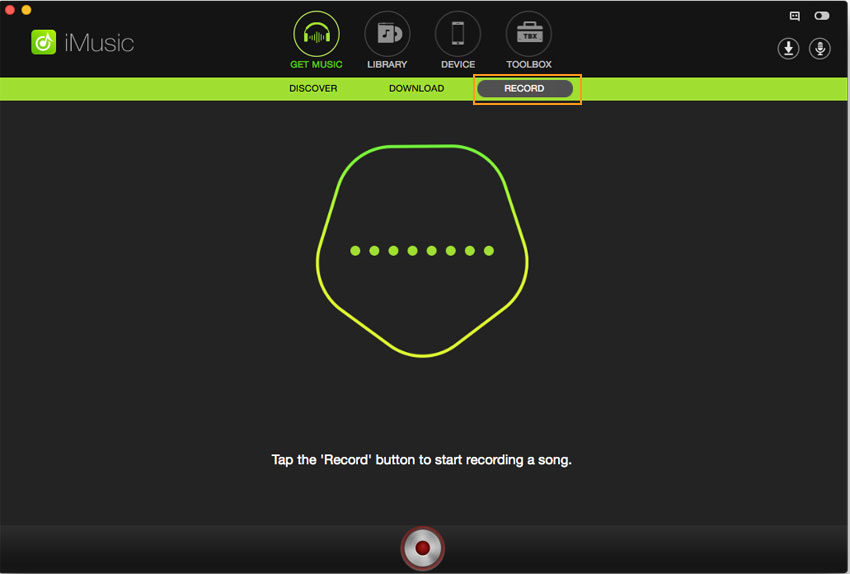
Step 1: Download the application and follow the installation instructions to install it. Launch the program. Click the RECORD tap and press the red button to get ready to record music.
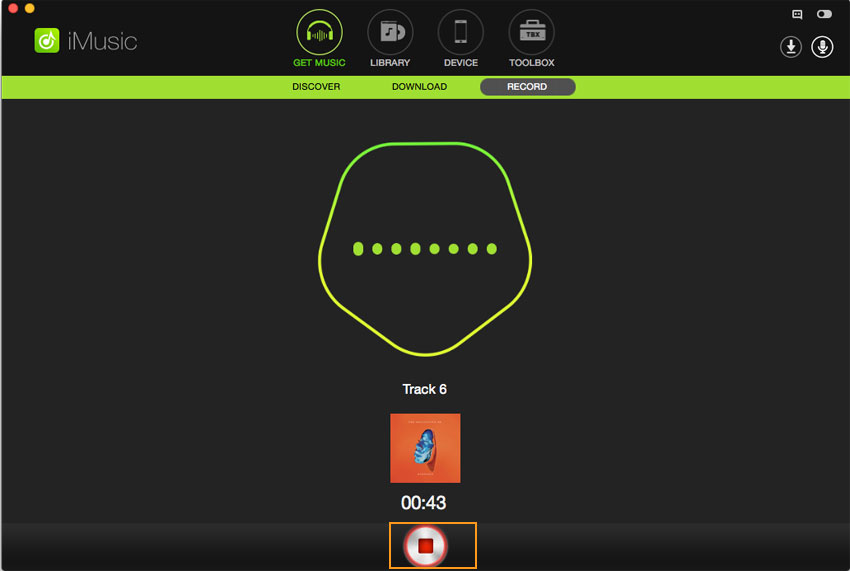
Step 2: Then go to iTunes, Spotify, or the web pages that have the music that you want to record, and then play that music. The application will begin to record only upon detection of the sound. Meanwhile you don't have to look after it. Press the red button again to stop recording if you want it to stop.
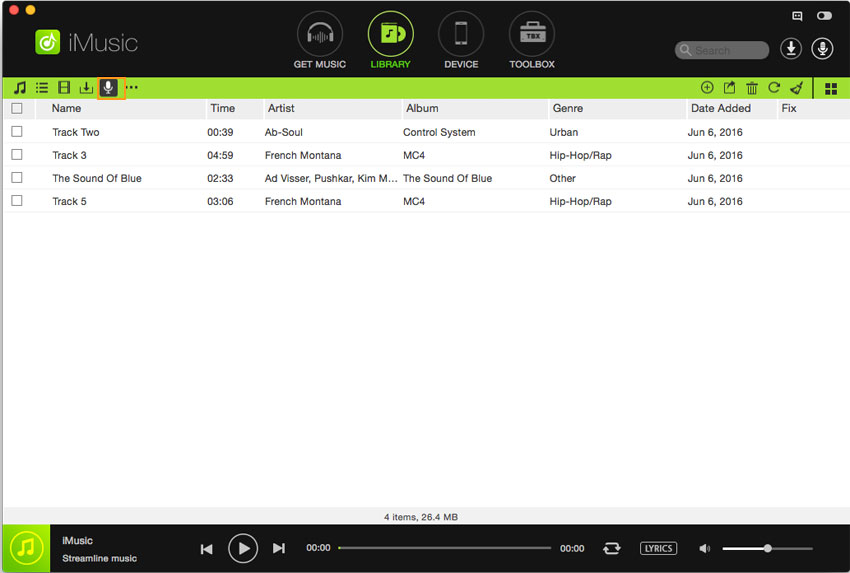
Step 3: To listen the recorded music, you can simple click LIBRARY tap to check them. And you can transfer them to your computer or other devices connecting to your computer by USB cable. You can transfer them to your iTunes Library too!


Any Product-related questions? Tweet us @iMusic_Studio to Get Support Directly