Recording audio music is a common activity that almost every lover of music does on regular basis. There is unlimited free music out there and the only way we can enjoy beyond the source is by recording and storing them in our computers. Many recording programs are out there purposely to help us record music. One of them is the Audacity Linux audio recorder. Like many other, programs, problems are bound to occur while using it.
Part1. Problems of Audacity Linux Audio Recorder
Here are the most common issues that occur while using Audacity Linux and how to fix them.
Problem1. Recordings sound at a wrong pitch or crackly
This problem usually occurs when you record a new track while playing an existing one (overdub recording). When you do this, you are in fact, subjecting your computer to a somehow hard task that might result in poor quality of the output. Your computer cannot lay down the track you are recording at the same time you play in response to the exact beat. So, what happens? If there is no intervention, the recording gets laid down not as it should be, but after the beat. In as much as Audacity tries to fix this problem by pushing backwards the recorded track once the recording stops, further action is necessary as this might not be enough.
There are several remedial measures to fix this problem but the best thing you should do is ensure that the project rate is the same as that of the already existing tracks. Moreover, make sure that the sound device you are using has updated drivers and be sure to use the same device for recording and playback.
Problem2. Recordings are fading out or sound as if the recording was done in a tunnel
This is a problem that is mostly common with Windows 7, Windows Vista and Windows 8 computers though it can also occur occasionally on new Mac Computers. This is a symptom that your sound device is trying to apply corrective enhancement or an effect. Fixing this is simple. Look for the "echo cancellation" and "noise suppression" buttons then turn them off. In addition, it is advisable that you change Windows settings of your computer to correct the sound effects.
Problem3. Appearance of red and vertical lines in the just recorded track
This visual indication simply tells you that the recording you have just done has clipping. With this, you do not need to be much troubled. It is in fact, the easiest to fix. These indicators can simply be turned off. Go to "Audacity default settings" button and turn off.
Problem4. Recording cursor gets stuck or recording pauses automatically
This happens if by mistake or accidentally you enabled "Sound Activated Recording" and the ongoing recording input does not reach the set threshold for starting the recording. You can easily tell that this problem is inherent by looking at the pause button. It gets depressed as soon as you start recording. To fix this, simply move to the "Transport" button and disable the "Sound Activated Recording"
Part2. The Alternative to Audacity Linux and How to Use it
If Audacity Linux is not working well for you, the best next alternative to use is the iMusic. With this, you are assured of high quality and easy recording of your best audio music from your favorite music sites. This is the best recorder for your computer. This amazing program has the following unique features that make it one of its kinds:
- It supports more than 3000 radio stations and music sites.
- With one click, you continuously record your music.
- It splits tracks automatically and separates your audio files.
- Eliminates ads between your audio tracks.

Step-by-step Guide on How to Record Audio Using iMusic
Recording audio music using iMusic is easy and does not require any specialized training. It simply involves the following direct steps and in no time, you have the job well done:
How to Download Tubidy Music with iMusic
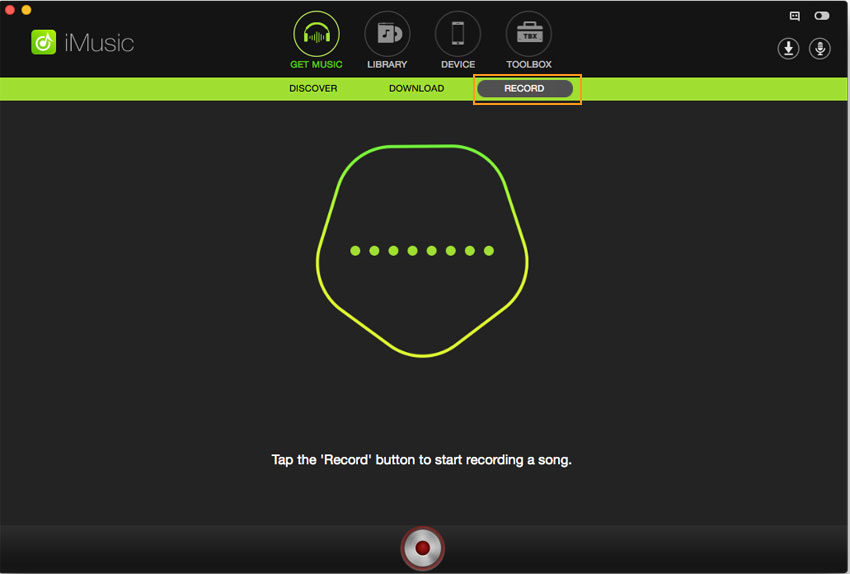
Step 1: Download the software from the link below and install it in your computer. Follow the given instructions to set the recorder. Launch the program on your computer and get to the recording interface. Set the program ready for working by clicking the record red button.
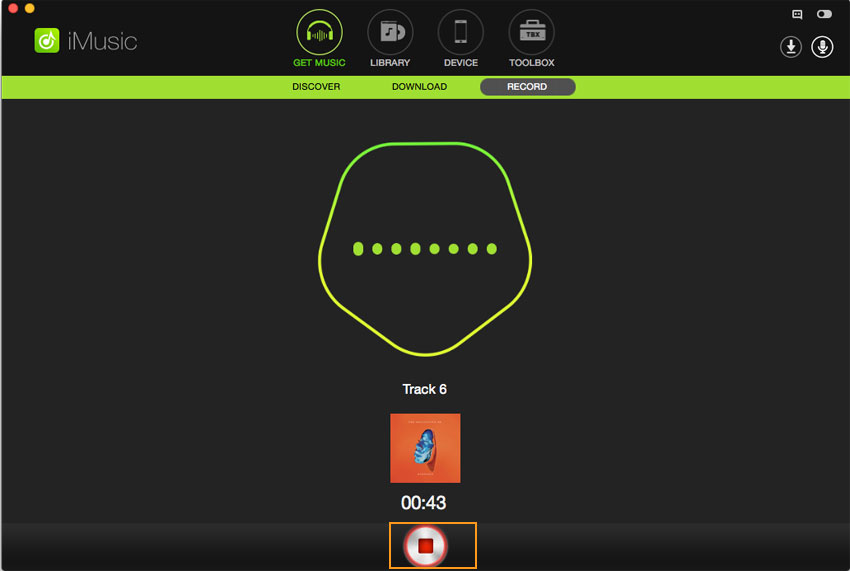
Step 2: Go to the music sites you would like to record your music from and start playing the audio. The application will detect the music and begin recording automatically. When the music stops, iMusic will automatically stop recording. Or you can press the red button to make it stop.
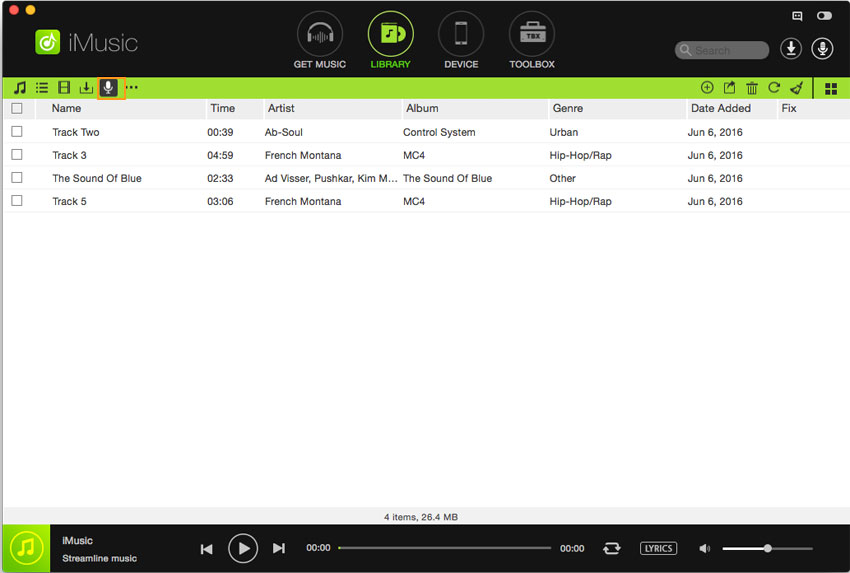
Step 3: After recording, you can go to LIBRARY tab to listen the recorded music. And you can export them to your computer or phone. You can also export them to your iTunes Library. It records with exactly the same quality as the original audio.


Any Product-related questions? Tweet us @iMusic_Studio to Get Support Directly