Audacity is a free and easy-to-use audio editor and recorder application. Roger Dannenberg and Dominic Mazzoni started Audacity in 1999 and introduced it to public in 2000.
Audacity can be used in recording live audio; converting tapes and records to digital records; recording computer playback; editing WAV, MP2, MP3, FLAC, AIFF or Ogg Vorbis sound files; importing, exporting, merging, cutting, mixing or copying sounds together; giving and changing effects such as speed and noise reduction; and a lot more.
Part 1: How to Download and Install Audacity on Mac or Windows
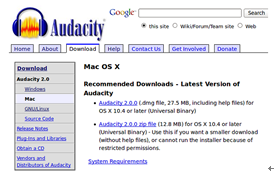
Step1. Since Audacity is a freeware, there are several sites where you can download the installer file. For this one, you can find it on http://audacityteam.org/download/. Choose the corresponding link if you are using Windows or Mac.
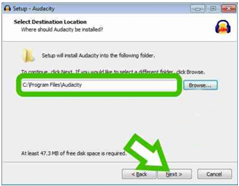
Step2. Save the file of the installer. When the download is done, run the installer. Choose your preferred language. On the next step, click the Next button. On the Information window, click the Next button again. Then, choose where you want to install Audacity, the default is in your Program Files folder, and choose Next.
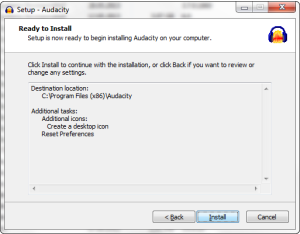
Step3. The wizard will ask you if you want to install additional tasks, creating a desktop icon and resetting preferences. Click Next button when done and the next window will tell you that it is now ready to install, showing a summary of the settings you have set. If there is nothing that you wish to change, proceed by clicking the Install button, or if you want to change something, click the Back button. Change whatever needs to corrected and just click on the Next button again.
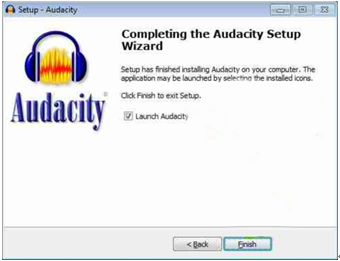
Step4. When you click on the Install button, installation will proceed and may take a while. Before the window telling you that the installation is already done, an information window will appear. When you are done reading, click the Next button. The next and last window is the window stating that Setup has finished. You may opt to launch Audacity by checking the box. Click Finish button to exit setup.
With Audacity, you can record audio files, edit those audio, apply effects like fading in or fading out, scrubbing, and a lot more features.
Part 2: How to Use Audacity for Recording
Launch Audacity. Make sure your microphone is working properly. Click the Record button to start recording. Make your voice clear on the microphone and check the waves on the interface. Click the Pause button if you will only stop for a while and wants to continue on that same track. But, if you will need to stop for a long period or when you are done with the track, press the Stop button.
Pausing for a long period is not advisable. Especially if you will go somewhere else and leave your computer. Aside from possible application crash down, there might be power interruptions, leaving your work unsaved and unrecoverable.
Part 3: How to Use Audacity for Editing
Load the file or files you want to edit or if you have just recorded, click on the Play button to listen to the audio.
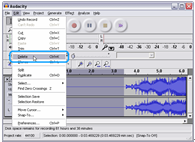
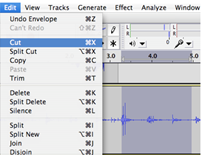
a. Deleting At the bottom of the window, use the bar to highlight the part you want to remove. From the Edit menu, choose Delete.
Load the file or files you want to edit or if you have just recorded, click on the Play button to listen to the audio.
Part 4: How to Use Audacity for Playback (how to guide with screenshots)
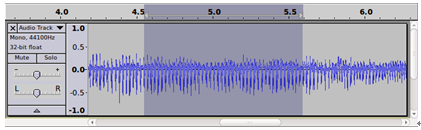
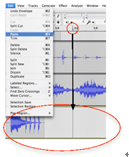
To do a Playback, highlight the part of the audio you want to hear, edit or make adjustments. When you press the Play button, only the highlighted part will play and a green down arrow head will indicate the part that is playing.

Part 5: 4 Reasons on Why You Should Not Use Audacity
There are some disadvantages using Audacity behind the fact that it is free. Here are some of the disadvantages:
- Audacity is not stable. After constant use, there is a tendency the program will crash. The worse thing of all is that there is no recovery of the unsaved lost track.
- LAME MP3, the codec that you need in order to export your recording as MP3, is not yet included when you download Audacity. You will have to download LAME MP3 and locate the LAME library file when you export to MP3 in Audacity for the first time since the program's installation. It would have been better if LAME MP3 is automatically installed when you install Audacity.
- Audacity usually crashes when the track is longer than an hour. So, when your track is getting longer, save it frequently.
- Audacity, being free, has its downsides. What you could do quicker in a paid software takes longer to make with a free software, therefore, taking much of your precious time.
Part 6: The Best Audacity Alternative
The best thing about Audacity perhaps is being a free audio editor and recorder software. However, it often crashes when used for a long period or when your audio is already longer than what it could handle. If you are into reliability no matter how long your audio is, there are other alternatives. iMusic is highly recommended.
iMusic is a paid up audio recorder. But, there is a free version although it has limited features, as all free software have. It can record any audio played on your Mac exactly the same quality as it is heard as the audio. It can give you the output in MP3 without having to install additional codec or plug-ins. And, it supports audio from more than 3000 online music and video websites and online radio stations. Plus, you can add the recorded audio to your iTunes Library in just one click.

Steps on How to Record Audio with the Application
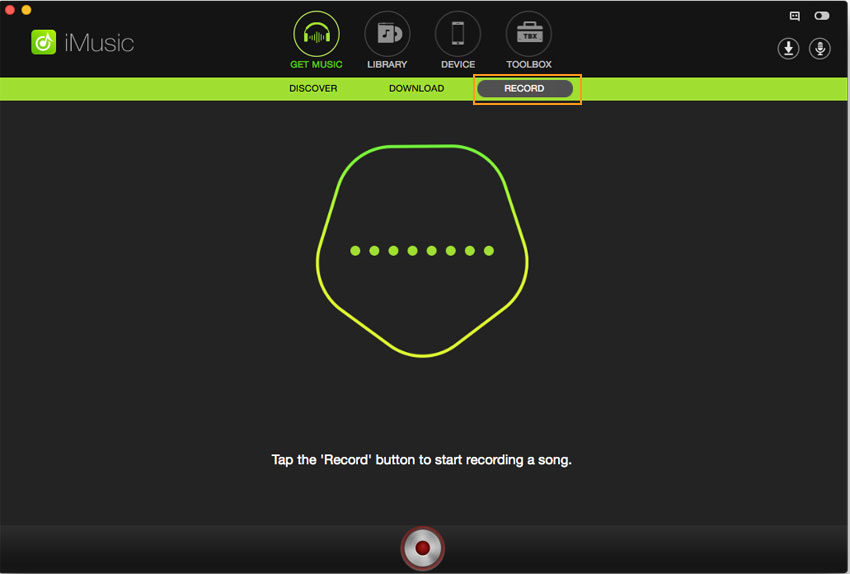
Step 1: Download the software from the link below and install it in your computer. Follow the given instructions to set the recorder. Launch the program on your computer and get to the recording interface. Set the program ready for working by clicking the record red button.
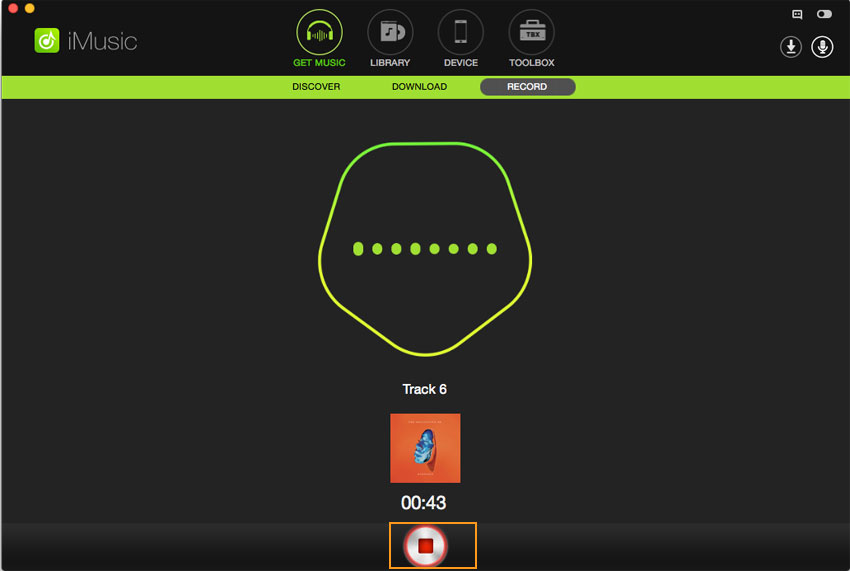
Step 2: Go to the music sites you would like to record your music from and start playing the audio. The application will detect the music and begin recording automatically. When the music stops, iMusic will automatically stop recording. Or you can press the red button to make it stop.
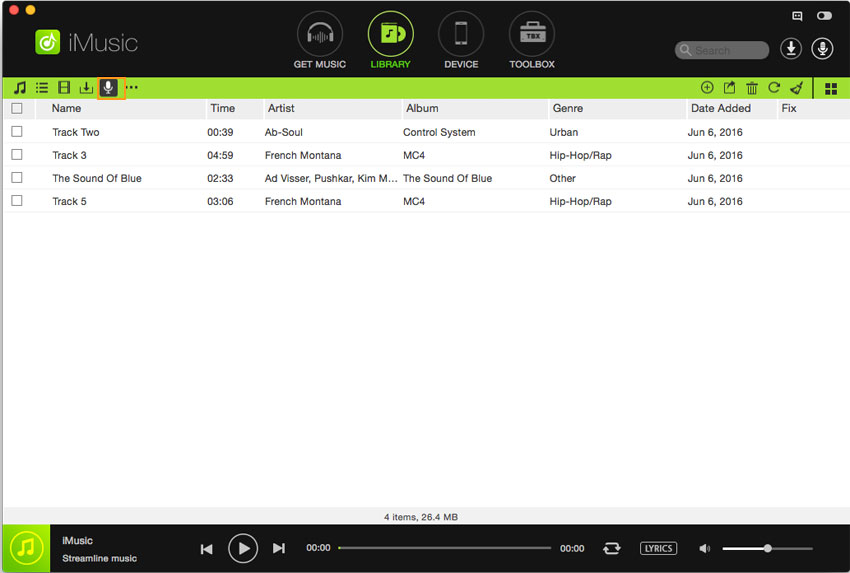
Step 3: After recording, you can go to LIBRARY tab to listen the recorded music. And you can export them to your computer or phone. You can also export them to your iTunes Library. It records with exactly the same quality as the original audio.
Key Features of iMusic:
Recording audio from a lot of streaming websites
You can now record from YouTube, Spotify, Yahoo Music, iTunes Radio, Pandora, Rhapsody, AOL Music and a lot more streaming websites. And, it is easy to record, just a click and record you go. And, you can even burn the music you have recorded into a CD.
Recording audio from video websites
It lets you record the audio of a video you are watching like from a YouTube music video. Only press the Record button to start recording and save it to a high quality MP3 or M4A file.
Transferring recorded audio to iTunes Library
One good thing with it is having an "Add to iTunes" button which lets you add your recorded audio to your iTunes Library with a single click.
Identifying songs through ID3 tags
It is capable of identifying recorded music files and can automatically get music information such as Title, Artist, Genre and Album. If you notice any mistakes with the information, you can edit the tag.
Recording audio in original quality
It records exactly what it heard from your Mac. You will enjoy exactly the same music.
What’s more, the application has its own media player. You can play the audio you have recorded and check the quality of the said audio. You can also organize your audio files and delete unwanted music file.


Any Product-related questions? Tweet us @iMusic_Studio to Get Support Directly