Have you ever experienced the situation where you wish to chop some unwanted music in the beginning or end, or perhaps just get over the whistles and cries of the fans before the singer arrives on the dais at a live concert? Well, the simple yet wonderful control of custom start and stop time provided by iTunes might come in handy then. It helps to omit the starting or the ending portion of a song while keeping the original file intact.
Here tips and tricks on how to cut music on iTunes to get your desired effect.
Part 1: 5 Steps to Cut Music on iTunes
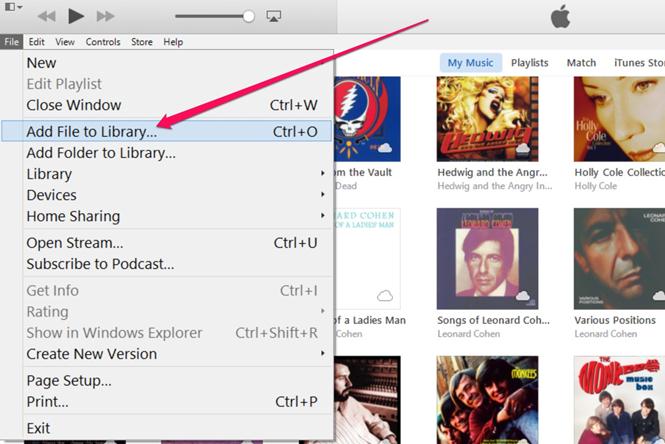
Step 1: Import the song to your iTunes Library
To edit the song, you need to first have it in your iTunes library. Press ‘Ctrl-O’ in iTunes OR press ‘File Add File to Library’. From the navigation window, click on the song you wish to edit, and choose ‘Open’.
iTunes usually supports most of the music formats including inter alia MP3, WAV etc.
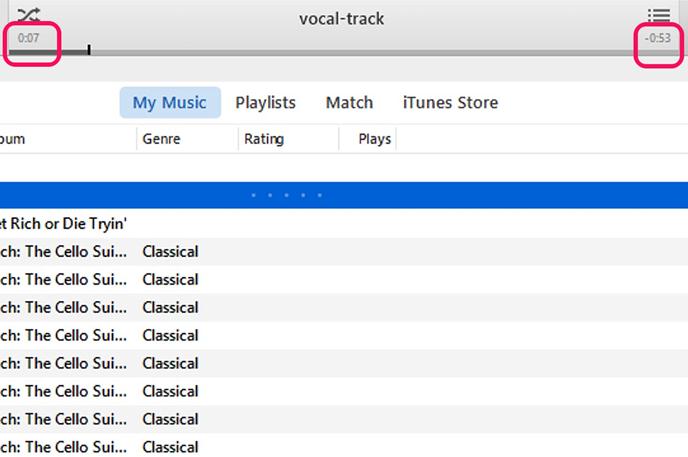
Step 2: Mark the time
Let the song play in iTunes. Pen down the start and the end time of the part of the song that you want to retain.
In order to find out the exact time from where the desired version of your song should start and end, check out the Status pane at the top-center part of the iTunes window while the song is being played. In order to shift swiftly on the Status pane, drag the slider to jump to the desired value through the song and note the exact value where you want your song to start and end.
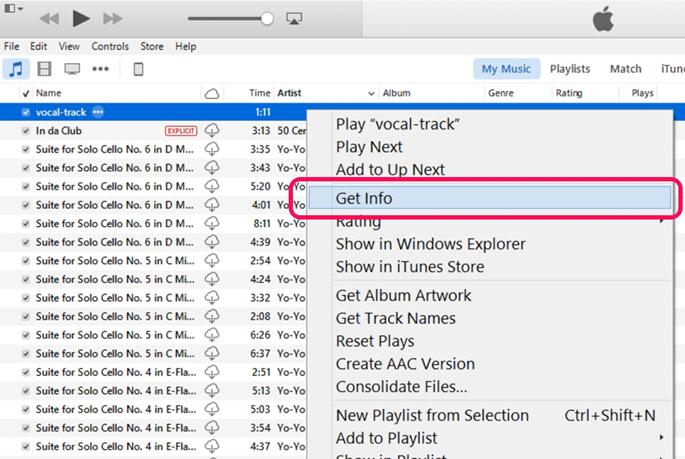
Step 3: Start and Stop
With the time details ready, ‘Right click’ on the title of the song that is being played, scroll down the options and choose ‘Get Info’. An Information window will appear on your screen. Now, click on the ‘Options’ tab that will help open the window where we can specify our desired values for the start and stop timings.

Here, click the ‘Start’ and ‘Stop’ check boxes and click inside the Start time field to mention the start time and inside the Stop time filed to specify the time when the song should end. Click ‘OK’ to save the above changes.
The time format will be minutes, seconds, and milliseconds. So, if your desired version of the song starts after cutting the first 5.3 seconds, the start value in the field will be 0:05.30 and say, it should end at 4 minutes, then you can type 4:00 in the Stop field.
Note: Although this sound track will still reflect the original time length in your iTunes library yet when the song is being played, it will only play from the time specified by you and end similarly.
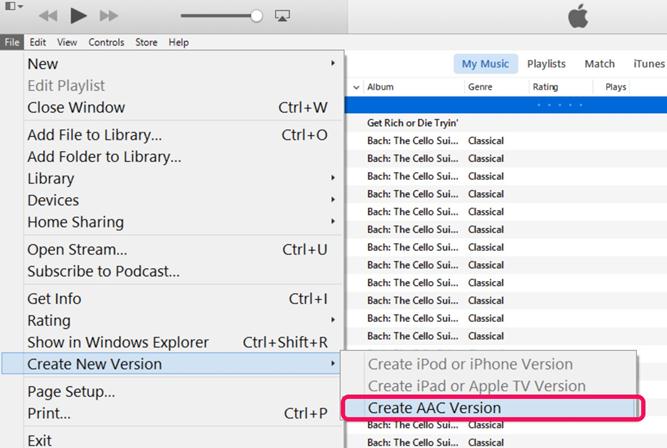
Step 4: Save the new version
In order to save your edited version to your iTunes library, ‘Right click’ on this edited version. From the options available, move down to select ‘Create New Version Create AAC Version.’ The edited version of the song will be added to your iTunes library next to the original song. While the titles of these songs may be same, the duration will continue to vary.
By selecting the AAC version, your edited song will be saved in M4A format, which goes along well with the music app of your choice.
Step 5: Verify the duration
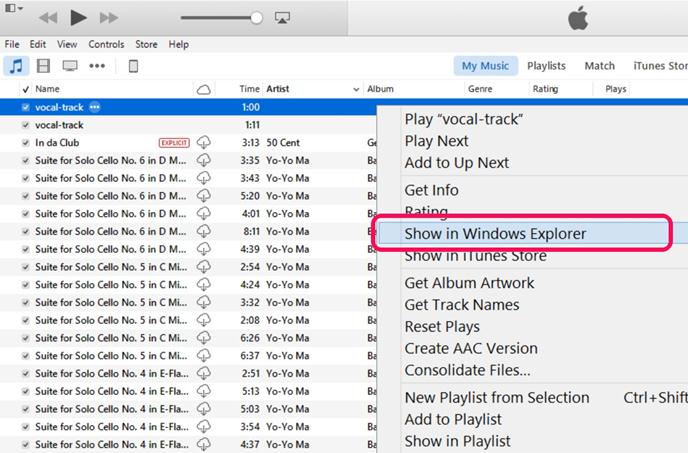
If you wish to verify whether the edited version has been trimmed to the duration of your choice, ‘Right click’ on the new version of the song and from the options available select ‘Show in Windows Explorer’.
An iTunes folder containing the new song will appear on your screen. Now, simply ‘Right Click’ on the song and select ‘Properties Details’. Here you can verify the length of your edited song.
There you go! You now have both, the original as well as the edited version in your iTunes library. Share the procedure, share the experience, and share the songs!
Part 2: The Best Way to Record Music for iTunes without Cutting
If go with an audio recorder, you can get the music for iTunes in the length you want or in any of your desired portion. Here iMusic is the best recorder for you. You can use it to record unlimited free music in any length you want. And the recorded music can be saved in MP3 or M4A to fit most of the devices. What's more, you can directly transfer the recorded music to your iTunes library. Below are more feature for the music recorder:
- Record music from online video sites and music sites.
- Download the music in 100% original quality.
- Identify and get music information.
- Transfer music to iTunes library or playlists.

Simple steps to record music for iTunes
- Step 1: Find the music and play it.
- Step 2: Launch the recorder and hit the "Record" button at the portion you want to start recording the music.
- Step 3: Click "Record" again to stop recording. Then you can go to the "Library" tab to find your music.


Any Product-related questions? Tweet us @iMusic_Studio to Get Support Directly