It really takes time to create a killer playlist especially when it contains hundreds of songs. If it's on your iPhone, then you must want to transfer the playlists from iPhone to itunes for listening on your computer. However, it's not so easy to copy playlist from iPhone to iTunes unless you know the right tool or the trick. Below 2 ways are introduced for you to do the job hassle freely.
Solution 1: Transfer playlist from iPhone to iTunes with iTransfer
Before considering to copy your iPhone playlists over to iTunes, you’ll have to keep in mind that in order for your playlists to play smoothly, you have to have the music that your playlists contain. If you're not sure about it, don't worry, try iMusic. It will help you copy playlists from your iPhone to iTunes with tunes. And you'll find no problem of playing the playlists on your computer. Below are the simple steps.

Streamline your music life by enabling you to share music anywhere at any time!
- Download music from more than 300 music sites, including YouTube, by copying and pasting the URL.
- Record unlimited music from any website or any audio or video playing in your computer with just one click.
- Built-in music library let you browse and preview the lattest and hottest music from popular music sites.
- Automatically save downloaded/recorded music to library for management and easy transfer.
- Identify and tag music with artist, title, album, genre, and more with the latest ID3 tag technology.
Step 1. Connect iPhone with Your Computer
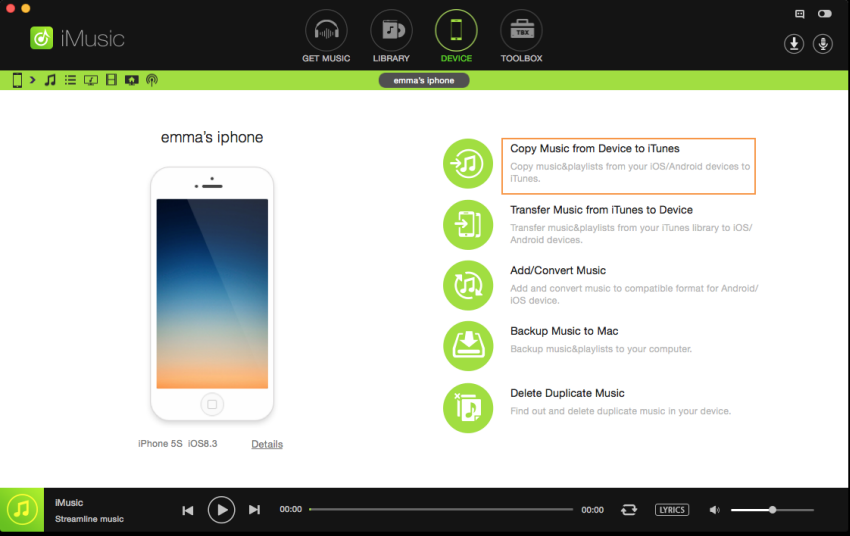
Download iMusic and install it on your computer. It has separated version for Windows PC and Mac. You're supposed to download the right version according to the operating system of your computer. After then, use your iPhone digital cable to connect your iPhone with your computer and click the "Trust" button your iPhone. Then, you can see iMusic detects your iPhone automatically. There is an option, called as "Copy Music from Device to iTunes".
Step 2. Transfer playlists from iPhone to iTunes
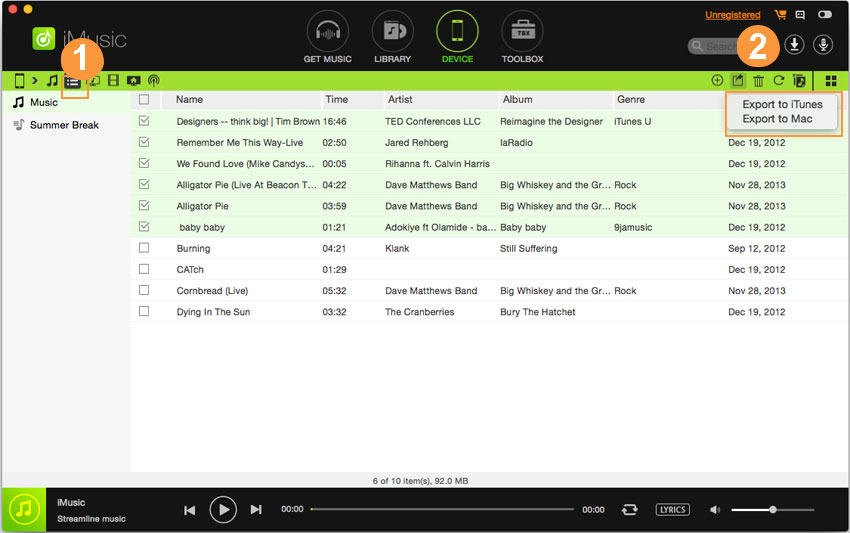
In the next window, click the third icon "playlist" to show all your playlist on your device. Check the playlist you want to transfer and right click on them. Choose export to iTunes Library. That's it!
Solution 2: Copy playlists from iPhone to iTunes
If you don't feel like to use a third-party tool to tranfer playlists from iPhone to iTunes, then you can try iTunes to do the job. However, you must ensure that all the songs in the playlists you're going to tranfer must be in iTunes library as well. Otherwise, the playlists will not play well in your iTunes.
Step 1. Enable iTunes Classic Menu
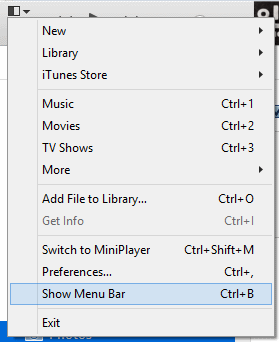
Launch iTunes first and you can see there is an icon on the very top left. From there, click the icon and select "Show Menu Bar".
Step 2. Export iPhone Playlists
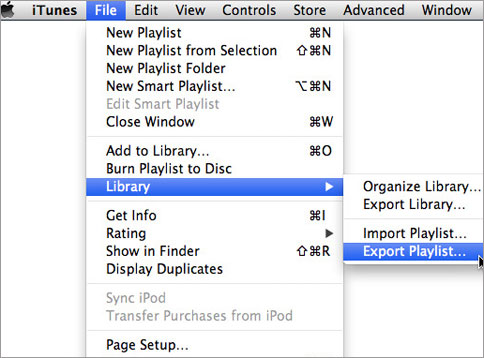
Connect your iPhone with your computer. On the top of iTunes, click your iPhone icon. After then, you can see all playlists on your iPhone displayed in the left side of the window. Click to select a playlist > click "File" > "Library" > "Export" in the iTunes menu to save the playlist as a text file on your computer
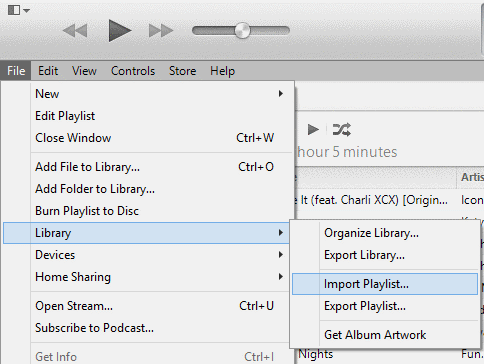
Step 3. Import iPhone Playlists to iTunes
Click "File" > "Library" > "Import Playlists" in the iTunes menu bar. The next, choose the file you've saved in step 2 to import the iPhone playlist to your iTunes. That's it!
Tips: Matters needing attention when transferring playlists
When transferring playlists from your iPhone to your iTunes library, there are several things you’ll have to consider to ensure that you are copying them properly and you’ll have them working perfectly once you save them to your iTunes library. These are things any user might overlook and you might want to consider checking that you have these things satisfied to save time and effort when copying and using the playlists from your iPhone:
* Playlist working properly on your iPhone: before copying the playlist of your choice to your iTunes library, it’ll have to work properly on your iPhone first before expecting it to run perfectly fine in the iTunes application on your Mac.
* Stable iPhone connection: make sure that your iPhone is connected stably during the whole transferring process. Once the connection is lost, the transfer will stop and you can’t make it successful.
* The latest iTransfer version: you also have to ensure that you’re using the latest version of iSkysoft’s iTransfer to maximize the features that each update brings to the software. Having the newest version of iTransfer lessens the possibility of encountering problems during the transferring process.
* The latest iTunes version: again, this is a small thing to be taken note of, but quite important, too. Like with iTransfer, having the latest iTunes version lessens the possibility of encountering errors when playing and modifying the playlists you transferred as each newer iTunes version means more errors fixed.
* Playlist music: you’ll have to make sure that if you plan on using your iPhone playlist on iTunes, you must copy the music listed in that playlist you’re going to transfer. This is to ensure that when you play your playlist on iTunes, all of the music listed in your playlist will play properly.


Any Product-related questions? Tweet us @iMusic_Studio to Get Support Directly