The smartphone evolution has given the opportunity for people to carry their favorite music in their hands. The new iPhone 7 from Apple is sure to enhance the music-listening experience. Although the Apple store provides the chance to download tracks, users also have the opportunity to transfer music to their iPhone 7 from your computer. In this article, we will be discussing in detail about the two basic procedures to transfer music to iPhone 7.

Step 1: Launch iTunes on your computer. Click "File" tab and choose "Add Folder to Library" or “Add Files to Library”option. Browse to the music files that you wish to import into iTunes library. You can search the local music directory provided by the Windows or head to the location where you typically store all your music files. After selecting the files and finishing with the process, you will notice the addition of the freshly imported files in the iTunes library.

Step 2: If you already have music files in your iTunes library, then it will not be difficult for you to locate the newly added songs. To check the newly added songs, you can click the "Recently Added" feature from the left pane of the iTunes window.

Step 3: Connect the new iPhone 7 to the computer using the provided USB cable. The devices will appear automatically as an icon at the upper left corner of the iTunes screen. Click the device icon. Under the Settings feature, you will notice the list of the categories that you can sync from your iTunes library to the connected device. Please note that iTunes will not display certain tabs if there is an absence of content in specific categories of iTunes library. For instance, you will not see the podcast tab if there is no podcast present in the iTunes library.

Step 4: Click Music from the left pane of the iTunes window to begin synchronizing the music files. the iTunes will display a message if you have used another iTunes library to sing the music to the device. If you choose “Erase and Sync” in the displayed message, iTunes will replace all the content on the device with the selected music files. Click the Apply button at the bottom of the screen to save the sync settings.
Using iTunes to transfer music files to iPhone 7 will be a tedious process, and there is the danger of deleting the already existing files. The recommended procedure to transfer music to iPhone 7 in the easiest procedure is by using iMusic. The application is all-in-one music management software, with added features that add excitement to music lovers. The following are the principal specialties of the program:

- Discover new music and download them freely. Users can use the search box for artists, songs, and playlists.
- Download music from over 300 websites. The list includes YouTube, Spotify, last.fm, Pandora, Vimeo, Dialymotion, VEVO, Facebook, and more.
- Record songs and playlists from multiple music sharing sites and radio stations.
- Move music files from computer to iPhone 7 in a few simple steps. Additionally, it is able to transfer music files from an Android device directly to the new iPhone 7.
Part 3. How to transfer music from iTunes Library to iPhone with iMusic
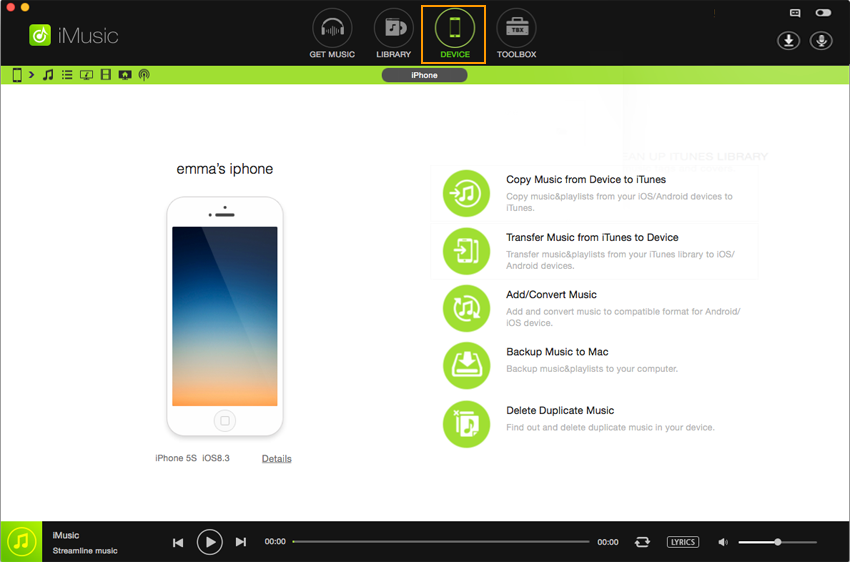
Step 1: Download the trial version of iMusic. Launch the program, and connect the iPhone 7 using the provided USB cable. The software will display the connected device as shown in the figure below. If you do not see the device, press "Trust" on the iPhone 7.
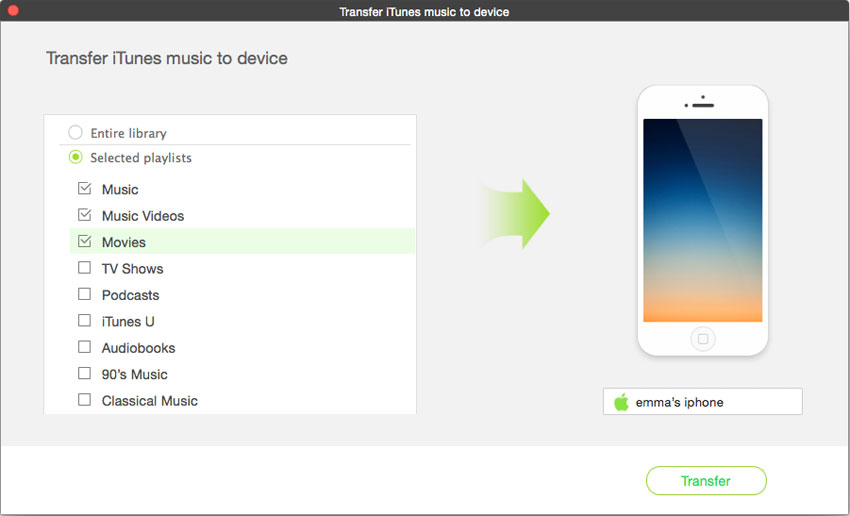
Step 2:(transfer all music from iTunes Library to iPhone 7): Press "Transfer Music from iTunes to Device" option from the main interface. In the following screen, you can select music as the category to transfer and press the transfer button.
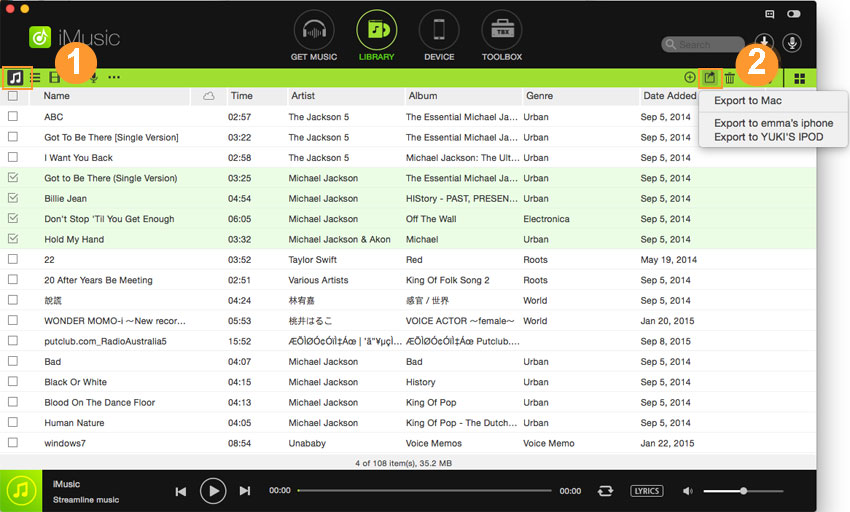
Step 3:(transfer selected songs from iTunes Library to iPhone 7): From the main interface, click the library icon to see the songs present in the iTunes library. You can then start selecting the songs that you wish to transfer by marking them against the check box. After finishing the selection, click the export icon, and select the connected iPhone 7 device. Alternatively, you can also click the right click of the mouse and choose “Add to” option and the connected iPhone 7.
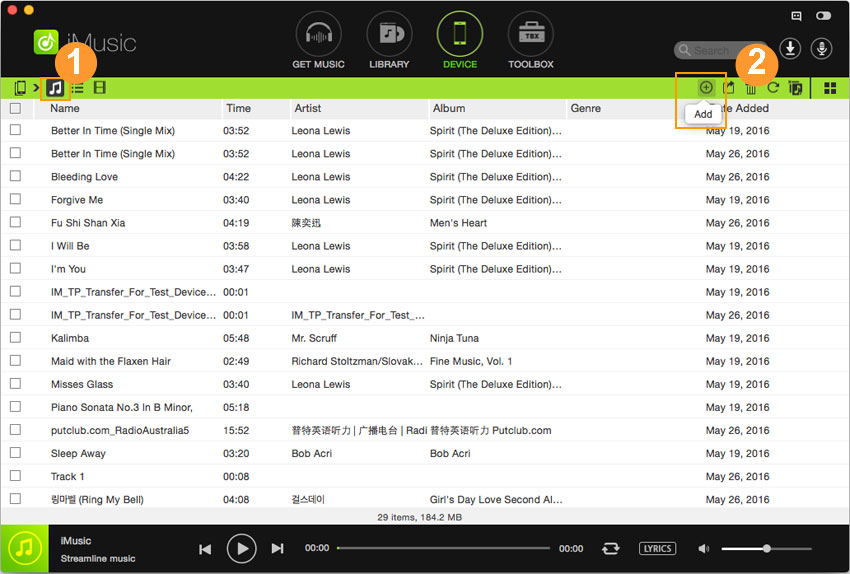
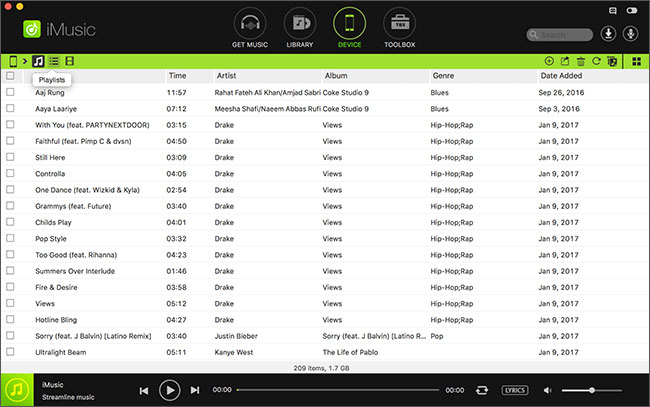
Step 1: From the main interface of the program, click the device icon as shown in the figure below. Press the device icon from the management window, and click the music icon on the left side to display the present songs on the device. You then have to press the “Plus” symbol to add file or folder to the connected iPhone.
Step 2: Browse to the section where you have the music files stored on your hard disk. You can elect multiple files or a single folder and click “Open” to add them to the device directly. The time taken to complete the transferring process depends on the total songs selected and their size. Wait until iMusic completes the transferring process before you can browse the connected iPhone 7 to check for the songs. Make sure that you unplug the device from the computer before you begin to check for the songs transferred using iMusic. Alternatively, you can also click the "Add/Convert Music” feature if you are using the Mac version to add songs directly to iPhone 7.


Any Product-related questions? Tweet us @iMusic_Studio to Get Support Directly