Did you know that you can manage more than one iTunes Library on your Mac at the same time? Most Apple users are often pleasantly surprised by this revelation. You never know when you might need multiple iTunes Libraries on your Mac. So why exactly should you have more than one iTunes Library on your Mac?
Part 1: Open a different iTunes Library File or Create a New iTunes Library
If you have multiple iTunes libraries, it feels like as if there are two different computers with different iTunes accounts on them. Having different iTunes Libraries allows to separate each person’s movies, music and applications, and they won’t be added to each other unless you intentionally copy files to that library. This is extremely helpful, especially if the Mac you’re using is a family computer and more than one family member uses it.
This way, you can sync multiple Apple devices (iPod/ iPhone/ iPad) so that you do not access other people’s music accidentally. Through this, iTunes would manage different types of music differently, from the same set of files. Since it is still using the same set of files, it is easier to back up all of them, so you don’t have to worry about doing any tiresome task when backing up your music.
How to create a new iTunes library on Mac besides the original one?
So how exactly do you create a separate iTunes Library for your Mac? It’s easy, just follow the steps outlined below and you will have two iTunes library on your Mac at the same time!
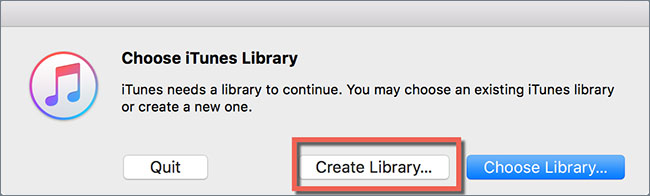
Step 1: Before you start anything, quit iTunes if it’s open right now. Keep pressing the Option Key for Mac Users, and also tap the iTunes icon to launch iTunes Library again. Hold the key till the pop-up is visible. Since we need to create a new library, click on the “Create Library” button.
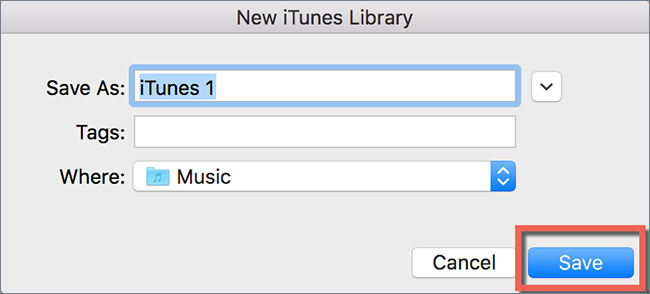
Step 2: Fill out the details when it asks you to tell your name and location for the new iTunes library that is going to be created. Tip: It will help you if you name your new iTunes Library something distinct and not similar to your old library in order to keep them separated from each other. Now, you’ll have to choose where you want to put your new iTunes library in your computer. Also, there is also the possibility that you can just create the new library in the same Music/ My music folder that you already have, which is also the easiest and the best option, since all the library’ content will be stored in the same place.
Step 3: Now that you’re done with that, Tap the “Save” button and behold, your new iTunes Library has been created! Now, iTunes will launch through the newly created library.
How to Open a Different iTunes Library on Mac?
Now that you’ve created a different iTunes library, how do you manage to select between them and open different iTunes libraries?
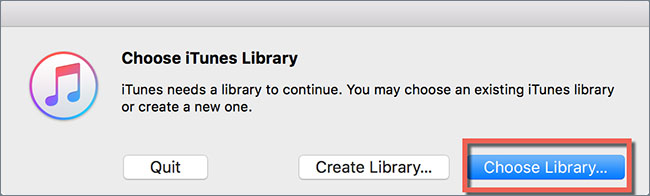
- When you open iTunes, click on the “Choose Library” button.
- A pop up window will appear, which will show you your Music/My music folder. However, if you had decided to store your iTunes Library in someplace other than these folders, just navigate to that location, and click on the folder to select that new folder.
- Now, just select the “Choose” option, and iTunes will launch the library that has just recently been chosen!
Disadvantages of having multiple iTunes library on Mac
So, having different iTunes Libraries seems like such an attractive option, one might be wondering. So why do more people not know of this option? Well, having different iTunes Libraries can also cause you a lot of headaches. Let’s take a look at some of those.
- If you’re using iTunes on your Mac, and have more than one iTunes library, you will just be directed to the last used library if you do not keep pressing the Option button on your computer.
- All your iTunes libraries are by default signed into the iTunes account that was last used. So, in order to be sure that every person is using his/her own iTunes account when using their library, you should always remember that you have to sign out after using iTunes.
- Even though you will have multiple iTunes libraries by following these steps, the parental control settings are the same for all your libraries on your computer, and you’re not allowed to have different settings for different libraries.
Part 2: Best iTunes Library Cleanup Tool - iMusic:
If you have multiple libraries, or even a single library, you will most likely face the problem of having a cluttered library, which might contain duplicate songs, absence of covers, and wrong and missing tags. Now, you can clean up your library trough the revolutionary tool, iMusic.

You might be thinking, what is iMusic? With this software, you can discover new music, download this music, record songs that you’ve never heard, and transfer your favorite songs from any platform to you iTunes library. The best advantage of this software is that it is compatible with both Android and iOS, which is just one of its distinct features. If you’re an audiophile who loves to tinker with his music professionally, there is no better software for you than this. Many people have a huge amount of songs in their iTunes library, and it would take so much time to clean it up. However, iSkysoft does it all by itself, which will save you a lot of time so you don’t have to go through the tiresome task yourself.
Step by Step guide to use iMusic to clean up iTunes Library
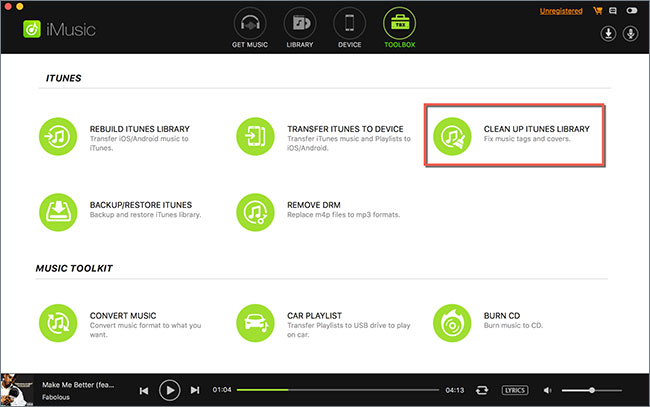
Step 1: First of all, launch the iMusic software. Now, at the top of the software, you will see “Toolbox” written. Click on that to enter the management option for the iTunes Music Library. Now that you’re done with this, click the music button present on the left side of the window. After this, the fourth button on the right side of the window is the Cleanup button. Just click that.
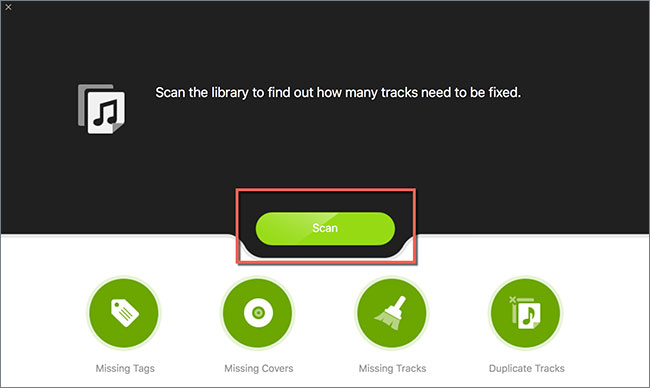
Step 2: A pop up window will now appear. If you just choose the “Scan” option, it will allow iMusic the freedom to scan for any songs that are duplicates or have broken and mislabeled tags. The time that it takes for this process to occur depends on how many songs are present in your library. If your collection is huge, it will still only take a mere few minutes.
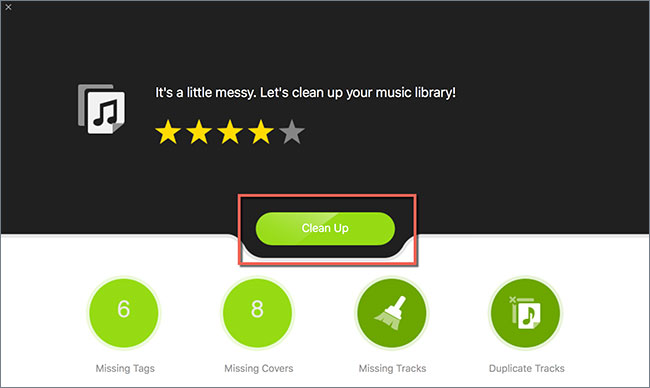
Step 3: When the screening process is done, all the missing tags. Covers and the duplicate tracks will now be seen in the result window. If you just click on the “Clean up” option, iMusic will repair all the problems for you!
Step 4: Skip this step if you proceeded with Step 3. If however, you want to fix everything yourself one by one, that is also possible. For all the options (Missing tags, duplicate tracks, missing tracks), click on the option that you want to clean up and it will happen. Choose “Fix” to repair music tags, click on “Get Covers” to have access to all the missing covers, and choose “Clean” to get all your missing tracks, and click “Delete duplicates” to get rid of any duplicates that your library might contain.


Any Product-related questions? Tweet us @iMusic_Studio to Get Support Directly