When I mention the File Sharing application, some people might be thinking, what exactly is File sharing. Well, it allows you to copy any files or applications from your computer to your Apple device. Suppose you wrote in a document on your iPad, but now you would like to access it in your Mac. Well, all you have to do is use File Sharing and it will open in the Mac!
Finding iTunes File Sharing on your laptop
Some people might have a problem locating the file sharing folder. To access that, follow the steps below:
- Firstly on your Mac/PC, open iTunes.
- Now, connect using a USB data cable to make a connection between your device and your computer.
- Now, find your device in iTunes.
- In the left sidebar is the Applications option, find the file sharing section which is located at the bottom of the page.
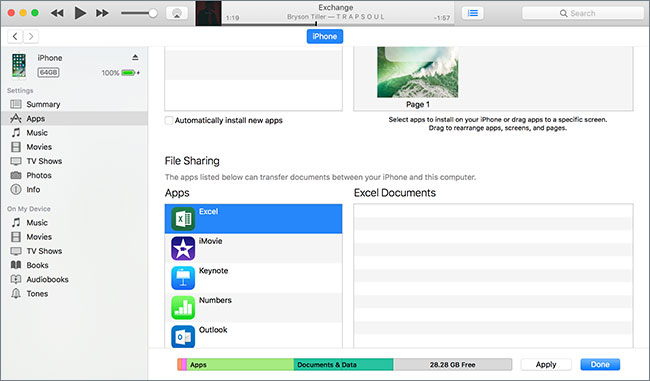
However, not all iOS apps can share files through File Sharing to your computer. So, you’ll have to see which applications are eligible for this option. If you access the file sharing option in iTunes, you’ll be able to see the list of applications that are able to use File Sharing.
How to use File Sharing in iTunes
There are two ways to use file sharing, you can either copy files from your computer straight to the App, or vice versa. Let’s look at how to copy files to your Application from your Computer. The steps to complete this process are:
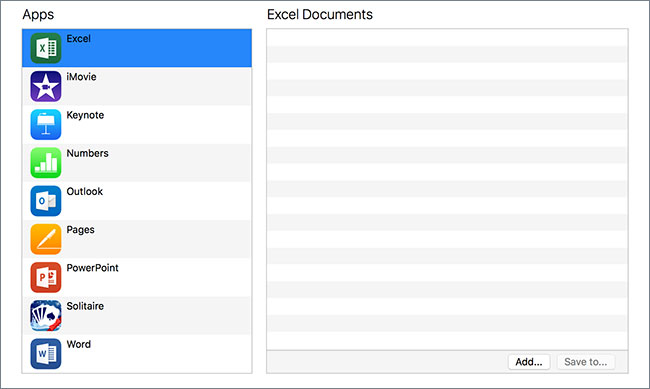
- Open iTunes, and select the app you wish to copy files to in the File Sharing section.
- Now, you can select the files that you want to copy by dragging them into the document list in the file sharing window in iTunes. Moreover, if you want to add some documents in iTunes, all you have to do is find the files that you want to share, and click Add. Remember, not all file types can be shared, so be careful.
You can also copy files to your computer from an iOS application. To do this, follow the mentioned steps:
- Firstly, select the application you wish to copy files from, these apps can be accessed from the file sharing section in your iTunes.
- Now, from the document list for this app, copy all the files that you need to any folder or window that you wish to use as the storage place for these files.
As is evident, it is really easy to use this feature, and all it takes is mere seconds to copy files to and from your computer.
Advantages and Disadvantages of using iTunes File Sharing
Like every other feature that exists, iTunes File sharing is accompanied by its plus points, as well as its drawbacks. Let’s take a look at its advantages and disadvantages.
The File Sharing feature is really easy to use and is not complicated at all. Through a USB data cable, you can sharing files in iTunes. Also, there is no loss in the quality of file sharing as might be the case with some other applications. With ease, you can share files from your PC to your Apple device, and file sharing can be done with all Apple devices, iPhone, iPad and iPod touch. Since you’re using a USB to share files, you do not have to sync any data, which might take a longer time than this process itself. Plus, there is no limit on the amount or the size of files that you can transfer from one device or another, and all your metadata will be intact when you’re done with file sharing!
However, some drawbacks do exist. As mentioned previously, not all applications are able to use iTunes File Sharing, and some apps do not support this feature. Even more so, not all iOS software supports File sharing, and any version that was released iOS 4 does not allow for file sharing to occur through this feature.
iMusic is a great tool that integrates all the features you need for getting and managing music. It is able to download and record music from music sharing sites, transfer music between computer and iTunes Library, iPhone, iPad, iPod, and Android devices. Here are its main features.
- Download music from more than 300 music sites to totally free.
- Download YouTube music to MP3 and save to iTunes Library directly.
- Record music from music sites, software that can play music on computer.
- Transfer music between Mac, Windows, iTunes Library and iPhone/iPad/iPod and Android devices
- Built-in "LIBRARY" gathers all the songs on your computer for further music fix and management.

So how exactly can you use iMusic to share music from iTunes to iPhone? Well, it’s really simple. This feature allows you to share Purchased and free music.
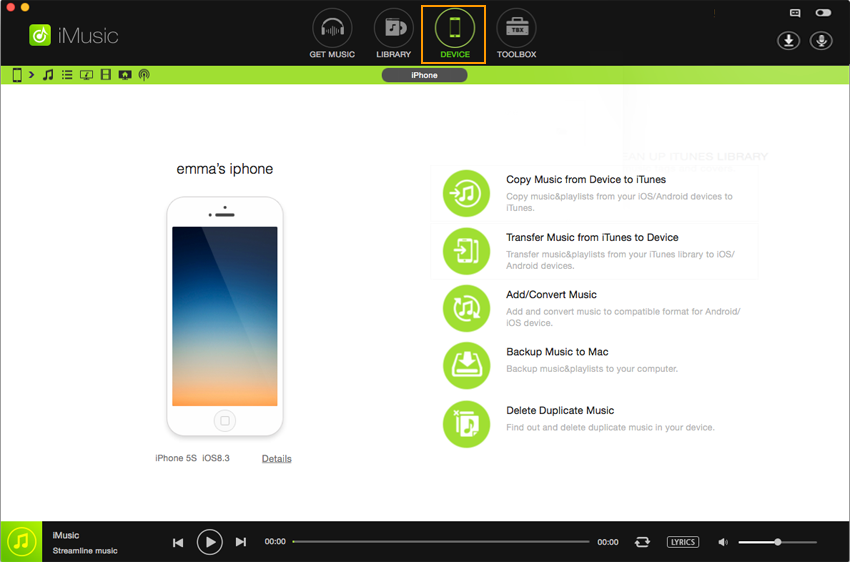
Step 1: Download from the links below and install iMusic. Then launch it. Connect your iPhone with your PC/Mac with an USB cable. When successfully connected, you iPhone will be shown in the main window of iMusic. Click DEVICE tab in the top menus.
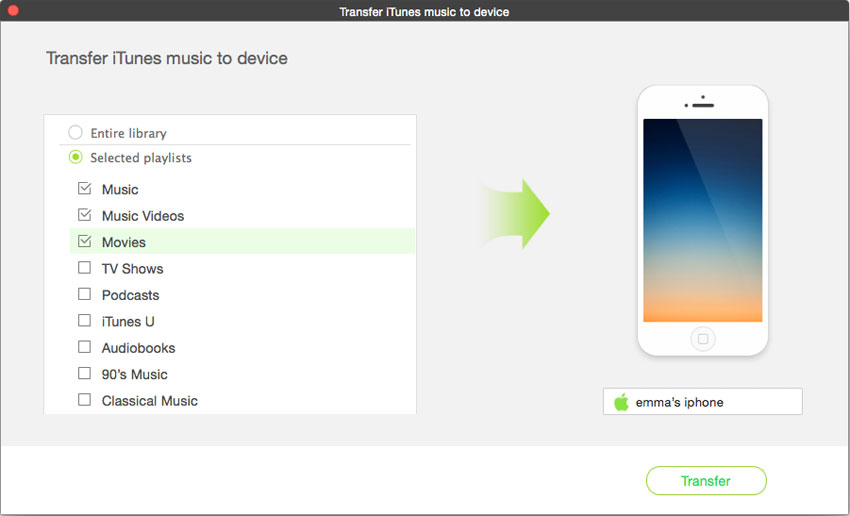
Step 2: In the DEVICE window, click on the Transfer Music from iTunes to Device option. Choose the file types that you want to transfer. And click Transfer button to start the process. Please note that this process will transfer the whole items in the chosen files. If you want to transfer only some selected songs, please read Step 3.
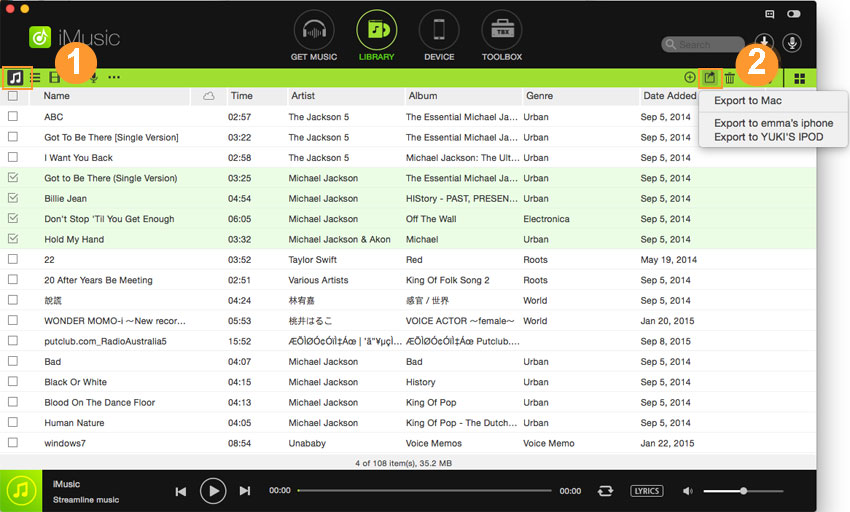
Step 3: Click the LIBRARY tab in the top menus. Select the songs that you want to sync and then click the Export icon at the top right corner. Click Export to (name of your iPhone). That’s it!


Any Product-related questions? Tweet us @iMusic_Studio to Get Support Directly