Modern devices have innumerable features and interesting functions. They are meant for communication, businesses as well as for entertainment. There are also a number of software that are loaded to these to make them even more useful and interesting. Audacity is free software meant for recording and editing audio files. The web defines it as ‘Open-source, cross-platform software’. It provides the user with such features by which the user can experiment with all types of audio recordings, whether recording live speeches with the help of microphones or recording lyrics and music files that are streaming on the internet sites. It has become one of the most popular software and has received much appreciation for its features. In this article, we shall cover some important tips regarding Audacity Effects.
Part1. What is Audacity Effects?
Audacity is popularly in demand due to its effects. Many effects are parts of this software. They are built in effects and the software comes loaded with these. Besides, Audacity allows the user to utilize various plug-in effects too. These effects are used to edit and modify the recorded soundtracks and music files. The users can create sound files of their choice. Some common effects include: Amplify, Fade in, Fadeout, Bass, Compressor, Change pitch, Change tempo, Classic filters and Noise remover.
Part2. How to Download Audacity Effects
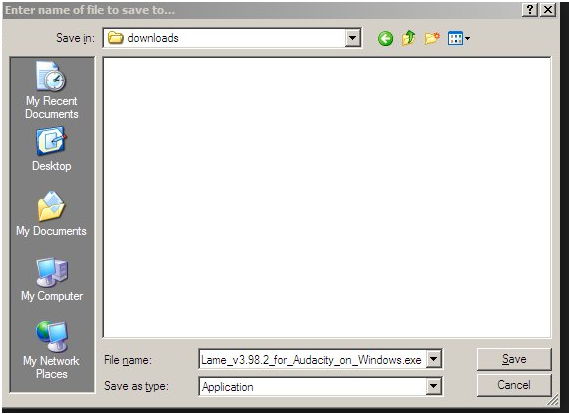
Although the Audacity Software comes equipped with built-in effects, many more functions can be added by downloading the plug-ins and libraries from the Audacity window. These plug-ins and libraries are helpful in many ways. They enhance your command over audio generation and sound analysis. By downloading libraries, many more audio formats can be imported and exported.
Audacity comes loaded with built-in support for many plug-ins. These plug-ins include the LADSPA Plug-Ins, VST Plug-Ins, Nyquist Plug-Ins, LV2 Plug-Ins, Audio-Unit Plug-Ins and Module Plug-Ins. All these plug-Ins can be installed and used successfully for sound effects.
These plug-Ins can be installed with great convenience following these steps:
- Step 1. Open the Plug-Ins folder that is present inside the Audacity installation folder.
- Step 2. This can be found under 'Programmes Files' on Windows and under 'Applications' in MacOSX.
- Step 3. The Plug-Ins to be installed has to be placed in this folder.
- Step 4. Restart Audacity.
- Step 5. You will find the plug-ins you have just added in the 'Effects', 'Generate' and 'Analyse' menu.
Part3. How to Make Audacity Sound Effects
The sound effects of Audacity are perhaps the most important effects. This software basically deals with sound and people love it because it enables them to do what they please with their tracks with the help of various sound effects. Anyone can make excellent effects with the help of Audacity. Finishing touches and polishing of sound tracks can be done very easily with this sound editing software. Nothing extra is required. Only Audacity software with its inbuilt effects will do the magic. However, the plug-ins can always be an enhancing support. The following effects can add magic to your creation.
- Step 1. Make every day ordinary sound special.
- Step 2. Start with a laugh and change the speed affecting the tempo as well as the pitch.
- Step 3. You can create a storm or a thunder by recording a noise and changing the speed.
- Step 4. You can fade in tacks by going to Effect> Fade in> Select a New Track. After this, edit the track by Edit> Select> Select All. Then, insert the track with offset and amplify. Next, add Tremolo.
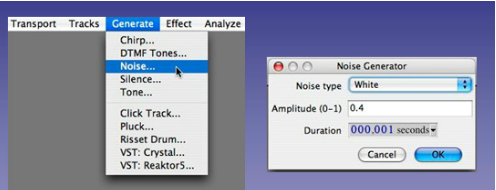
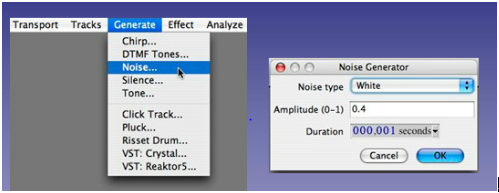
- Step 5. You can create sounds similar to oceans by selecting pink noise on the noise generator and add slow Tremolo.
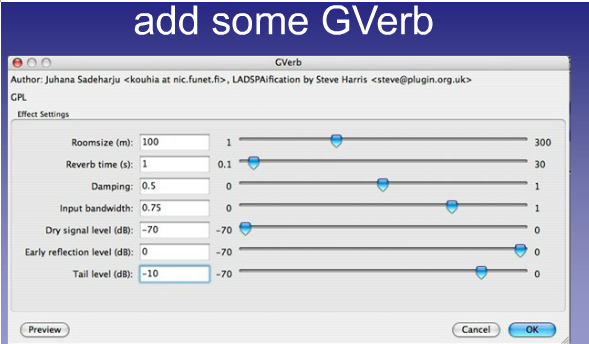
- Step 6. Similarly, rain effect can be created by selecting white noise from the noise generator. Then, open Equalizer and decrease the frequency by about 1000 Hz; change pitch without changing tempo and adjust features in Gverb.
- Step 7. Some sounds like the sound of Alien Alarm Drum, Phone Dialing sound and the sound of punches have been tagged with Audacity. These sounds are free and can be used by all at any time.
- Step 8. You can always make sounds louder or softer with the effects of amplifier, compressor, leveller, limiter and the normalizer effects.
- Step 9. You can fade in or fade out a section of any sound track.
- Step 10. You can alter the quality of sounds by the Bass and Treble, Classic Filters, Equalizer, High Pass Filter, Low Pass Filter and Phaser.
- Step 11. Unwanted sound and noise can be removed and reduced by Click Removal, Clip Fix, Noise Reduction, Notch Filter and Repair effects.
- Step 12. You can make sound tracks fast or slow, high-pitched or low-pitched by amazing effects of Audacity. These amazing effects are: Change Pitch, Change Speed, Change Tempo, Pitch Shift and Truncate Silence.
In this way, we observe that Audacity Effects provide pleasing and satisfying results to our creations and compositions.
Part4. How to make Audacity Radio Effects
Audacity is used for mixing multiple audio tracks into one and for removing the unwanted part from it. At times, you can fade-in or fade-out tracks and replace it with the sound of your choice. With this feature, you can fade in a sound track around some spoken audio and then, add a catchy tune over there. Due to these interesting features, Audacity is considered a perfect software for Radio creations.
If you want to create Radio-like effect for your soundtracks and voice files, you can get it easily with Audacity. The requirements are minimum. The Audacity software with the built-in effects and the installed plug-ins will give you the desired radio like sound. The text-to-speech synthesiser of eSpeak can be used to replace microphones in case the microphone is unavailable. However, it is not mandatory.
A combination of two effects of Audacity, Equalisation and High Pass Filter, gives radio like sound. In order to get this radio like sound for your track follow the steps given below.
- Get the recording of the sound that you want to enhance by effects.
- Let the entire recorded soundtrack be selected through the selection tool.
- You may press Ctrl-A to select the entire track.
- Go to Effects and High Pass Filter from the menu.
- Use the cut off frequency that will be appearing as prompt.
- Turn on the 'Allow Clipping'.
- Select Effect and go to Amplify from the menu.
- Again, select Effect and High Pass Filters from the menu.
- Again, select Effect and go to Amplify, but set the amplification frequency to half the value from that of the first time.
The soundtracks can be made even more exciting by including some more statics.
- For this you will require one more blank track. You can get this by accessing Project> New Stereo Track.
- With this track selected, press Generate> White Noise.
- Put the white noise in the background, as it is bound to be too loud, and allow the original track to dominate.
- Press Effect> High Pass Filter.
- Repeat it for few more times so that both sounds will seem to be coming from a single source.
- A small part of static track can be introduced in the beginning and at the end of the track for more effective results.
- Adding phaser effect to both the tracks also gives more radio like spacey effect to the tracks.
Part5. Audacity Effects Not Working
There is no doubt that Audacity is useful editing software. However, there have been ample cases of people facing problems with this. Here are a few such cases and their solutions in brief.
1. Some sections of the program do not open.
Some of the Audacity users have reported that they are unable to open certain programs on the Effects menu. When they attempt to access the drop down effects and open noise reduction option, they fail to do so.
The suggested solution to it is that the track to be edited should be selected before going to the Effects menu. If the track is selected and then the effect menu is dropped down, all options appear and can be accessed. Also, ensure that the pause button is not pressed and your selected track is not paused at the time of editing.
2. The effects get grayed out.
Some users get grayed out effects and they cannot use Audacity properly. This adds to their frustration and irritation.
The suggested solution explains that Audacity is an open source and its sources can be used for more development. So, it is quite possible that some running program can be conflicting with the source program and causing the problem. It can also be a bug. However, shutting off unnecessary running programs, deleting and reinstalling the program can be a good solution.
3. Effects not available to be clicked.
It is not surprising that you lose your patience when you are attempting to do some important editing and the Audacity effect options do not show. It is really frustrating that you do not know where to click because the effect options are unavailable.
The solution to this problem has been provided by a frequent user of Audacity sound editor. According to the editor, being in stop mode will solve the problem.


Any Product-related questions? Tweet us @iMusic_Studio to Get Support Directly