The brand new expensive computer will not provide you the level of joy that you are expecting from it without the lovely melodic tunes stored in your iTunes library. So you need a reliable and quick way to transfer all your favorite tunes to your new hard drive and start having all the fun. Therefore, the need for transferring iTunes library from your personal computer to Mac computer is inevitable. To transfer the entire iTunes Library from PC to Mac does not need you to be a system engineer. There are however multiple ways to accomplish this task and transfer your files easily from one computer to other. Let us explore some nice ways to use the iTunes backup and restore the wide variety of data to our local machines.
Method 1: Without External Hard Drive – Using iMusic (Highly Recommend)
Before you start your transfer process, reliable network connectivity between the two computers is needed i.e. between your PC and Mac. The iTunes software must be installed on both computers also. Your Apple id must also be linked to iTunes library in order to proceed successfully. In this first method of transferring iTunes library from PC to Mac machine, we will not make use of any external storage devices or hard drives. Instead, we will make use of the gadgets like iPod, iPad or iPhone. We need to choose a robust tool like iMusic to transfer the iTunes library from Personal computer to Mac.
iMusic is a powerful all-in-one multimedia management tool that has built-in features for transferring media files and fixing iTunes-related issues. One particular feature that stands out in this regard is the Rebuild iTunes Library feature that can be used to transfer the entire iTunes library from a Windows PC to a Mac in no time!

Main Features:
- Download music from more than 300 music sites, including YouTube, by copying and pasting the URL.
- Record unlimited music from any website or any audio or video playing in your computer with just one click.
- Built-in music library let you browse and preview the lattest and hottest music from popular music sites.
- Automatically save downloaded/recorded music to library for management and easy transfer.
- Identify and tag music with artist, title, album, genre, and more with the latest ID3 tag technology.
Due to the fact that iSkySoft iMusic is compatible with both Microsoft Windows technology as well as Mac operating system, you will find it enjoyable not to run into OS compatibility issues. Follow the steps below to enjoy a convenient experience of transferring your iTunes library from PC to Mac:
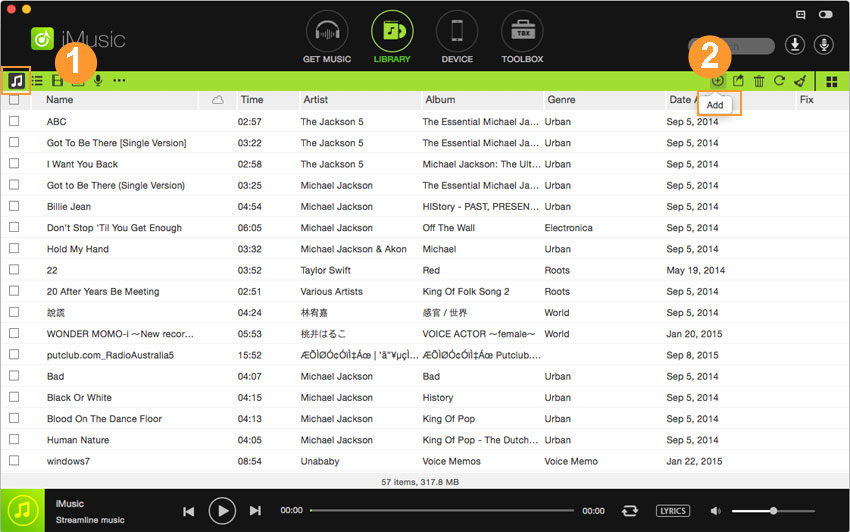
Step 1: Download and install iMusic. Connect your device with your computer and click on the “Library” >> “Add” button on the top bar. Select the files from PC to iTunes Library.

Step 2: Disconnect your device from one computer and connect it with the other computer. Once you have connected the device, click on the “Toolbox”. Hit the “Rebuilt iTunes Library” on this new computer and select your device from the screen. Click on the “Start” button.
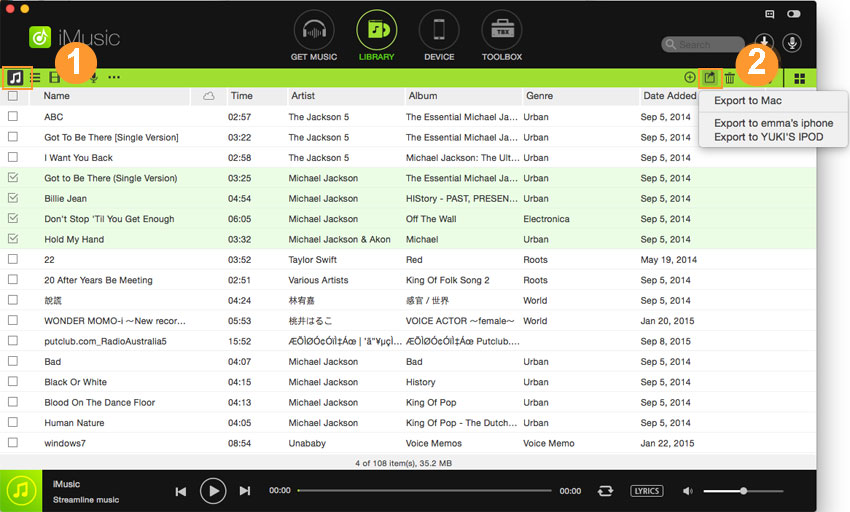
Step 3: Now, select the corresponding tab which is present at the top and click on the “Export to Mac”. This is the last step which may take some time depending upon the music present on your computer. Once the process is completed, you will see the pop-up on the screen showing the successful transfer.
Using the “Rebuild iTunes” feature is easy but you need to be cautious also locate folders yourself. This may take a lot of time to complete depending upon your computer speed and data files, but in the end, it leaves you happy and satisfied.
Method 2: Transfer With External Hard Drive
Keeping your iTunes files in one location makes your job easier for using this method. Then you can arrange a hard drive to copy all your files to it and enjoy transferring the data to a new location on the new machine. The best way is to you External Hard Drive or the USB depending upon the music library present on your computer. Before you continue, remember that this method will not work the Apple music and you can only transfer the tracks which are already present on your computer or you have purchased from the iTunes Library.
- On your Mac computer, click open preferences and click iTunes. Then select advance and keep track of your music folder on your local PC.
- Now select Organize Library and click on the Consolidate option. Now all your media and music files will be copied to your computer in the iTunes folder. The larger the size of your files, the longer it will take to complete. As soon as the process of Consolidation ends, you can quit iTunes.
- The next step is to plug in the hard drive externally which has large free space available to hold all your desired data. Check the folder size and find out how much the size of your data in the folder properties is.
- If your external hard drive is no formatted, format it before proceeding forward. The Apple iPod or iPhone can also be used as an external hard drive depending on how much space they have.
- Once the external drive is formatted and connected, you can drop and drag the iTunes folder and start the process of copying the media files to external drive. Click Eject Hard Drive once the copying process is over.
- Now move on to your Mac computer and locate your iTunes media folder on the new system. Connect the external drive to this machine and you are ready to transfer the iTunes library to your Mac now. If you do not want the existing music on your mew machine to be deleted, then copy those files and save them on the external disk.
- Now all you have to do is to replace the currently existing media folder with the new one. All the playlists, ratings and songs information will be reloaded by the iTunes automatically once it is done.
Method 3: Transfer With Home Sharing Method
The Home Sharing Method is relatively an easy method to transfer the iTunes library from PC to Mac. The necessary condition to complete this method is to install the iTunes on the both computers first. Moreover, you will also need to use the same iTunes account on the both computer. Let’s see the step by step procedure to use the Home Sharing Method.
- As soon as the Mac and old computer are connected to the same network using the Wi-Fi, open iTunes on them one by one.
- Then on the first computer (with Windows), select the Home Sharing icon which will be seen on the left menu. Sometimes this icon does not appear due to Home Sharing being turned off, in this case, turn on the home sharing first.
- After the Home sharing is enabled on both of your computers, you can see the Home sharing icon and click it. The Home Share Button can be created here by entering your known Apple password and id.
- Now you need to assign permissions to your computer on which you are copying your iTunes library to. Click Authorize Computer on the Store Menu and again enter your Apple id and password.
- In the left menu, click the Home Sharing icon now. Select all the files and music that you want to copy or select all if you need everything to the new machine.
- Now the final step is to hit the Import button. Once done, the files will start copying onto your new computer without a delay. If network speed is good with a Wi-Fi connection, then the process will take only a few minutes. The transfer speed also depends on the size of your iTunes library items. That completes our third method to transfer the iTunes library from PC to Mac successfully.
Conclusion:
All methods have their own pros and cons, if you don’t want to use the same iTunes account on both computers, the best way is to transfer the library using iMusic. Moreover, it will also save you a lot of time as you will not need to transfer the data from one computer to hard drive and then to the other computer. In this way, you can also preserve the library on your iPhone, iPod Touch or iPad. Which is your favorite method? Let us know in the comments section below.


Any Product-related questions? Tweet us @iMusic_Studio to Get Support Directly