Reverb adds echo, sound or noise to your recording with rapid, altered repetitions merged with the novel sound that offers an impression of ambience. The Audacity Reverb outcome bases on the novel "free verb" process. Additional reverberation is every now and then necessary for concert halls that are too trivial or enclose voluminous people that the hall's normal reverb diminishes.
Adding a small expanse of stereo reverb to a raw mono signal doubled into a two-channel stereo track will frequently make it sound more regular.
Note that this influence may upsurge the volume, so the "Dry Gain" should typically be set lower than 0 dB in order to avoid clipping. To permit the influence's reverb tail to be proficient of for hearing, the selection extend further than the end of the audio, which may possibly necessitate adding quietness to the end of the track.
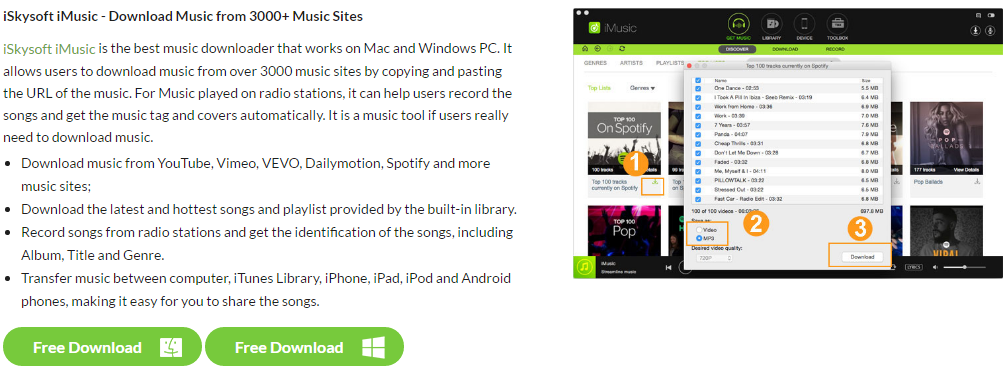
iMusic - Discover, Download, Record and Transfer Music
Part1. How to Set Audacity Reverb
Room Size (%): Sets the size of the computer-generated room. 0% is like a closet, 100% is like a huge church or large lecture hall. A high value will mimic the reverberation result of a large area and a low value will mimic the result of a small room.
Pre-delay (ms): Postpones the commencement of the reverberation for the fixed time subsequently to the start of the original input. It delays the commencement of the reverb tail as well. The maximum pre-delay is 200 milliseconds. Cautious regulation of this parameter can increase the clearness of the result.
Reverberance (%): Sets the interval of the reverberation tail. This regulates how long the reverberation endures for once the original sound being reverbed stop, and so mimics the energy of the room auditory range. For any particular reverberance value, the tail will be bigger for loftier room sizes.
Damping (%): Cumulating the damping creates an added hushed result. The reverberation does not shape up as considerable, and the high frequencies deteriorate quicker than the low frequencies. Mimics the captivation of high frequencies in the reverberation.
Tone Low (%): Adjusting this controller lower than 100% decreases the low frequency constituents of the reverberation, fashioning a lesser amount of roominess as a result.
Tone High (%): Adjusting this controller below 100% decreases the high frequency constituents of the reverberation, producing a lesser amount of perkiness as a result.
Wet Gain (dB): Relates to the volume fine-tuning to the reverberation ("wet") factor in the mix. Accumulating this value in relation to the "Dry Gain" intensifies the power of the reverb.
Dry Gain (dB): Relates to the volume fine-tuning to the novel ("dry") audio in the mix. Accumulating this value in relation to the "Wet Gain" decreases the power of the reverb. When the Wet Gain and Dry Gain values are similar, then the combination of wet effect and dry audio to be produced to the track will be made louder or softer by precisely this value (supposing "Wet Only" is not patterned).
Stereo Width (%): Sets the superficial width of the Reverb outcome for stereophonic tracks only. Growing this value contribute more deviation concerning left and right channels, generating a more roomy result. If set at nil, the result is applied autonomously to left and right channels.
Wet Only: Indicating this regulator, only the wet indicator (additional reverberation) will be in the subsequent output, and the novel audio will be impassive. This can be beneficial when reviewing the result, but in most circumstances, you should uncheck this when adjusting the effect.
Wet Only may be used on the other hand to produce a "reverb only" track allowing you to be able to then combine in larger or smaller amount with the novel track.
Presets
Click this button to load one of nine fixed presets:
- Vocal I
- Vocal II
- Bathroom
- Small Room Bright
- Small Room Dark
- Medium Room
- Large Room
- Church Hall
- Cathedral
After deciding on the preset that is best suited for what you require, click OK, the settings for the selected preset with be loaded into the effect you want.
User Settings
You are able to save your favorite settings in the Settings0 to Settings9, until you saved your settings in one of these slots, the default settings will load into you effect. Defaults settings are similar to the screenshot above.
Previews
Part2. How to Get Good Audacity Reverb
Apply a rich and bright reverb to a "dry" vocal recording.
This technique habits the built-in preset Vocal II. Otherwise, Vocal I creates a softer, less obvious reverb.
Ensure that there is a few seconds of silence at the end of the audio so that the final note can fade away naturally. If necessary, add a few seconds of silence to the end of the track (see steps 1.1 to 1.4 in the example below).
- Select the audio track that contains the vocal recording.
- Click Effect > Reverb to launch the Reverb effect.
- In the "Presets" panel, click the Load button, select Vocal II from the list then click OK. The controls will now have been adjusted according to the selected preset.
- Click on the OK button.
Keep the reverb effect on an unconnected track
With this technique, you make an identical the track to apply reverb to, and then apply the Reverb effect to the copied tract track, checking the "Wet Only" checkbox in the Reverb interchange. You can then regulate the quantity of reverb in the final mixture by fine-tuning the Track Gain Sliders on the reverbed and original track. This offers you the flexibility to twist the fraction of reverb at any time once applying the effect.
1. Add a few seconds of silence to the end of the track:
- Click the Skip to End button on Transport Toolbar or press the shortcut K.
- Click Generate > Silence.
- Choose how much silence to add (20 seconds is the most you will ever need, 5 second will often be adequate).
- Click OK to add the silence to the end of the track.
2. Select the entire track by clicking on the empty space in the Track Control Panel or use SHIFT + J.
3. Click Edit > Clip Boundaries > Join or use its shortcut CTRL + J.
4. Duplicate the track by selecting the track then clicking Edit > Duplicate.
5. Choose the replica track on its own.
6. Add the Reverb effect to the replica track, ensuring the Wet Only checkbox has the indicated.
7. Play both tracks using the Gain Slider on to blend in an attractive amount of reverb. Make sure the collective improvement is sufficient so that the red snipping indicators at the end of the Playback Meter's replay bars do not come on.
Adding stereo reverb to a mono track
If during the recording the red cursor is only drawing a flat line - an indication of no wavelength, this means that no sound is being recorded.
At times the need persist to enhance reverb to a monophonic track (such as a vocal) but add a stereo range to the reverb. This is commonly more attractive and sounds improved when the ultimate mix is in stereo.
1. Add a few seconds of silence to the end of the track:
- Add a small number of seconds of silence to the finish of the track (see above).
- Replicate the track by choosing the track then clicking Edit > Duplicate.
- From the Audio Track Dropdown Menu on the upper track, select Make Stereo Track.
- Select the novel stereo track.
- Add the Reverb effect to the track, selecting an attractive value for "Stereo Width" and ensuring to uncheck the Wet Only checkbox.
Audacity Gverb with Vocal to Reverb Effects
Instant GVerb settings
If you want to add GVerb straight to your track, here are more or less settings for instantaneous gratification that sound, a lot more improved than the GVerb defaults:
|
|
The Quick Fix |
Bright, small hall |
Nice hall effect |
Singing in the Sewer |
Last row of the church |
Electric guitar and electric bass |
|---|---|---|---|---|---|---|
|
Roomsize |
40 m² |
50 m² |
40 m² |
6 m² |
200 m² |
1 m² |
|
Reverb time |
4 s |
1.5 s |
20 s |
15 s |
9 s |
one beat |
|
Damping |
0.9 |
0.1 |
0.50 |
0.9 |
0.7 |
1 |
|
Input bandwidth |
0.75 |
0.75 |
0.75 |
0.1 |
0.8 |
0.7 |
|
Dry signal level |
0 dB |
-1.5 dB |
0 dB |
-10 dB |
-20 dB |
0 dB |
|
Early reflection level |
-22 dB |
-10 dB |
-10 dB |
-10 dB |
-15 dB |
-15 dB |
|
Tail level |
-28 dB |
-20 dB |
-30 dB |
-10 dB |
-8 dB |
0 dB |
The amount of time for one beat of the song. For example, a beat in a 151 beats-per-minute song is 0.397351 seconds.
Part3. How to Create Robot Voice in Audacity
Step 1: Start with a text to speech program
First, you need to adapt text to voice. Unquestionably, you could do your own soundtracks, but robots do not start with humanoid sounds. They commence with computer sounds. Change the opinion to "Mike, US English."
Now add the conversation you want your robot to say.
Step 2: Use Audacity to create your robot voice!
Open up Audacity, and use the File menu to select "Open." Navigate to the file you just saved and then open it.
During the following steps you will must ensure that, the complete audio file is carefully chosen by pressing CTRL+A.
- Select the complete audio file. Use CTRL+A .
- Click on "Effect" in the menu bar, and chose "Change Pitch...".
- Alter the pitch -14%, and click OK.
- In the Effect menu, select "Echo".
- Modify "Delay time" to .015 and "Decay Factor" to .65. Click OK.
- Once more in the Effect menu, select "Change Tempo...".
- Reduce the tempo by 10% (-10.000) and click OK.
- Recap steps 4 and 5.
Now play your robot voice with the green "Play" button toward the top.
Click on "File" and then "Export as WAV..." and save it.


Any Product-related questions? Tweet us @iMusic_Studio to Get Support Directly