Spotify is a well-known and established Swedish podcast and video streaming service that started in 2008. It offers digital rights management protected music and videos from several media companies and record labels in most of Europe, Australia, the Americas, limited Asian countries, and New Zealand. Apart from posting the content over the Internet, users can also access the content using an app, which is available for most modern devices such as Android, iOS, Microsoft Windows, Linux, and Mac OS smartphones and tablets.
Spotify is currently offering the content under free and premium versions. Let us look in detail at the differences between the two categories.
|
Type |
Free of ads | Listening time | Mobile use | HD audio | Listen offline | Cost in the UK | Cost in the US | Cost in the Cananda | Cost in Europe |
|---|---|---|---|---|---|---|---|---|---|
Spotify Free |
No | Unlimited | Shuffle only | No | No | Free | |||
Spotify Premium |
Yes | Unlimited | Yes | Yes | Yes | £9.99/month | $9.99/month | $9.99/month | €9.99/month |
Part 2: How to use Spotify Premium
The premium version of Spotify offers extensive flexibility and options in comparison to the free version as stated in the table above. An interesting part of the premium version is the ability to search and listen to a preferred song at any time and from anyway. The interesting option is the availability of the songs off-line. Let us look at how to search, listen to preferred track online and off-line.
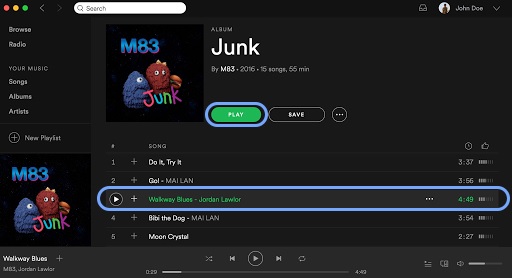
Step 1: Login to your Spotify account and open the player. In the search bar, type the song, playlist, album, artist, or mood, genre.
Step 2: Based on the entry, Spotify will retrieve a list containing the details. If you are unable to see for the information, press Enter. Spotify will present you with more results. You can scroll down the list and look for the preferred song, artist, playlist or genre. The songs already present in your music have a tick mark at the starting.
Step 3: You can now select a specific song from the list to add it to your existing music content or play it using the Spotify music player. All you need to do is press the play icon or the play button.
Part 3: How to listen offline
For premium members, Spotify provides the opportunity to hear 3,333 songs off-line on a maximum of three different devices. Furthermore, it is necessary that the user visits at least once every 30 days in order to maintain the off-line music settings.
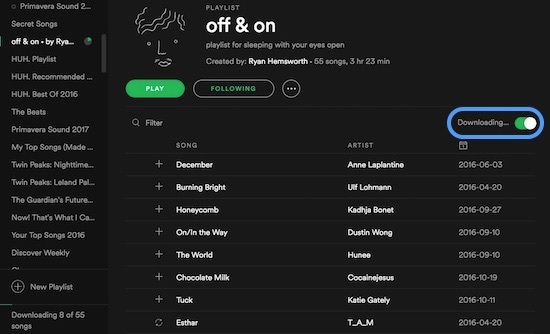
- First, click on the playlist that you wish to make it available offline.
- Secondly, switch on the Download at the right side of the playlist to download the songs available within the playlist. You will be able to see the progress in the left-hand column.
- After completion, you will notice a green download arrow button reflecting against the playlist.
- You can listen to the downloaded playlist offline by selecting the offline mode from the menu bar at the top.
Note: You will automatically enter the off-line mode once you lose your ongoing Internet connection if you are listening to the downloaded playlist.
An excellent method through which you can download music without opting for the premium version of Spotify is by using iMusic. The iMusic application, available for both Windows and Mac, is a simple solution and a single management for music lifestyle. It means it is capable of helping in searching for songs, download them, record streaming music or videos over the Internet, transfer content from one device to another, fix an existing library for missing information, and rebuild/backup a library that you can easily transfer when you are migrating to a new system.
An excellent feature about iMusic is the availability of built-in music library with hundreds of songs listed according to alphabetical order. The search criteria make it easy for the user to look for the song based on an artist’s name, playlist, genre, or mood. With the help of the record feature available within the software, it is possible to save the online streaming songs from Spotify website in MP3 format. Once done, users can easily transfer them to their existing playlist, local disk, or an external device such as smartphone or tablet.
Step-by-step Guide to Download Music Using iMusic
Method 1:
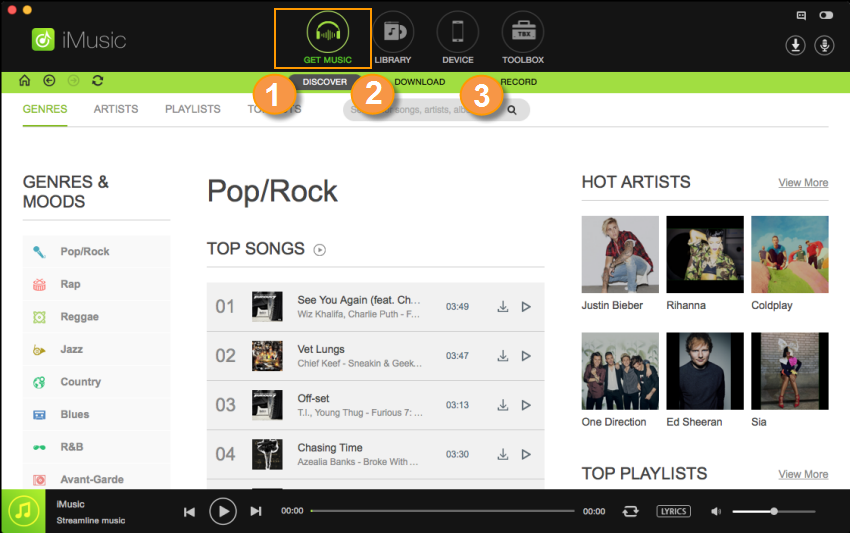
Step 1: iSkysoft is offering iMusic as a trial version for both Mac and Windows. Download the application software according to your operating system and follow the screen instructions to finish the installation. Upon launching, you will notice the several options provided by it in the product window. From the window, click “Get Music” option and choose “Discover” feature.
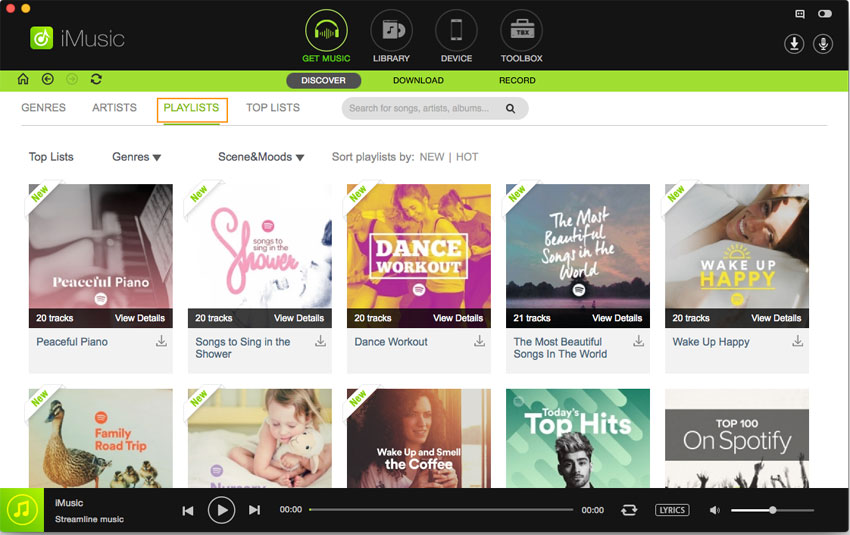
Step 2: Users can begin searching for the songs using artist, playlist, top playlist, and genre. The following is a screenshot when users are looking for songs using the “Genre” option.
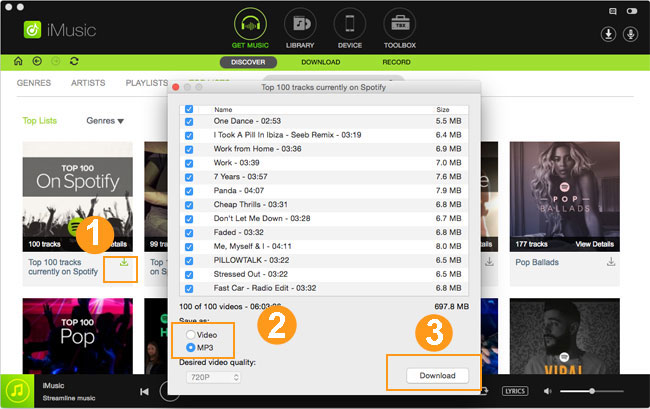
Step 3: Once you have found the songs that you wish to download, you can just press the download button that appears right next to the song. If you have selected the playlist, you will have first to download the entire playlist, choose the songs from the playlist in the pop-up window, opt for MP3 or MP4 and click the download button.
Method 2:
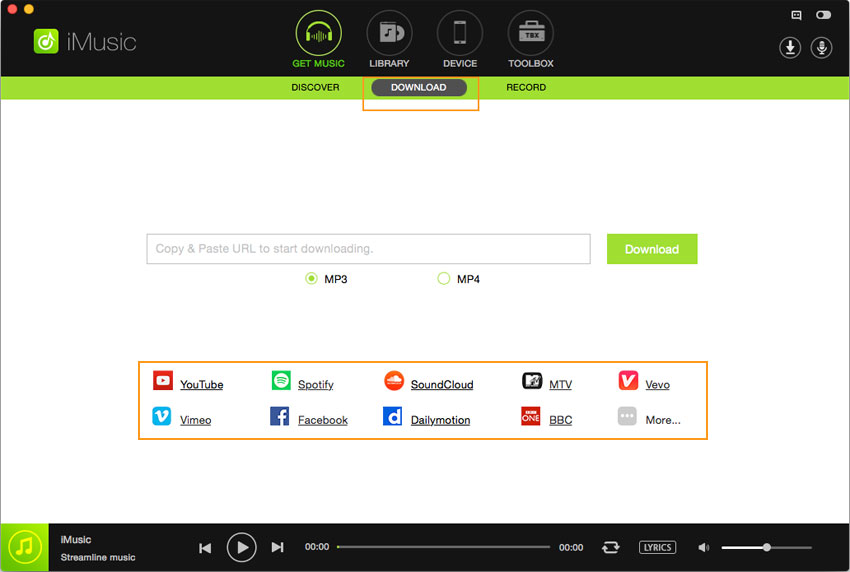
Step 1: If you are willing to download directly from Spotify, you will have to press the “Download” feature from the menu bar. You will notice the following layout of the product window.
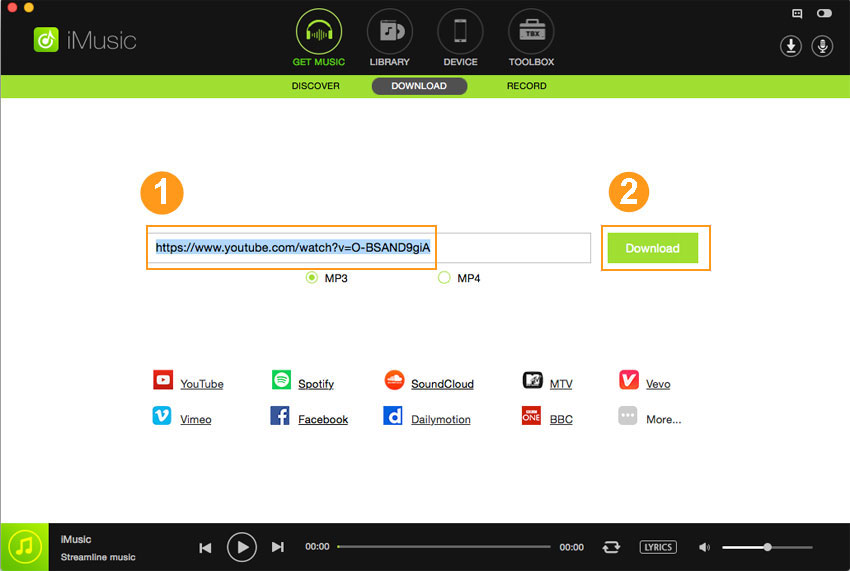
Step 2: From the above screen, you can see that you can directly enter to Spotify by clicking on the icon. Once you enter the website, search for the song, choose MP3 or MP4 format and click the download button. Another alternative is by copying the link of the song from the Spotify website and pasting in the space provided as shown in the above picture. You can then click the download button to save the file as MP3 or MP4. You will be able to see the downloaded content in the music library, which you can access by clicking the Library icon on the main menu bar of the product window.




Any Product-related questions? Tweet us @iMusic_Studio to Get Support Directly