Part 1: Audacity Audio Transcription
Besides having audio recording and CD ripping capabilities, Audacity also has some useful features for transcribing speech manually. It has a Transcription Toolbar that has its own Play-at-speed button that plays at the speed that is set by a slider. It can slow down the tempo of an audio file that you would like to transcribe without affecting or changing its pitch. If you are a musician who is trying to figure out the complex parts of a song, you will find this feature to be really helpful.
Guidelines on How to Use Audacity Audio Transcription
Step1. The first step will be to export the audio file that you would like to transcribe to Audacity.
Step2. After that, open Microsoft Word or another word processor of your choice. You will be typing the transcribed text into the word processor.
Step3. The next step will be to transcribe your audio. Go to the Transcription Toolbar, and then press the Play button.
Step4. Listen the words carefully without transcribing anything first. Be sure to listen to the sentences or phrases keenly in order to get the exact feel of the words. You can set the audio to play more slowly if you have trouble hearing the words.
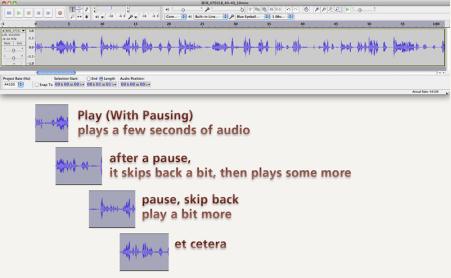
Step5. Listen to a few words at once, press pause, and then type the sentence or phrase in Microsoft Word or another editor that you may prefer.
Step6. Make sure that you save the document every time you type a sentence or phrase.
Step7. Repeat the process of playing, pausing and transcribing using Audacity until you have the whole audio file transcribed into your word processor.
Part 2: Audacity Audio Converter
Audacity audio converter provides you with a full set of tools for editing audio files as well as adding effects using a clear and accessible interface. You can convert multiple audio files at once using this audio converter. The following is the procedure for using it.
Step1. First, you will need to download and install Audacity on your computer.
Step2. After that, you should launch it, and then click File, and then Open, and then locate the song that you would like to use, and then load it.
Step3. Next, you will need to click the Play button to listen to the song, and then left click your mouse and then drag it to highlight the part of the song that you would like to use.
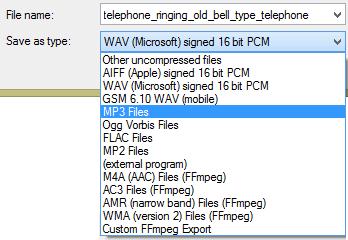
Step4. After that, go to file, and then choose "export selected" as WAV or MP3 depending on the format that you would like to save it in.
Part 3: Audacity Audio to Text
You can use Audacity to convert audio to text with ease. However, you will need to use it together with Soundflower to achieve this. Instead of listening to the audio and then trying to figure it out manually, these two programs will help you do it automatically. The following is what you will need to do.
Step1. First, you will need to make sure that both Audacity and Soundflower are installed on your computer.
Step2. When Soundlflower has been successfully installed on your computer, you will need to do the following modifications to it:
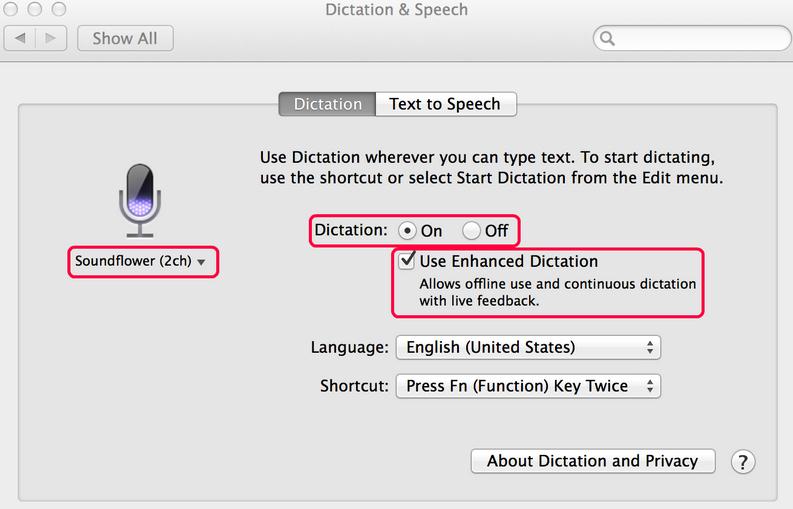
- Go to System Preferences, and then choose Dictation and Speech from the View Menu.
- Click "On" so as to turn on dictation.
- Make sure that "Enhanced Dictation" is enabled because it allows you to dictate without necessarily having an active internet connection.
Step3. After that, you will need to prepare Audacity for converting audio to text by importing recording audio to it, and then changing output device to Soundflower (2ch).
Step4. Once that is done, you will need to make sure that Audacity and your favorite word processor are opened side by side, and then quickly start the audio file in Audacity.
Step5. Go to the word editing program and then turn on dictation. You can do this by choosing Edit, and then Start Dictation.
Part 4: Audacity Audio Effects
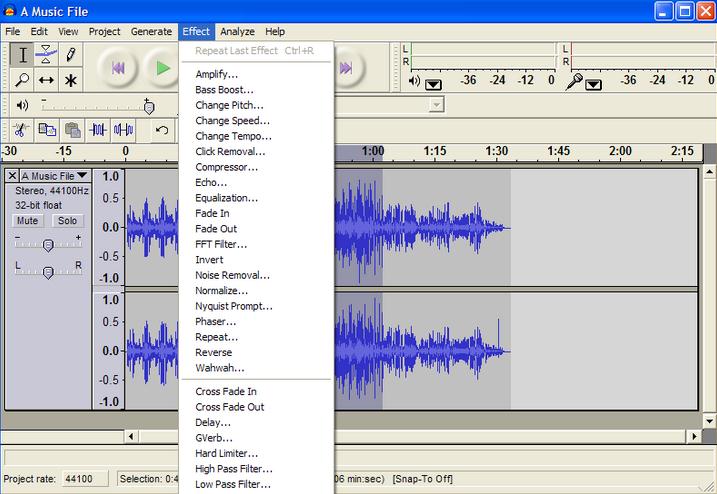
Audacity has audio effects that allow you to customize your audio files accordingly when you are editing them. The following are some of them.
- Amplify which increases or decreases the volume of the audio file.
- Auto Duck that reduces the volume of multiple tracks.
- Compressor that compresses the dynamic range of the audio file.
- Leveler that makes passages the quieter audio file to become louder and vice versa.
Other audio effects that you will find to be interesting include limiter, normalize, fade in, fade out and SC4.
In order to use these Audacity audio effects, you will need to access them as follows.
- Launch Audacity, and then go to Preferences.
- Choose your soundcard for Input, and then choose the Input Source.
- Make other changes accordingly, and then save them.
You can also use the audio effects by selecting part of the file, right click, and then choose "Effects" on the menu bar, and then apply the effects accordingly.
Part 5: How to Increase Audio Volume with Audacity
When using Audacity to record or edit audio files, you may want to increase the volume of those files especially if you are mixing them. The following is what you will need to do.
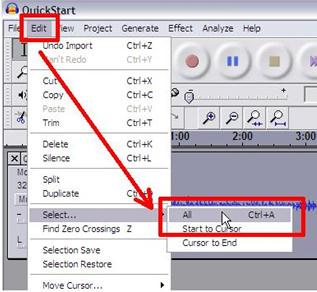
1. Making sure that Audacity is open. Go to Edit, and then Select, and then all to select the entire content of the sound track. If you only want to increase sound to part of the audio file, you will need to select the specific part of the file.
2. After that, go to Effect, and then choose Normalize. You can use the Amplify effect to increase the audio volume in Audacity by going to Effect, and then choose Amplify.
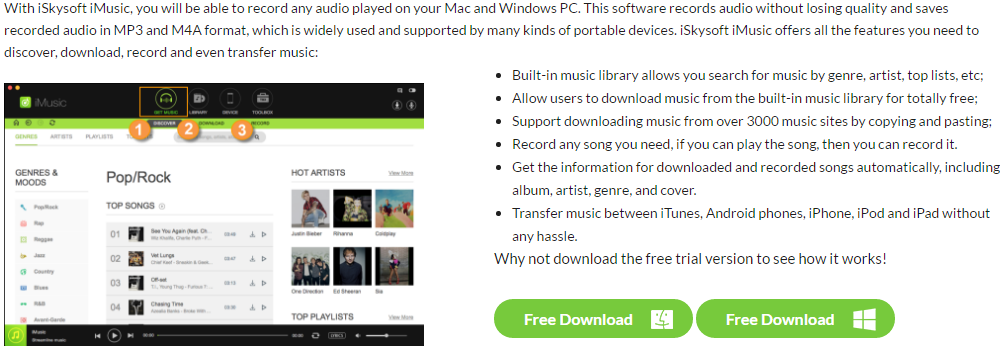
Part 6: The All-in-one Music Recording Software Alternative to Audacity - iMusic


Any Product-related questions? Tweet us @iMusic_Studio to Get Support Directly