Using Audacity on Ubuntu can sometimes be disappointing due to a range of problems that pops up along the process. If you have been experiencing Audacity Ubuntu related problems lately, you need to worry no more- we have got your back. Below, you are going to encounter some common problems that are associated with Audacity and Ubuntu and possible solutions to them.
Problem1. Audacity Fails to Launch on Ubuntu
One of the most common problems Ubuntu users experience with Audacity is failure of the application to launch. Any time you try to launch it, you will get the following error: "Audacity could not find a place to store temporary files. Please enter an appropriate directory in the preferences dialog." This problem arises because whenever you start up Audacity, it searches for a temporary directory (/var/tmp/audacity-${USER}) where it can store its temporary files.
Solution
To solve this issue, enter the following code: mkdir /var/tmp/audacity-${USER}. In case your unmask is not 0007 and also for private purposes, you can enter this code instead: chmod 0700 /var/tmp/audacity-${USER}
Problem2. Audacity fails to play the highlighted audio part
This problem is experienced when audacity fails to play the first few seconds of the audio you highlighted. Instead, it replaces it with some noise which makes the audio output to be annoying.
Solution
The best solution to this problem is changing your playback device from default to another device in the list. To do this, follow these directions: Click on the Edit button> Preferences> Devices> Playback.
Problem3. Sliding Time Scale fails to work correctly
If you have tried to use sliding Time Scale feature to speed up your audio file but you don't get the desired results, chances are, you are using the 64 bit Ubuntu version.
Solution
Install Windows along Ubuntu such that it acts as a virtual machine. This way, you will be able to run Audacity version for Windows comfortably. Also you can use the Ubuntu PPA that comes with "Nighty" Audacity version. Alternatively, you can change your pitch to the "Change Speed" effect.
These are the common problems that many Ubuntu Audacity users experience when they try to run Audacity on their PCs. Overtime, these problems becomes so annoying , making Audacity an unreliable tool for recording and editing your audio files. At this point, you are left with no other option but looking for other alternative tools in the market.
Apparently, the market has alternatives for Audacity which will improve your audio processing experience. The best one is iSkysoft Audio Recorder for Windows which runs smoothly on Ubuntu to give you amazing results. Following is a brief review of the application that comprises a brief introduction of the program, its main features, and a step-by-step guide on how you can use it to record high quality audio files.
Record Audio on Ubuntu with Audacity Alternative
iMusic is a sound recording and editing application that allows the user to download unlimited audio files with high quality output, similar to that of the original sound.

Key Features:
- It supports recording of top quality audio files from 500 plus music streaming sites such as YouTube, Pandora, Google Play, Yahoo Music, MySpace, LAST.FM, iTunes Radio among others.
- It amazingly eliminates all ads that appear between audio tracks, resulting into a perfect output.
- The application makes it possible to record audio tracks that have ZERO-loss of quality (that is, they maintain a high quality as that of the original audio track).
- It supports ID3 Tags technology which makes it easy to get the details of a song such as the song's title, artist, album, and genre and so on.
- With this program, you can record audio files directly to the iTunes library or playlist by clicking on the "Add to iTunes" on the recorder.
Step-by-step Guide on How to Download Audio on Ubuntu
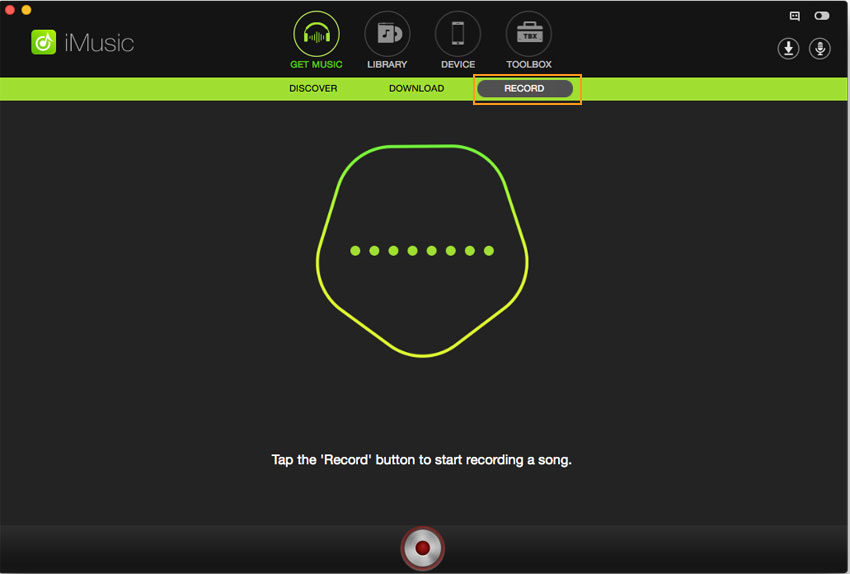
Step 1: Start by downloading and installing the program on your computer. Additionally, you need to have an Audio Recorder Drive installed on your PC for the program to work. Launch the program so that it shows the main recording interface. Click on the Record red button to make the program ready for the task ahead.
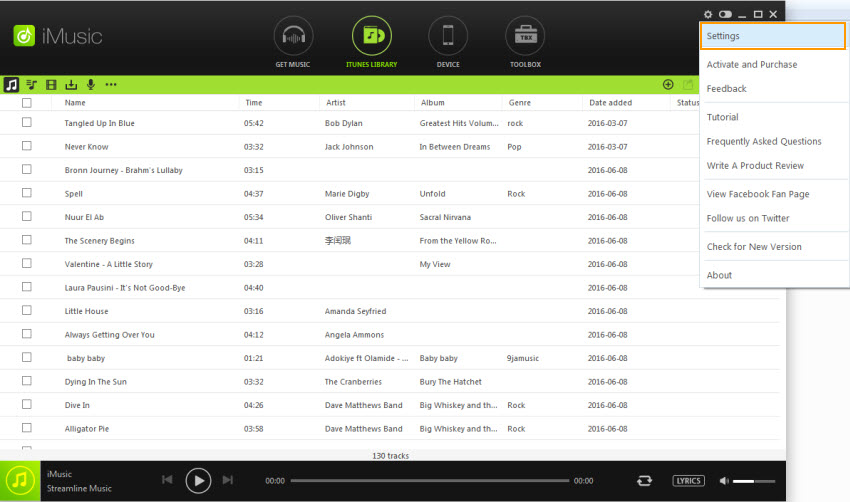
Before starting the recording process, set your preferred quality and format for your output file by going to Settings option on the right top of the window.
Step 2: Head on to the music site where you would like to fish you audio tracks from and start playing the audios. The program will automatically detect the audio tracks and start downloading them!
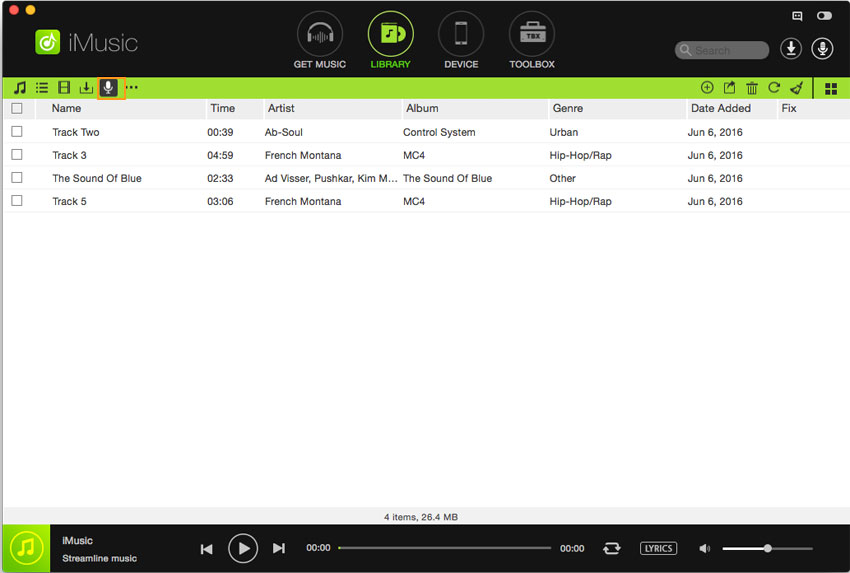
Step 3: After recording all the music you want, you can go to check and listen the recorded music in the "Library" tab. You can also export them to your local computer or any device connecting to computer with USB cable. And also you can export them to your iTunes Library!


Any Product-related questions? Tweet us @iMusic_Studio to Get Support Directly