Today we all enjoy the benefits of fast broadband access and with this has come the rise in popularity of streaming media. However, even with all that access, there are times when having your audio files stored locally can be beneficial. To achieve this there are several software tools available that can help you record audio from Internet, but which Internet audio recorder should you choose? Read on to check the list.
Part 1. How to Record Music from Internet on Mac (OS X Yosemite Included)
If you want to download music from any sites, iMusic is a great tool for you. It is compatible with over 500 different sites and offering lossless recording of any audio source. With it, you can record music from Internet without ads. It also can split tracks and continuously record tracks, so you do not need to download music one by one. Its ID 3 tag feature allows you to get music information automatically. Just take a trial.
Steps for Recording Audio from Internet
The ease of use has been mentioned a few times, so let us go through the recording process itself to see what that actually means. Recording anything is accomplished in just a few straightforward steps, as we see below.
What You Will Need:
A Computer;
iMusic
Time Required:
Very Fast (Variable depending on the video file size)
Difficulty:
Easy
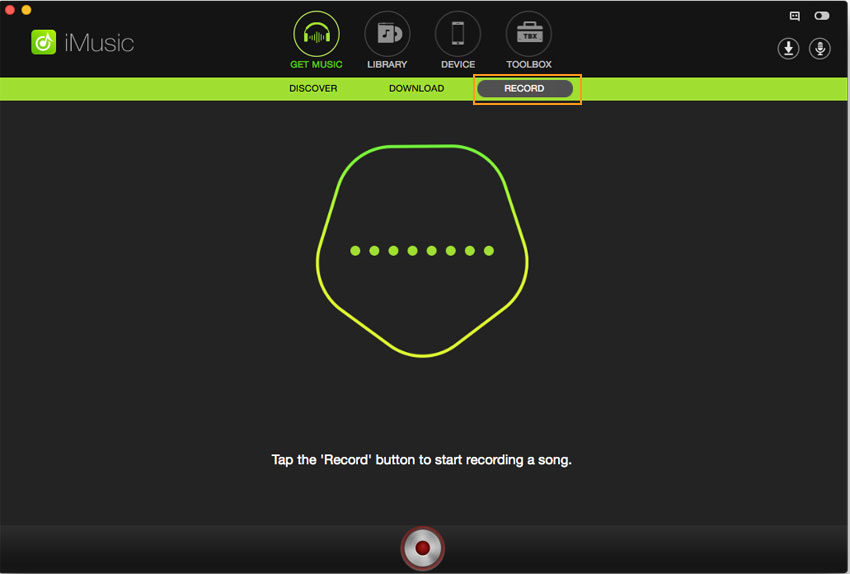
Step 1. Start Recording Internet Audio
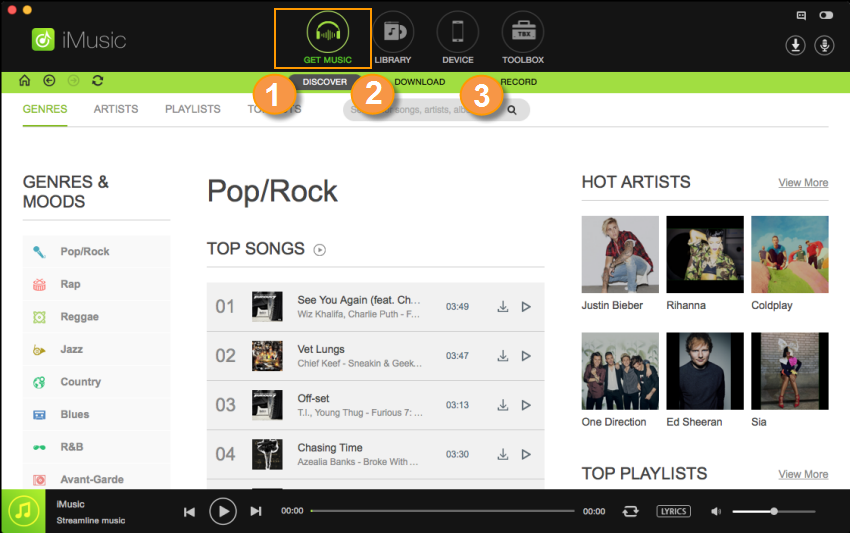
Simply launch iMusic. On the interface, click on the RECORD button and there is a big red Record button, just press it. Then launch your favorite browser and go to the audio files you want. Start it playing. Audio Recorder for Mac will detect it and start recording automatically. It really is as straightforward as that to download any audio file you want.
Tips: To choose the audio format and audio quality you prefer, you can click the Gear icon to open the Settings menu and customize the output options.
Step 2. Manage the Recorded Internet Audio
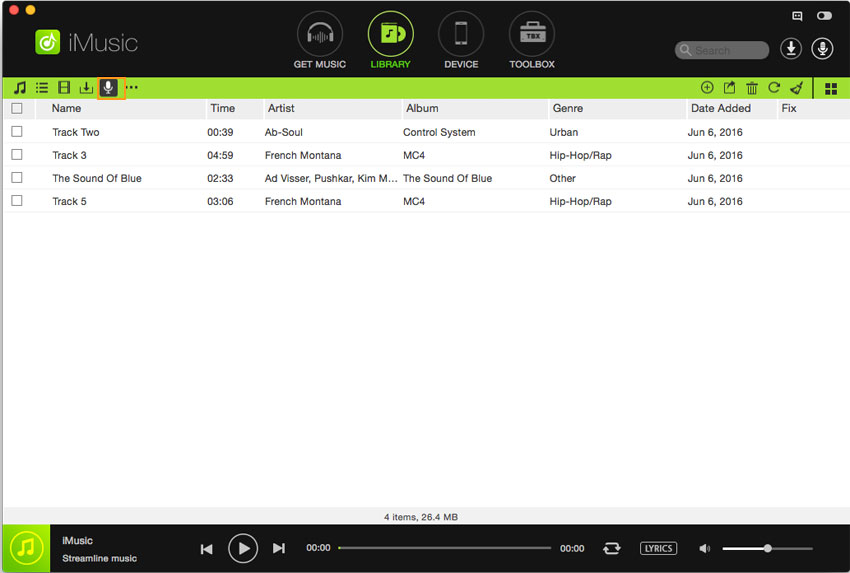
When the recording is finished, you can click the Library tab to access your audio files. Double click on the music, you can play it with the built in player. You can also import local audio files into the program for playback and management.
This smart tool also allows you to compile ID3 tags, transfer music to iTunes with one click and burn music to a CD.
Part 2. How to Record Music from Internet on Windows 8
iMusic is your best choice to record Internet audio on your Windows PC. Just one click, you can record any sound on your computer or on the site you are hearing. You can avoid the annoying ad and get tracks separately intelligently. Simply enjoy your lovely music with the help of this Windows Internet audio recorder.
Steps on how to record music from Internet
What You Will Need:
A Computer;
iMusic
Time Required:
Very Fast (Variable depending on the video file size)
Difficulty:
Easy
Step 1. Launch iMusic on PC
After you free download this audio recorder, you can easily install it with the help of built-in installation instruction. Then launch the program and click "Record" to get ready for recording.
Tips: Click the Audio Recorder icon on the program, you can customize the output format and music quality as you like.
Part 3. How to Record Music from Internet on iPad
The iPad does not have a default recording app that you can use to record your favorite music from the web or other applications such as iTunes and Spotify. You will be required to download and install an audio recording app that is compatible with it to be able to enjoy recording your favorite audios on the internet. One of the best apps that you can use to record music from internet on iPad is Voice Record Pro that can be found at http://apple.co/1jDBwZU. You can use it to record on-site sounds as well a voice memos at an unlimited length and without interfering with audio quality. It can record directly in MP3, WAV and MPEG formats, and it also has a convert function that enables you to convert the record audios to all supported formats.
The following is a step-by-step guide on how to use Voice Record Pro.
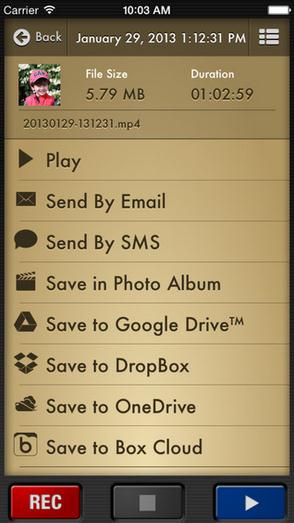
Step 1: First, you need download this program from the website mentioned above and then install it on your iPad.
Step 2: On your iPad's Home screen, look for the Voice Recorder Pro icon and then tap on it to launch the program.
Step 3: When the program opens, you will see a red button at the bottom of the screen. Tap that button in order to bring up a screen with a cassette and other options.
Step 4: Look for a record button that says "REC" and then tap on it to start recording. You can press this button again any time to pause your recording. When it is paused and you would like it to continue recording, you simply need to tap the button again.
Step 5: Once the recording is complete and you would like it to stop it, you simply need to press the "STOP" button.
Step 6: After that, you will need to tap the "SAVE AS" button to save your recording at your preferred destination on the iPad.
Part 4. Top 3 Internet Audio Recording Software
#1. iSkysoft Audio Recorder
Compatible with over 500 different sites and offering lossless recording of any audio source, iMusic can also split tracks automatically into individual files and strip out ads from the music as it goes. It can record in either MP3 or M4A file formats and offers a selection of quality settings for each to ensure the perfect mix of quality and file size for any project. It can also recognize and identify tracks as it records, and automatically tag the files with the relevant artist, track title, album tags as it goes.
The music library built up from these recordings is fully searchable by either artist, album or track name to make things easy, and a simple "Add to iTunes" button allows you to import your collection into iTunes with that one click. This is a very user friendly package that offers quality recording and versatility.
#2. Jaksta Media Recorder for Mac
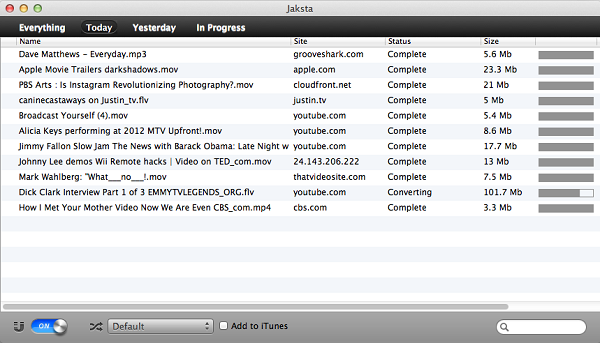
Jaksta is a feature rich package that offers lossless recording of audio streams from a wide range of streaming sites and other audio sources. It offers an easy set up and workflow, with a choice of output formats that should satisfy any device you may wish to listen to the files on.
Jaksta also gives the benefit of full iTunes integration and can export your downloads directly into iTunes in an appropriate format automatically as part of the download. Simple to use and well featured, Jaksta presents a useful software package.
#3. Leawo Music Recorder for Mac
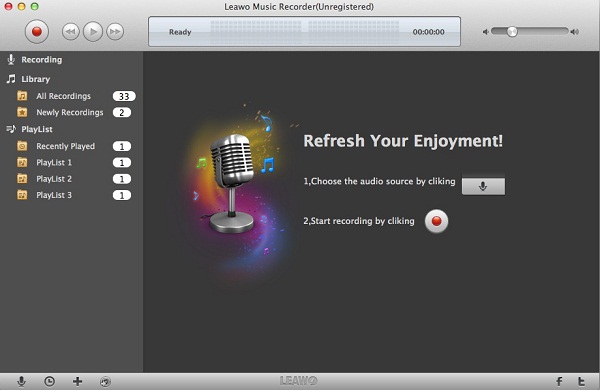
Another capable piece of software that allows media capture from a broad range of streaming websites. This package benefits from a scheduler to allow times recordings when you are away from your computer, and can launch the program, record and even remove ads from the recording as it goes all automatically.
It also includes a feature that enables it to add tags for track title, artist and album during the download process. This enables easy search and identification of downloaded media from your library of content later, making the Leawo package highly effective overall, and a very capable software choice.
Comparison of the above Internet Audio Recorder Software
|
Features |
iSkysoft Audio Recorder for Mac |
Jaksta Media Recorder for Mac |
Leawo Music Recorder for Mac |
|---|---|---|---|
|
Compatible Sites |
Over 500 streaming sites built in plus all other audio | 100+ | 100+ |
|
Scheduling |
|
--- |
|
|
Auto Tagging |
|
--- | --- |
|
Auto Ad Filtering |
|
--- | --- |
|
File Conversion |
|
|
--- |
|
Cost (US $) |
$29.00 | $49.95 | $19.99 |
Verdict:
As we can see, whilst all three provide a strong package, iSkysoft Audio Recorder for Mac is the standout software here. It offers the broadest range of features and balances that with good value and an easy to follow interface and workflow making it the most user friendly on offer here too.
This is why I fully recommend Audio Recorder for Mac as the best solution, as a complete package it is the best on offer here. It has the best interface, the broadest compatibility with streaming sites and allows automatic ad removal and file tagging so that you can easily find your favorite audio files once you have downloaded them. It does everything for you.



Any Product-related questions? Tweet us @iMusic_Studio to Get Support Directly